Office 365
Please ensure that you log into your 365 tenant using admin credentials
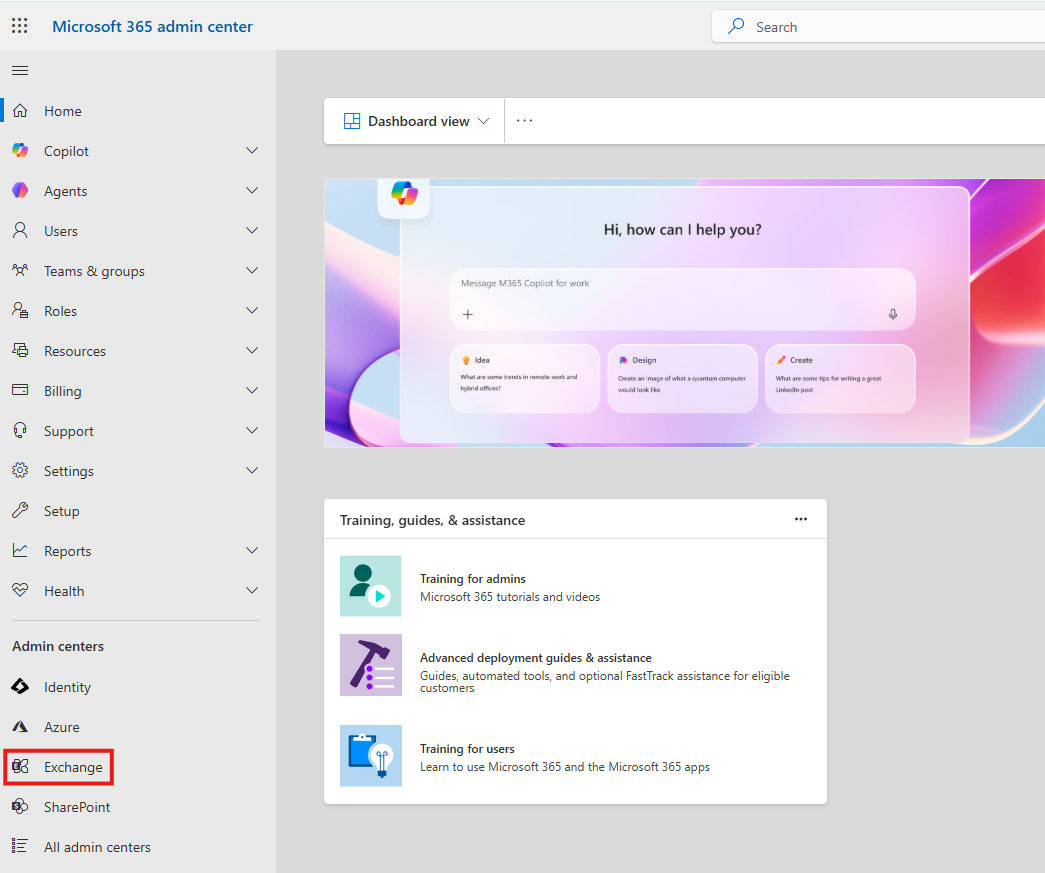
- Navigate to: https://admin.microsoft.com
- Once logged in select the … (left window pane) and then click on Exchange under Admin Centers
Step 1 – Enable Rocketseed branding connector
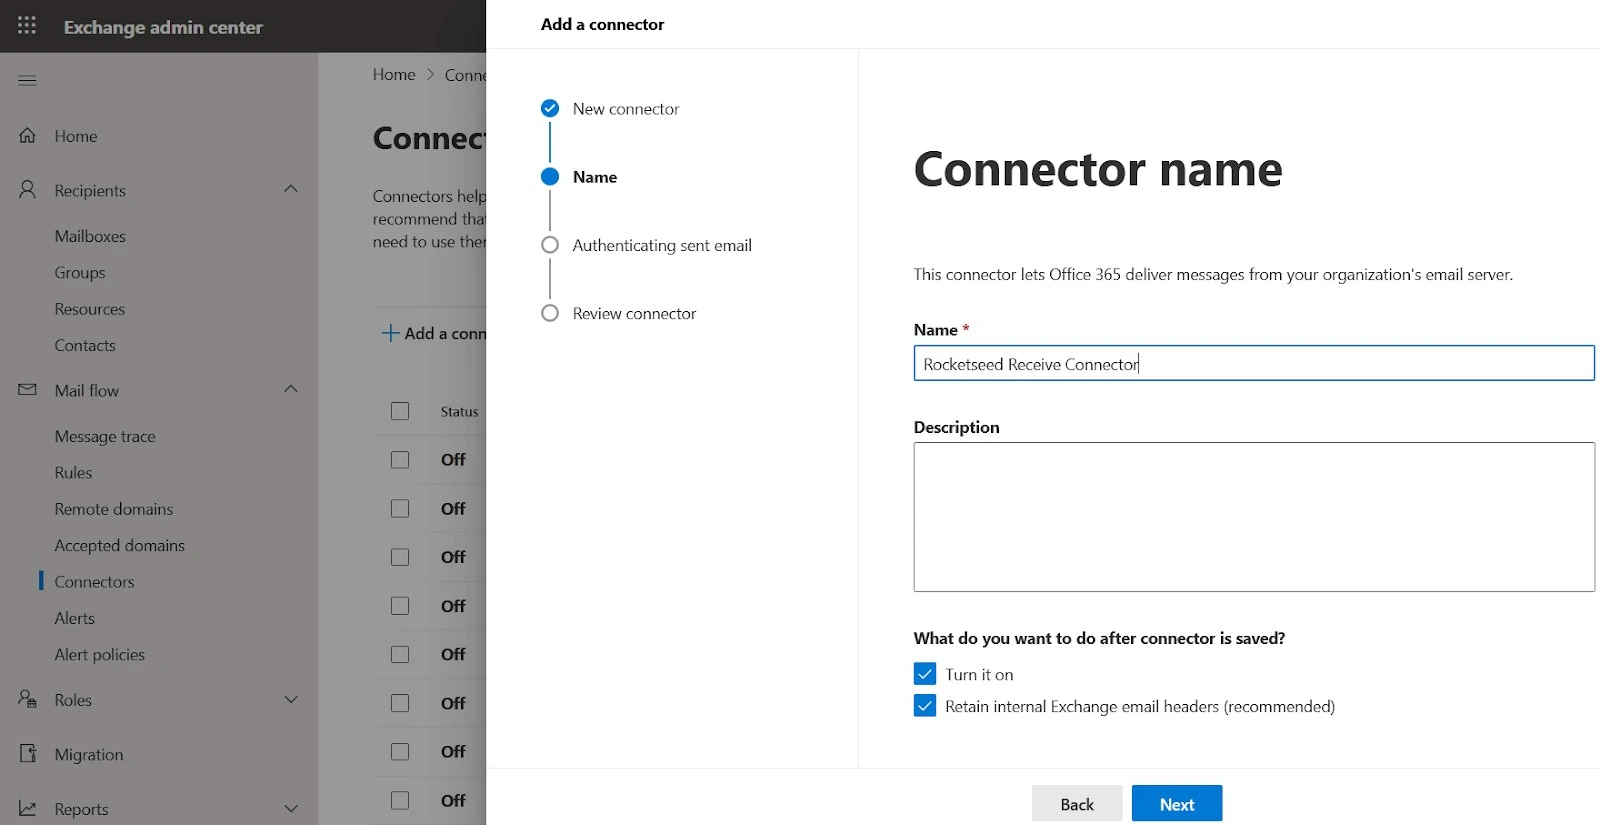
- Under mail flow click on Connectors
- Under Connectors, click +
- Select “Your organization’s email server” and it will by default select office 365.
- Select next

- Name the connector: “Rocketseed Receive Connector”.
- Select next
- Select the second option an add in the IP addresses supplied by Parrot Digital.
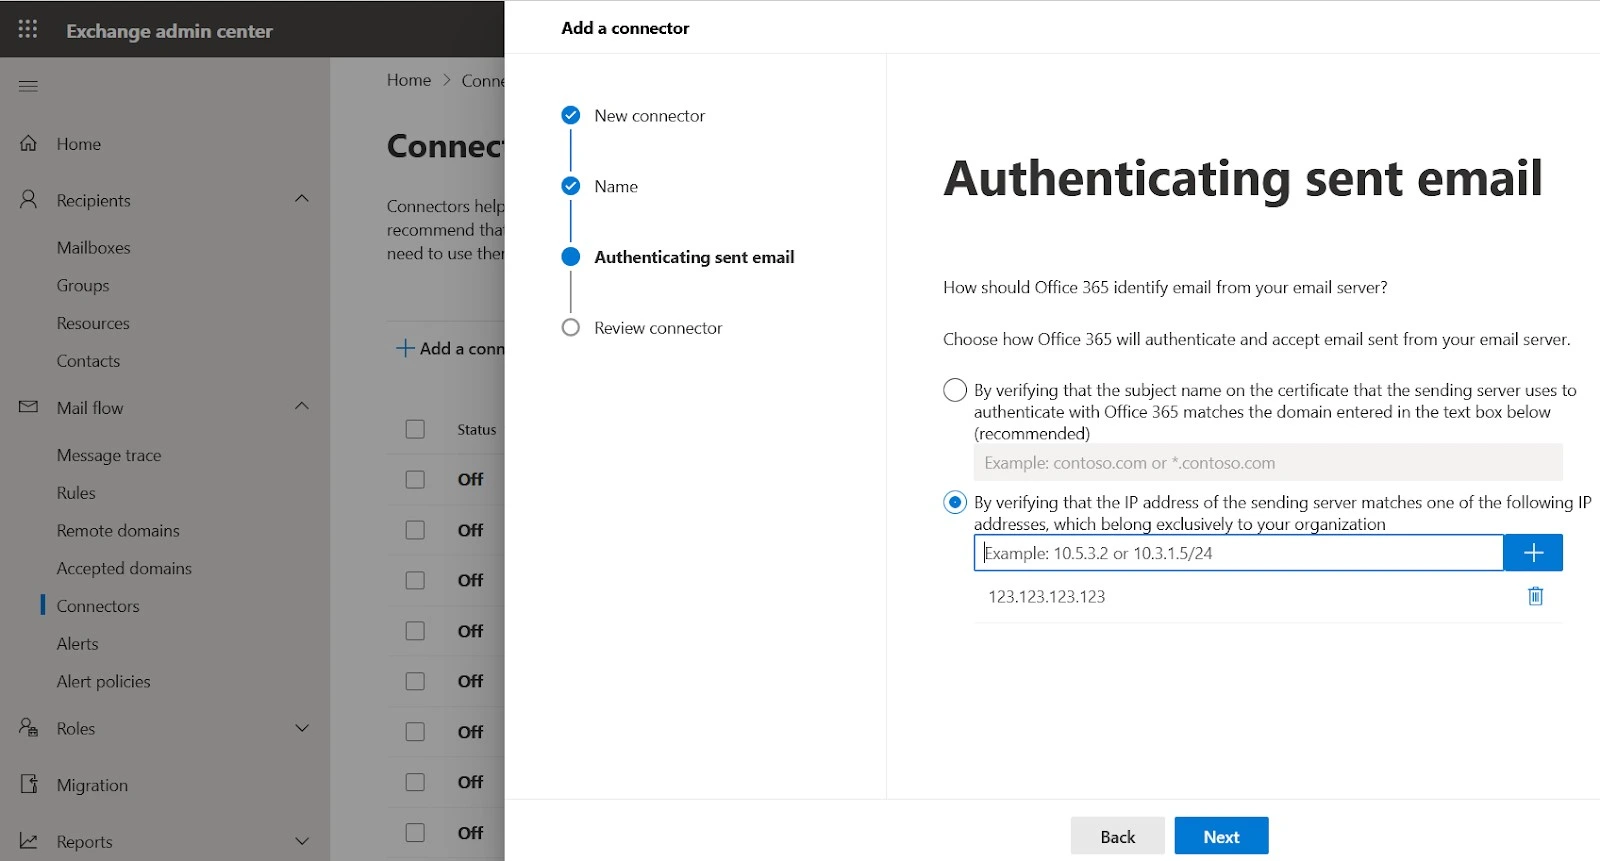
- Click Create Connector
Step 2 – Rocketseed sender connector
- Stay on the connectors page
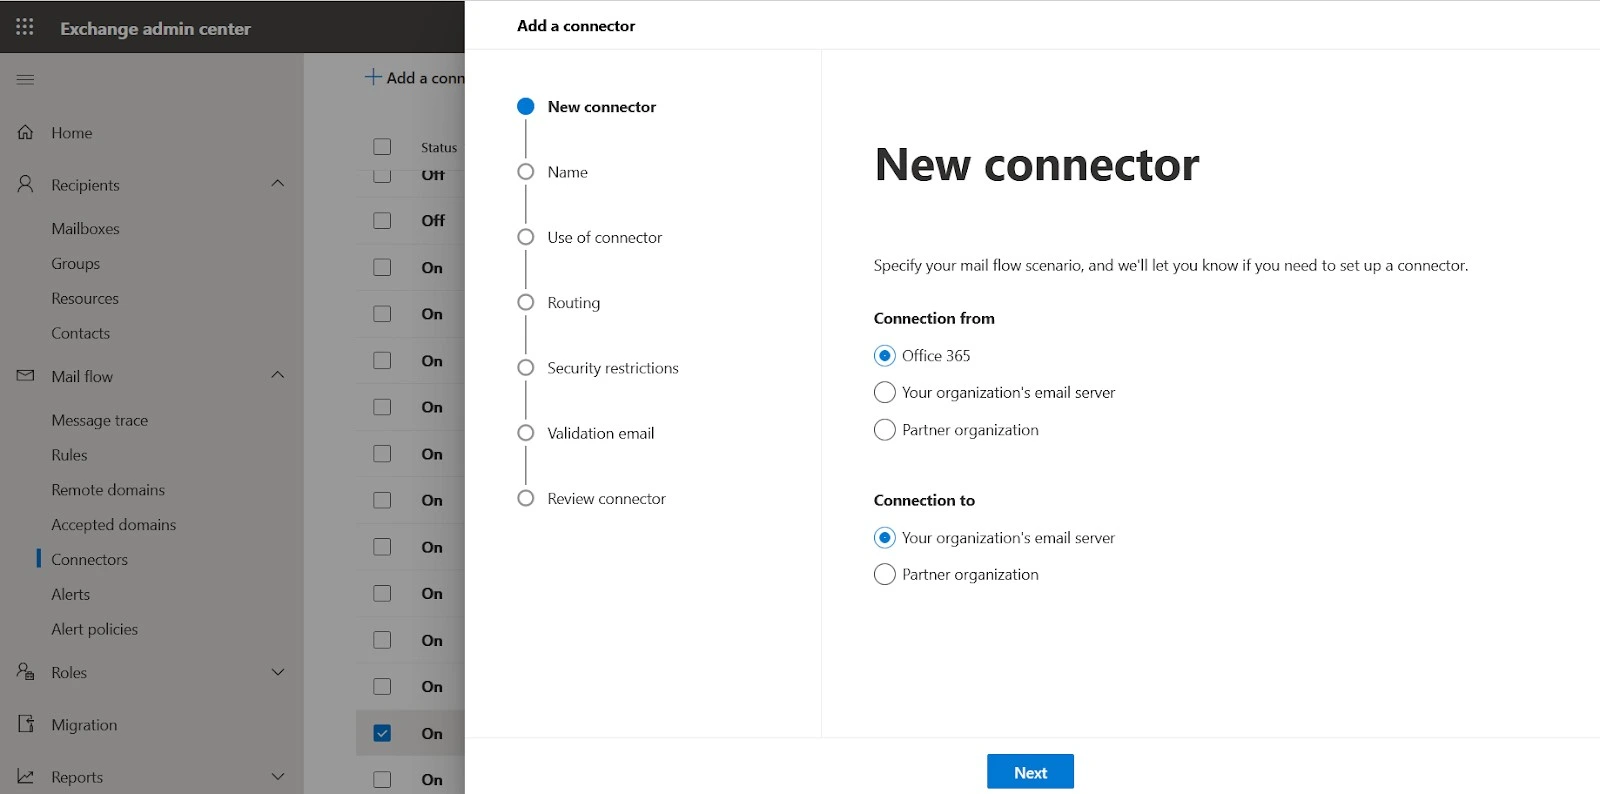
- Select the + to create another connector
- Select connection from: “Office 365” and this will automatically select connection to “your organization’s email server”.
- Select next
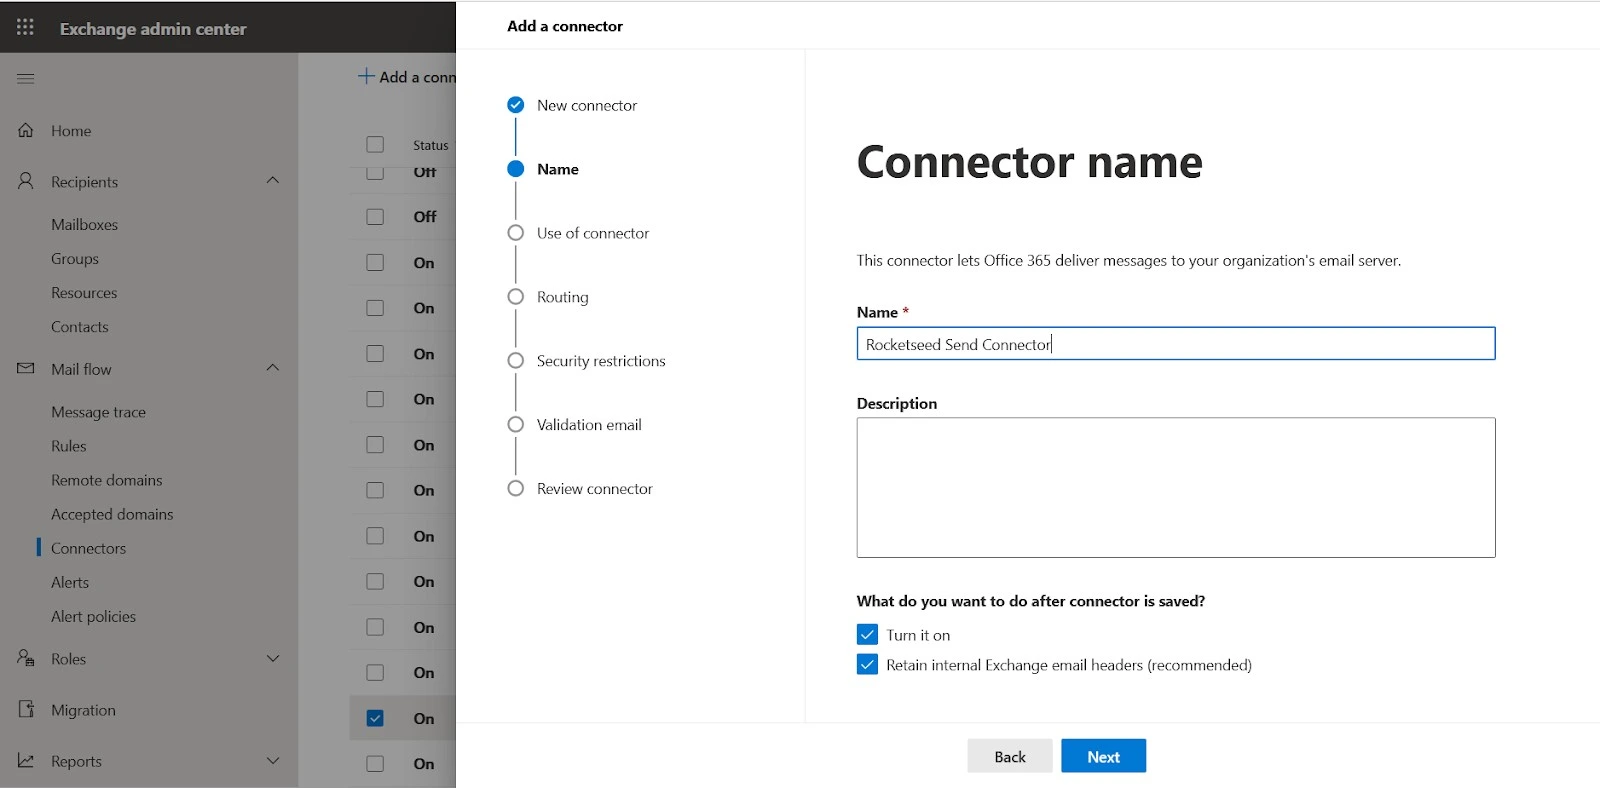
- Name the connector: “Rocketseed Send Connector”.
- Select next
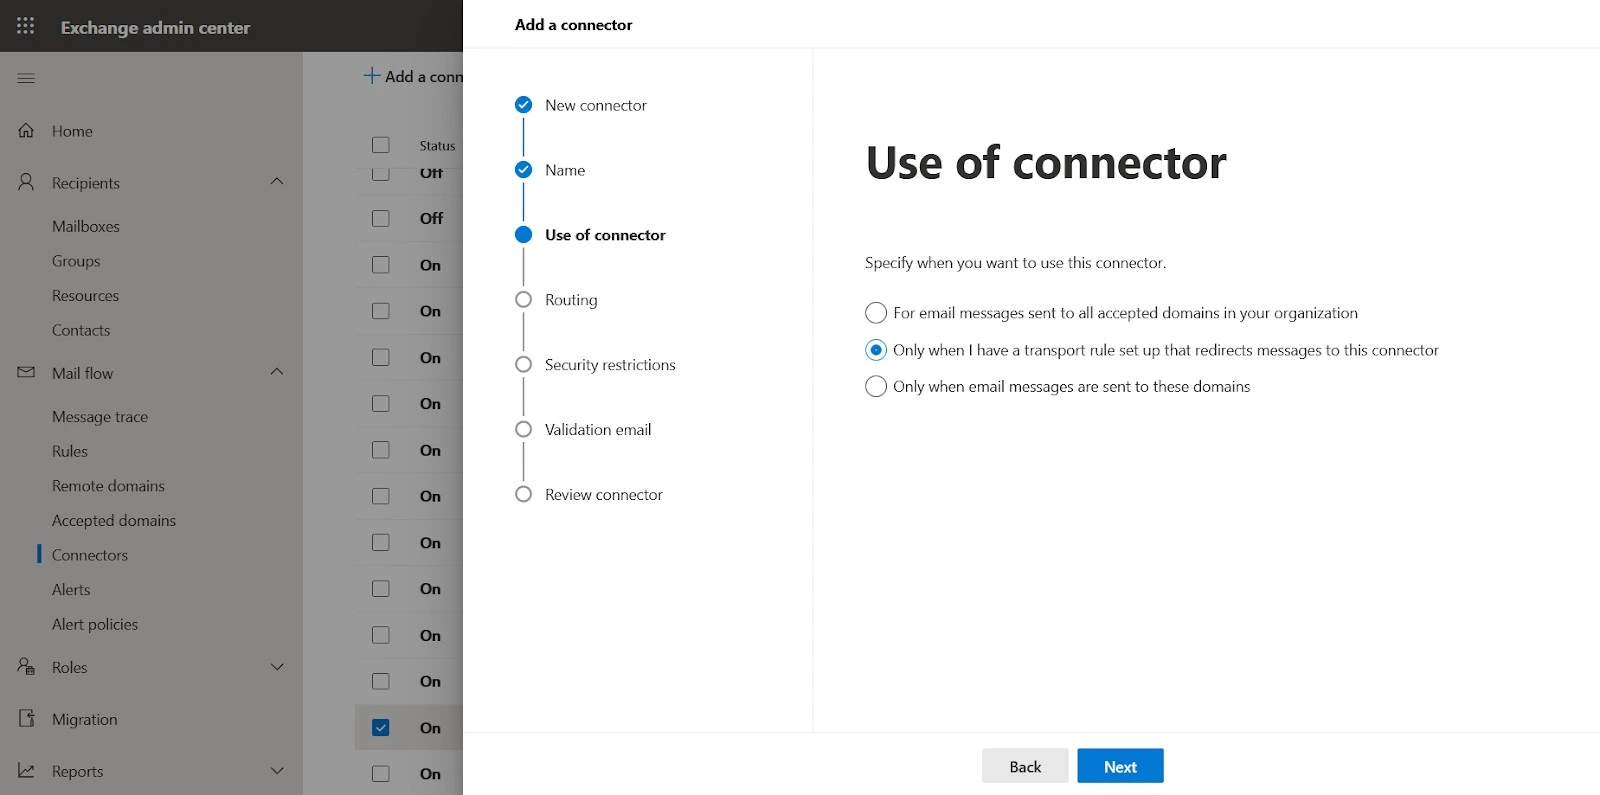
- Select the second option: “only when I have a transport rule setup that redirects messages to this connector”.
- Select next
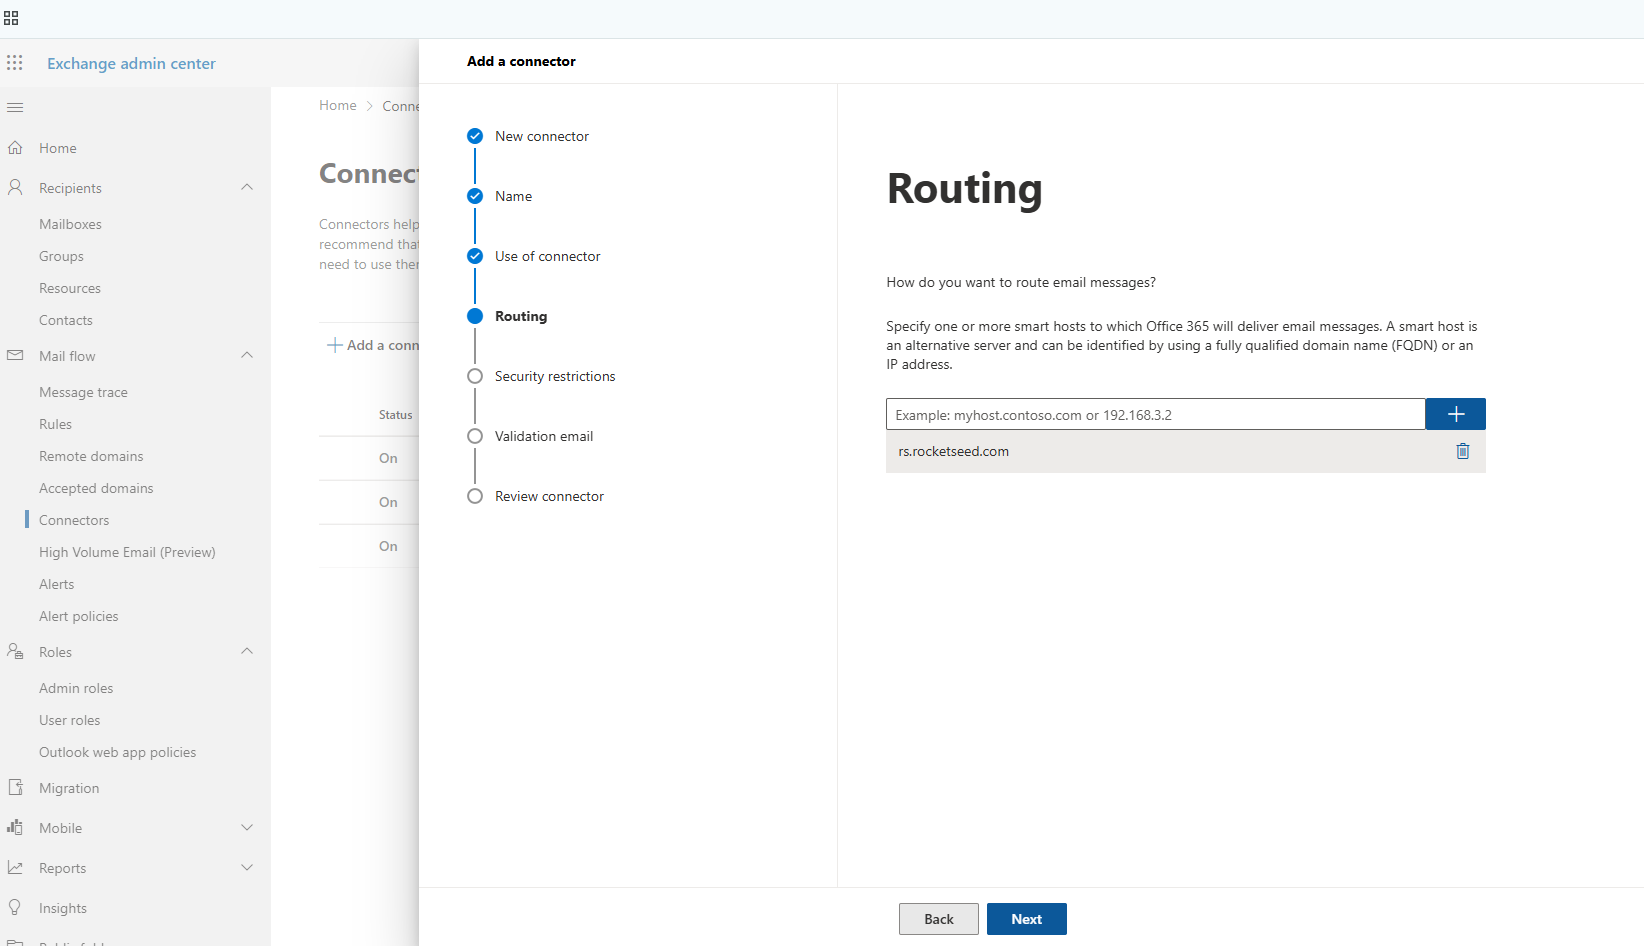
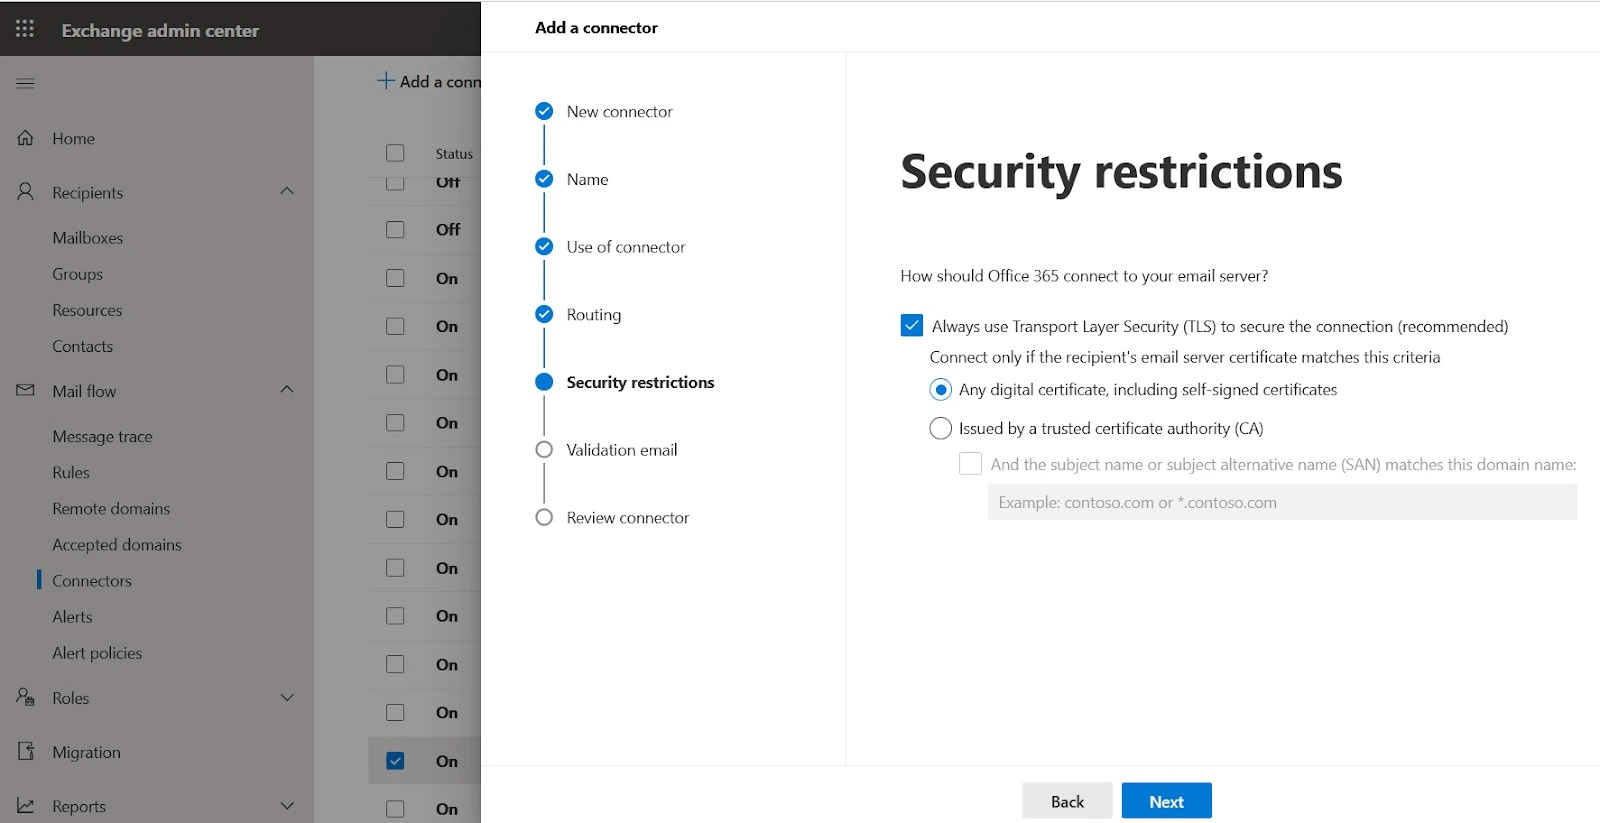
- Add the server name provided by Parrot Digital
- Select “any digital certificate including self-signed certificates”. Always use TLS, the checkbox will be automatically ticked.
- Select next
- Enter an external email address that is not part of the 365 tenant. This step is to validate the connector to ensure that email sent from your 365 can reach the server and be successfully sent to the recipient.
- Click validate. This will take about a minute to complete.
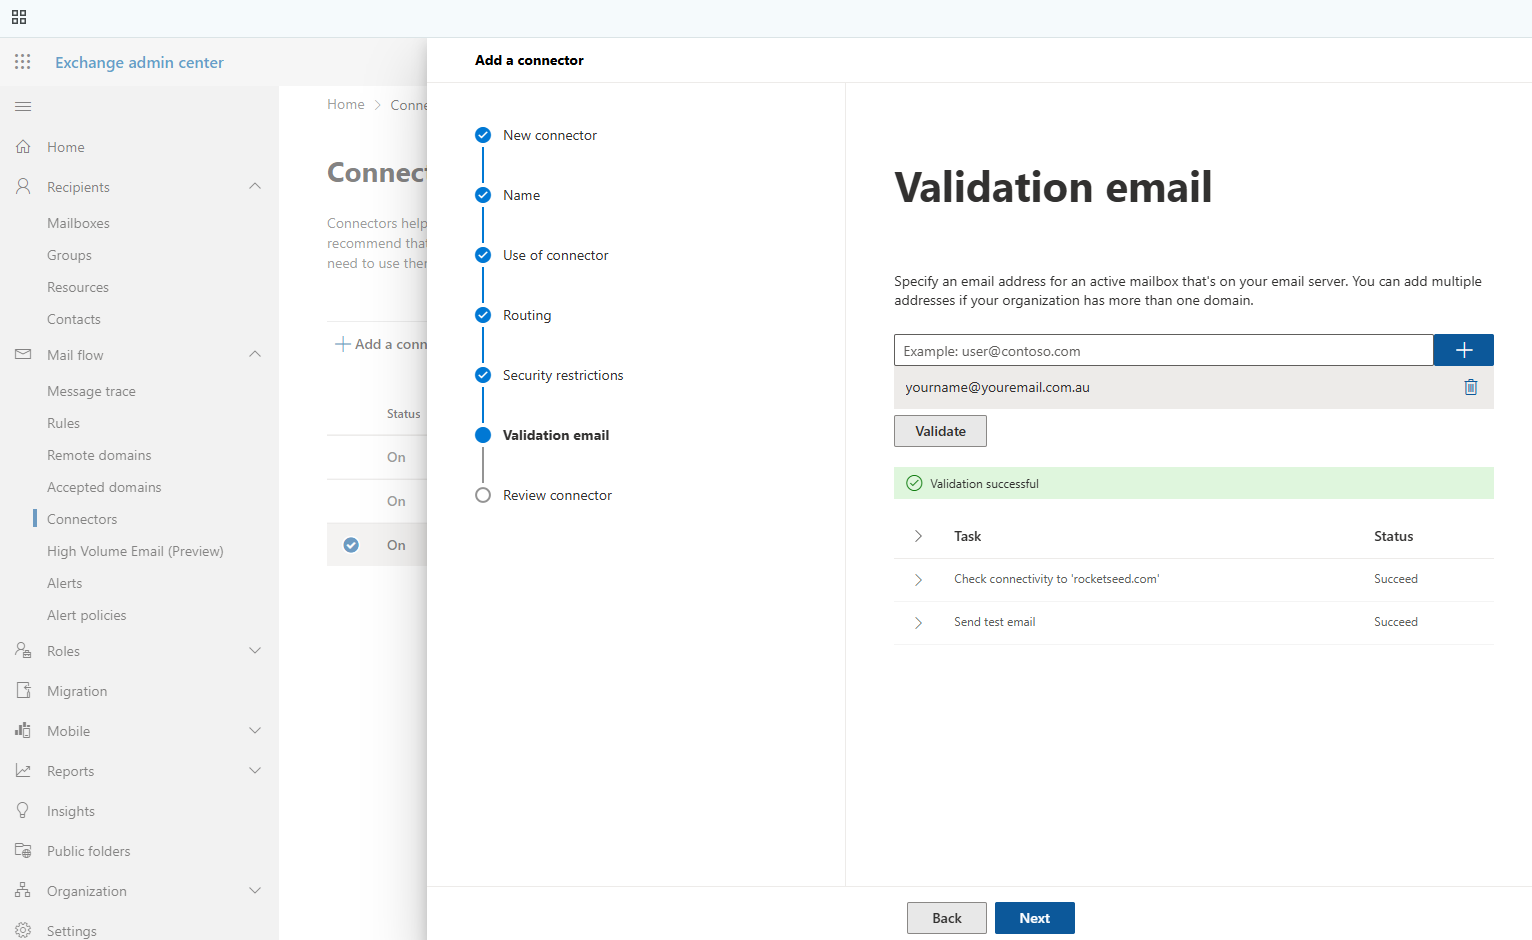
- Click next and select Create Connector
Step 3 – Remote domains
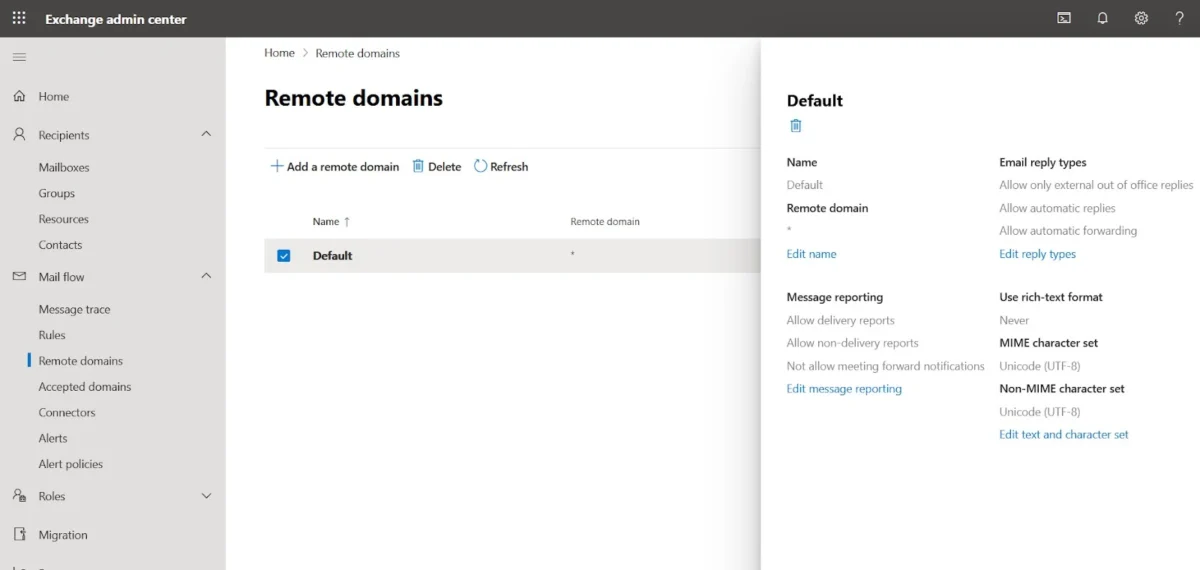
- Under mail flow select Remote domains.
- Click on the default domain
- Click on “Edit text and character set”
- Use rich-text Format = Never
- Mime character set and Non mime character set = Unicode UTF 8
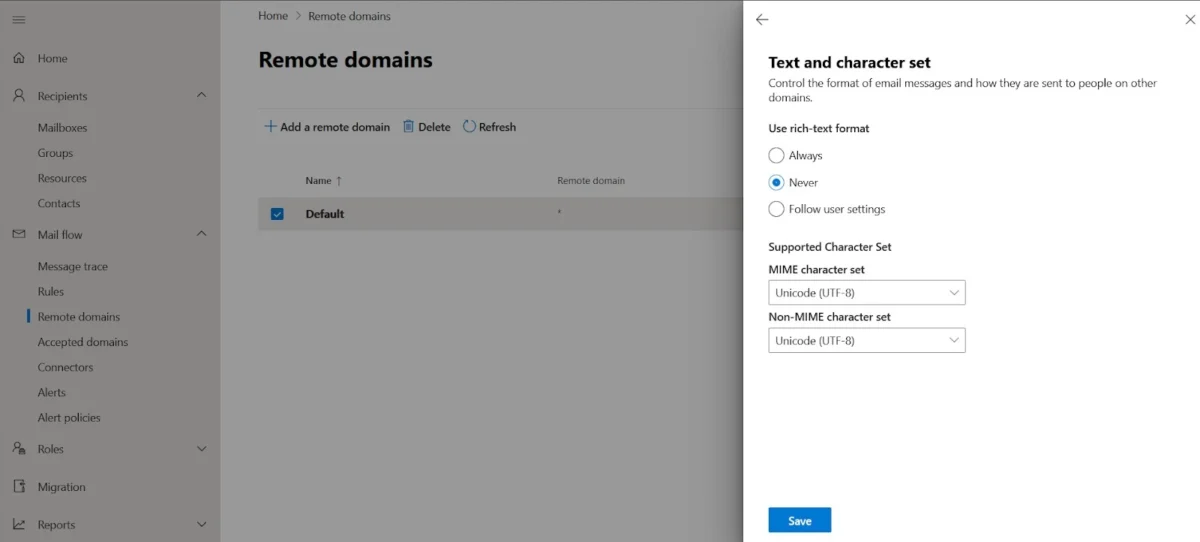
- Click save
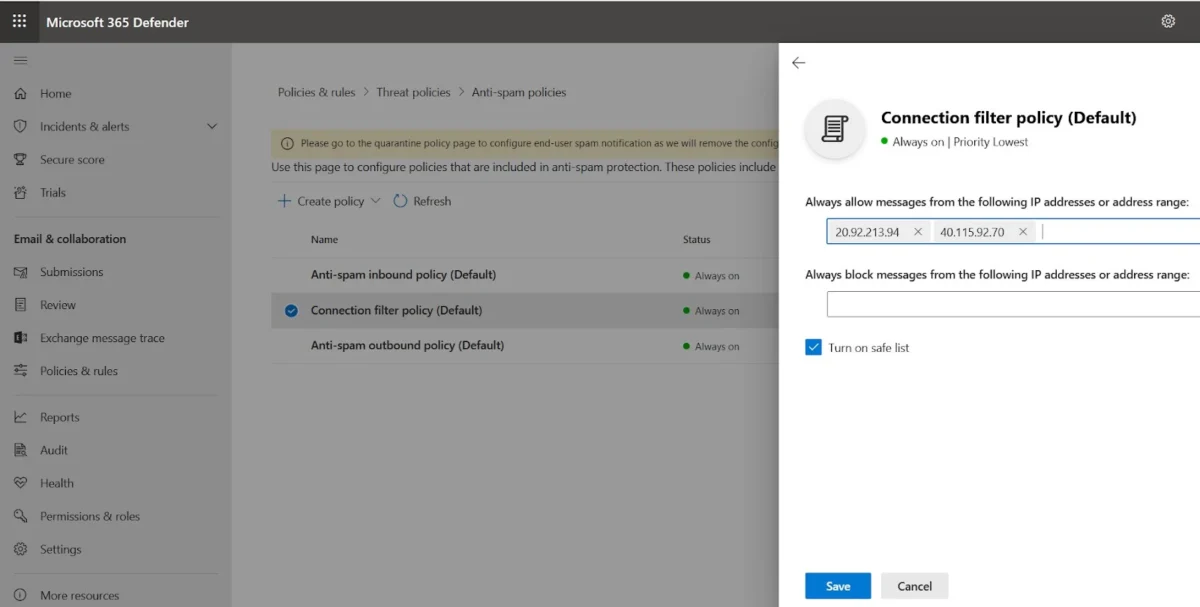
Step 4 – Connection filter
- Open a second internet page
- Navigate to the following url https://security.microsoft.com/antispam
- Select the Connection filter policy
- Add the IP addresses supplied by Parrot Digital to the Allow List rule, then click Save.
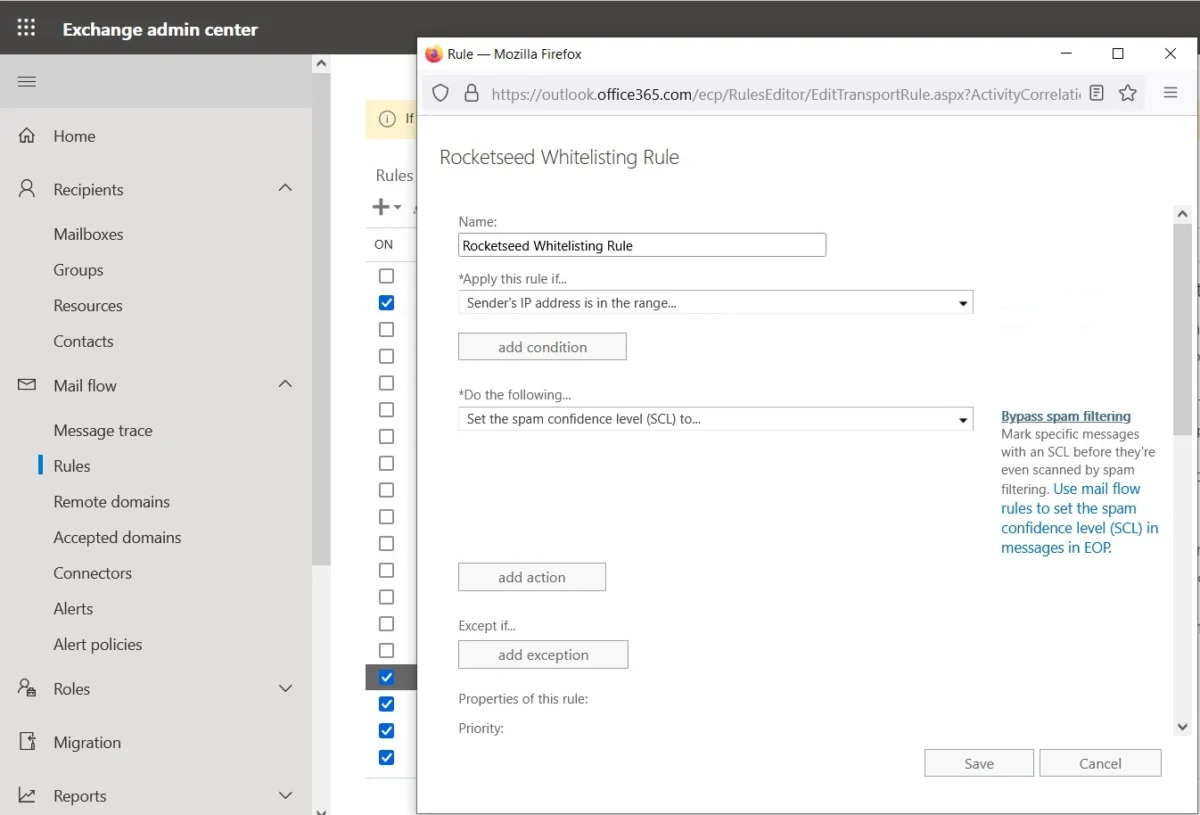
Step 5 – Rocketseed whitelist rule
- Navigate back to the Exchange admin center page.
- Under mail flow select Rules
- Click on the + and then select the first option “create new rule”
- Name the rule “Rocketseed Whitelisting Rule”
- On the bottom left select “More options” which is highlighted in blue.
- Select the dropdown Apply this rule if: “The sender’s IP address is in any of these range or exactly matches”
- Add the IP addresses supplied by Parrot Digital
- Select the dropdown under “Do the following” Modify the message properties >> Set the spam confidence level.
- Select the dropdown and select Bypass spam filtering.
- Select okay and then save the rule.
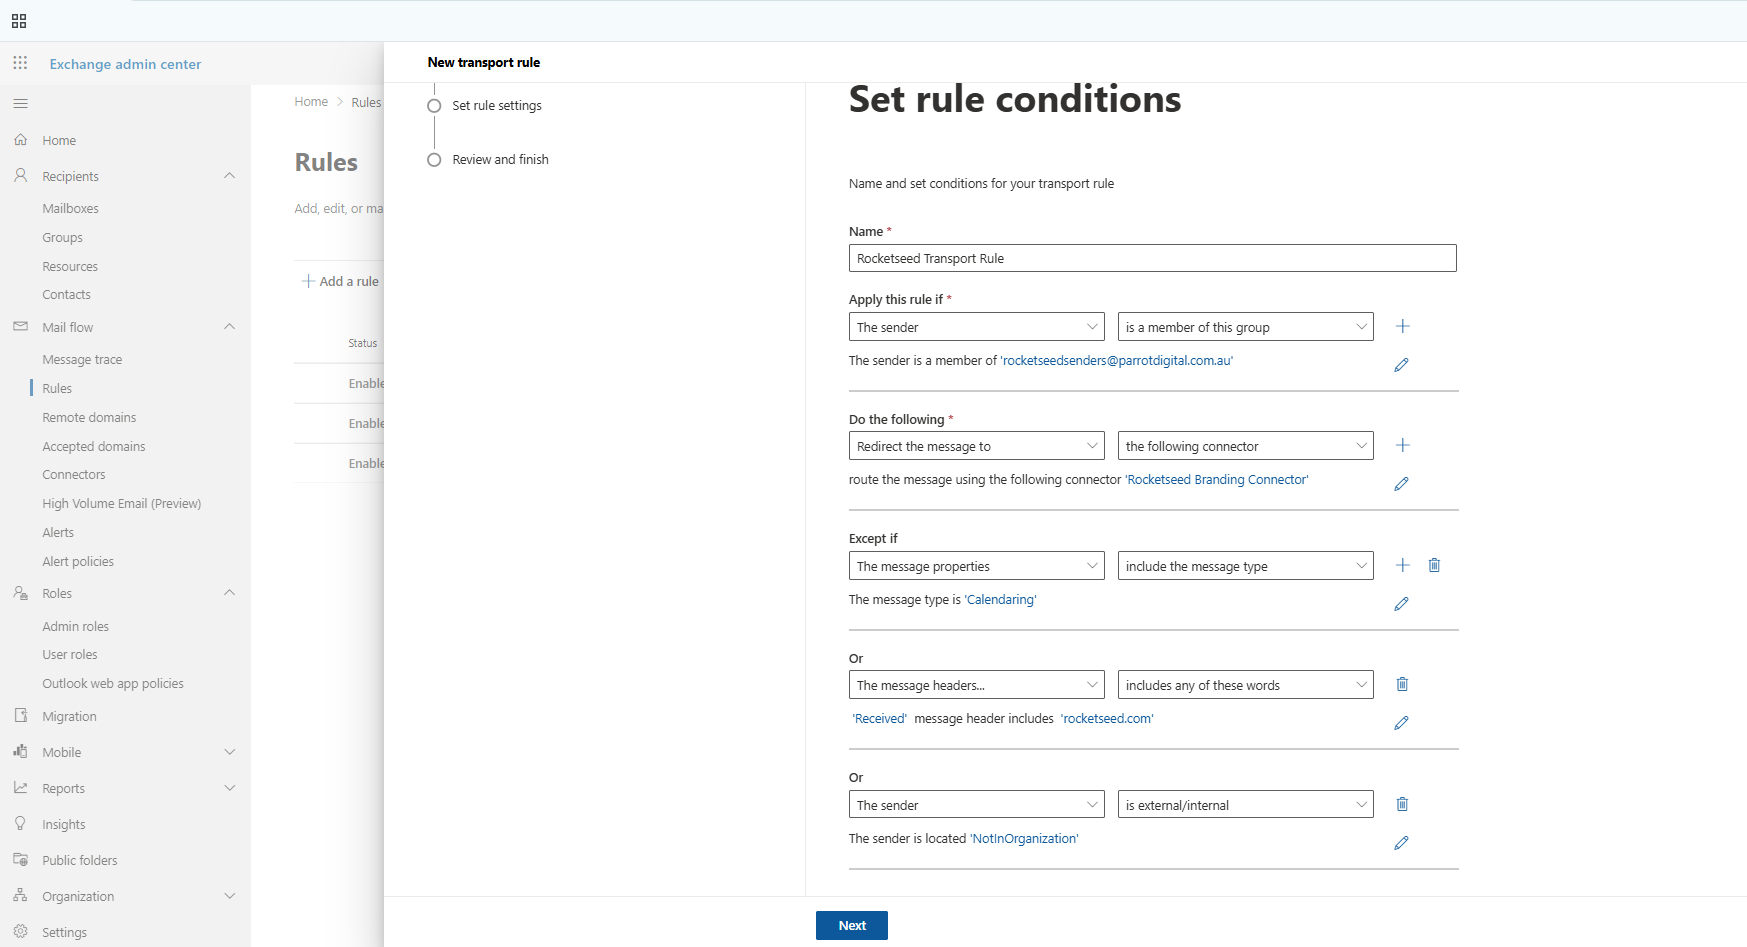
Step 6 – Rocketseed transport rule
- Click on the + and then select the first option “create new rule”
- Name the rule “Rocketseed Transport Rule”
- On the bottom left select “More options” which is highlighted in blue.
- Select the dropdown “Apply this rule if” and choose one of the following options depending on how you want the routing to apply:
- “The sender is this person”. Add the specific user you want to test the routing with. This option is typically used for initial testing to confirm that the transport rule is working correctly.
- “Is a member of this group”. Add the Rocketseed Mail-Enabled Security Group. This option is recommended if you only want specific users or a group of users to have their emails routed through this Transport Rule.
- “Domain is”. Add the domain(s) you want to route. This option is useful if you want all email users within your Microsoft 365 domain to automatically route through this Transport Rule. Using this method means you do not need to manually add new users to the Rocketseed Mail-Enabled Security Group whenever a new mailbox is created.
- Select the dropdown under Do the following: “Redirect the message to >> The following connector”. Small window will appear and select the Rocketseed send connector
- Select Add exception then select the dropdown: “The message properties >> include this message type”. Window will appear, select Calendaring and select ok
- Select Add exception then select the dropdown: “The sender is external/internal”. Window will appear, select “Outside the organization” and select okay.
- Select Add exception then select the dropdown: “A message header includes any of these words” Where it says “enter text”… select and enter the word “Received” then where it says “enter words…” select and enter the the word “rocketseed.com”
- Note: Please ensure that the connector name and characters are entered exactly as shown, including spacing and capitalization. This is important to avoid potential mail transport rule issues that may occur if the connector name is modified or incorrectly referenced.
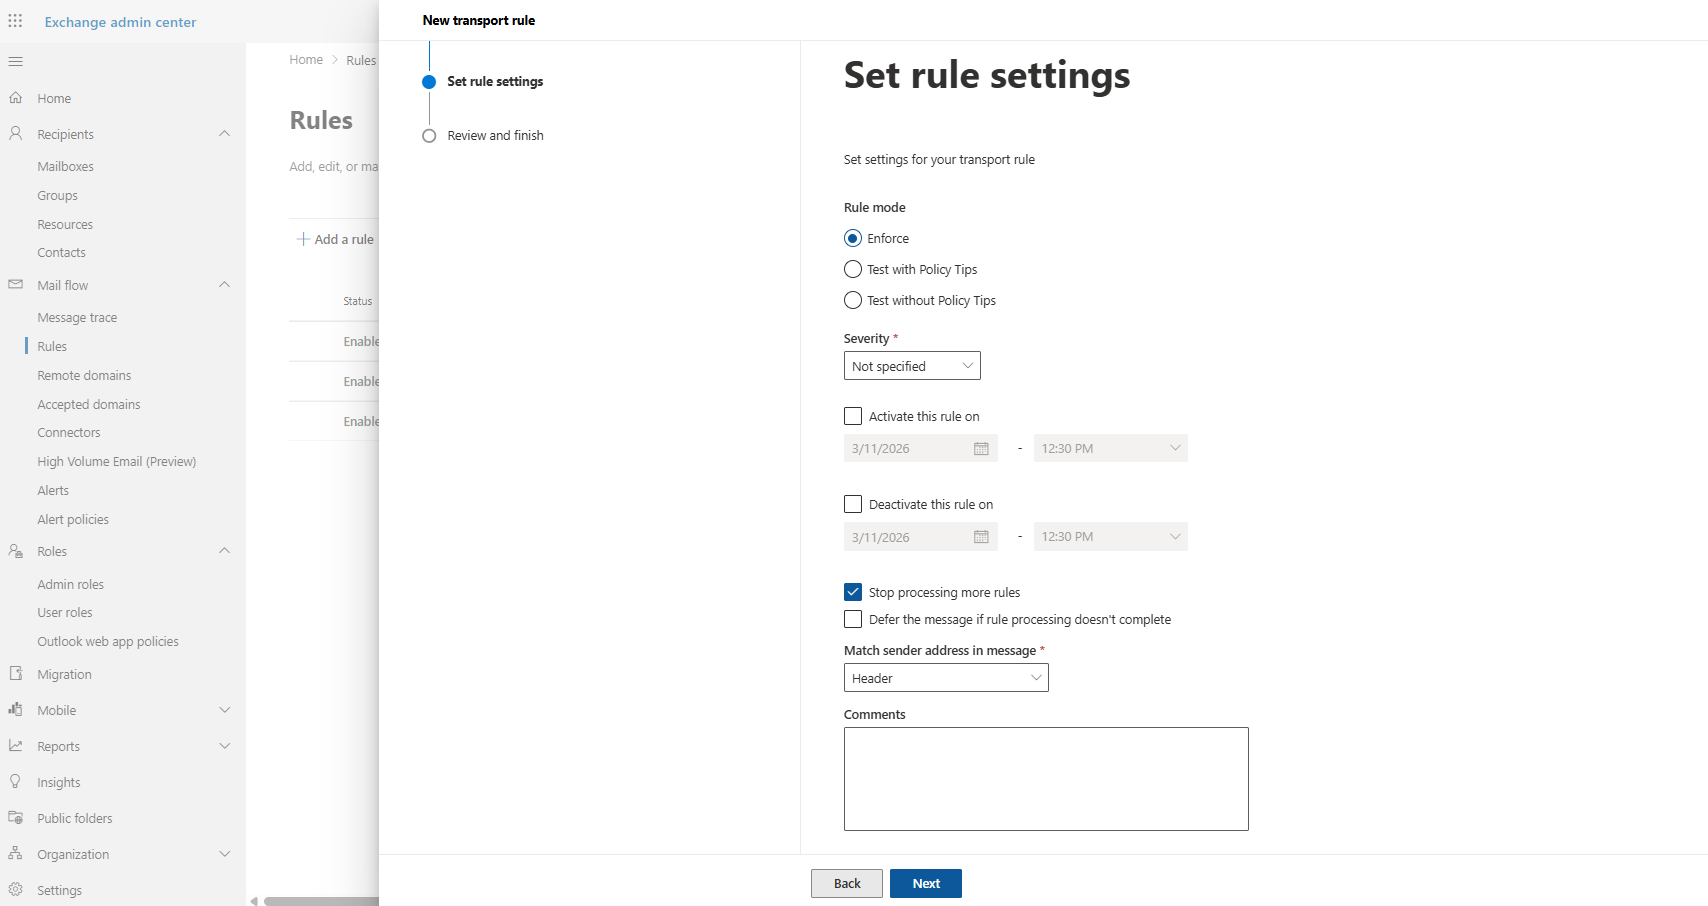
- Click next
- Tick “Stop processing more rules.”
- Note: This ensures that once the email matches this Transport Rule and is routed through the Rocketseed connector, no other mail flow rules will be applied afterward. This helps prevent conflicts or duplicate processing with other rules in your Microsoft 365 mail flow configuration.
- Click “Next”
- Then Click “Finish”
Please email support@parrotdigital.com.au when you have made the changes. Parrot Digital will then update the system config to relay via the Office 365 servers.