Google Workspace
Rocketseed branding is controlled with a Google distribution group. All members of the specified group will be routed to your Rocketseed server. You can specify an existing group or create a new one.
To create a new group follow the next steps; if you prefer to use an existing group of senders skip to Step 6.
- You need to create a new group, and add the senders you intend to route through Rocketseed.
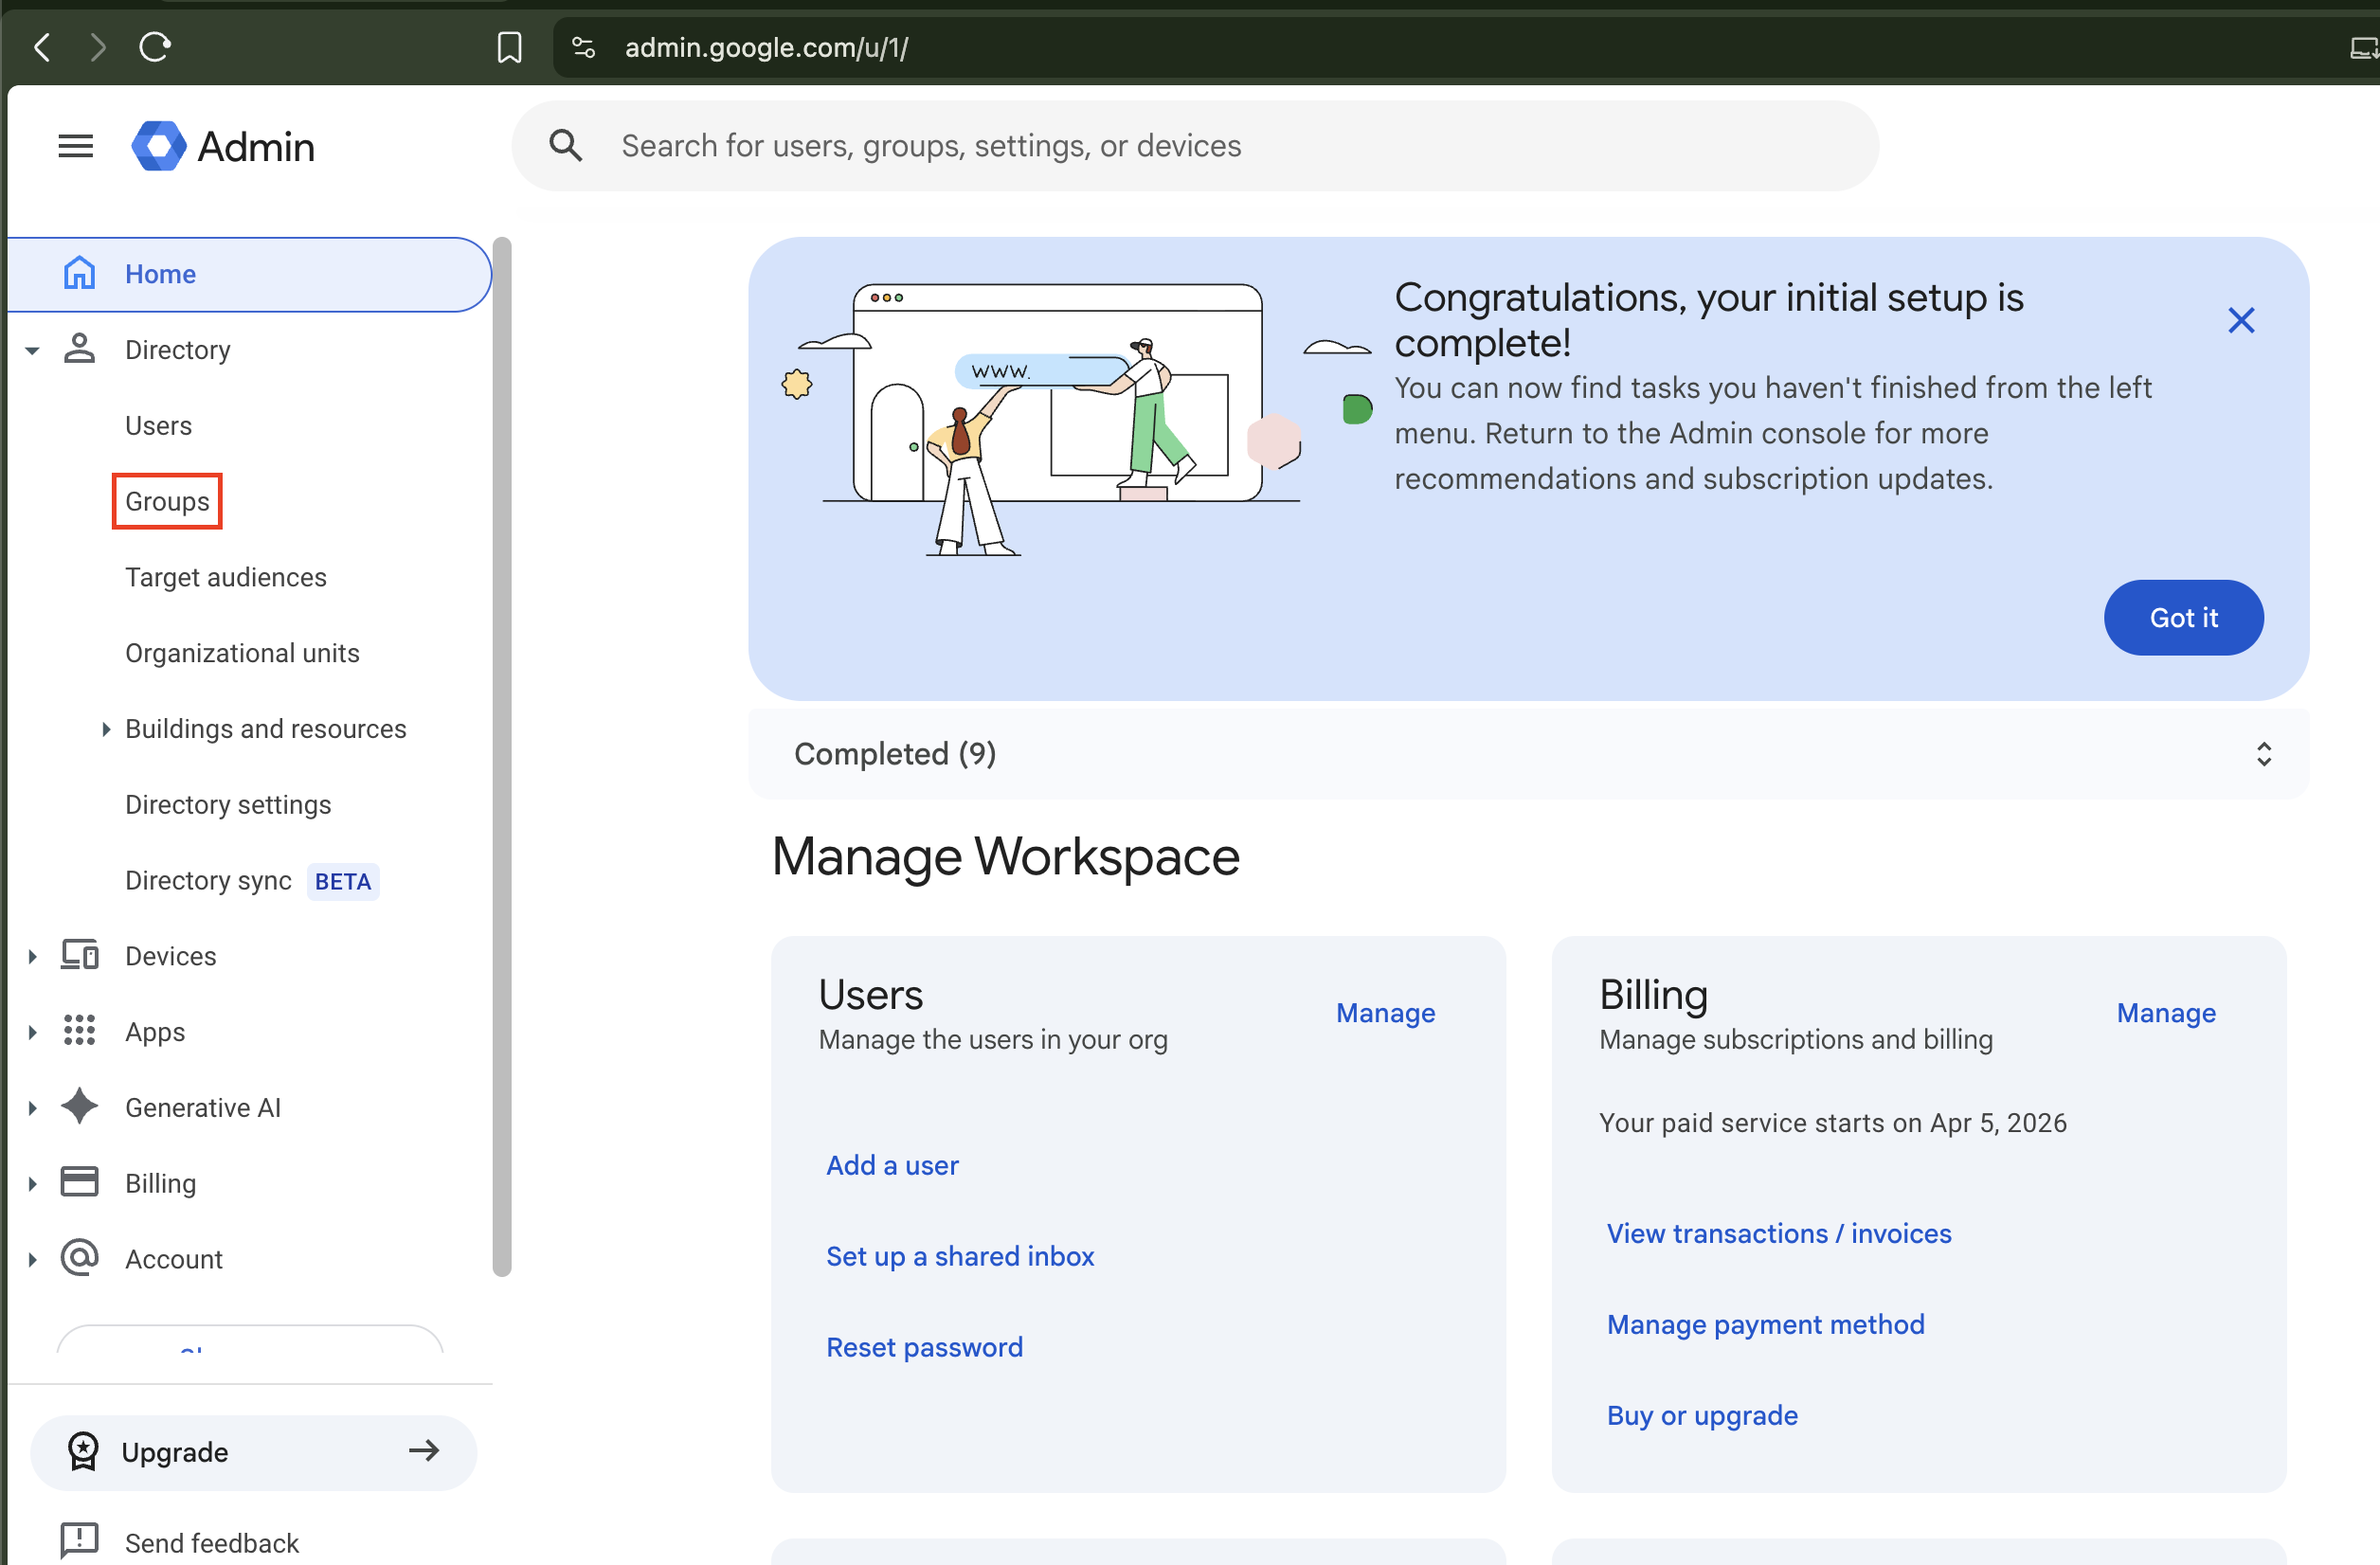
Log in to your Google Workspace account here. Once logged in, click on the Main menu in the top left corner. Navigate to Directory > Groups
2. Click the Create group button.

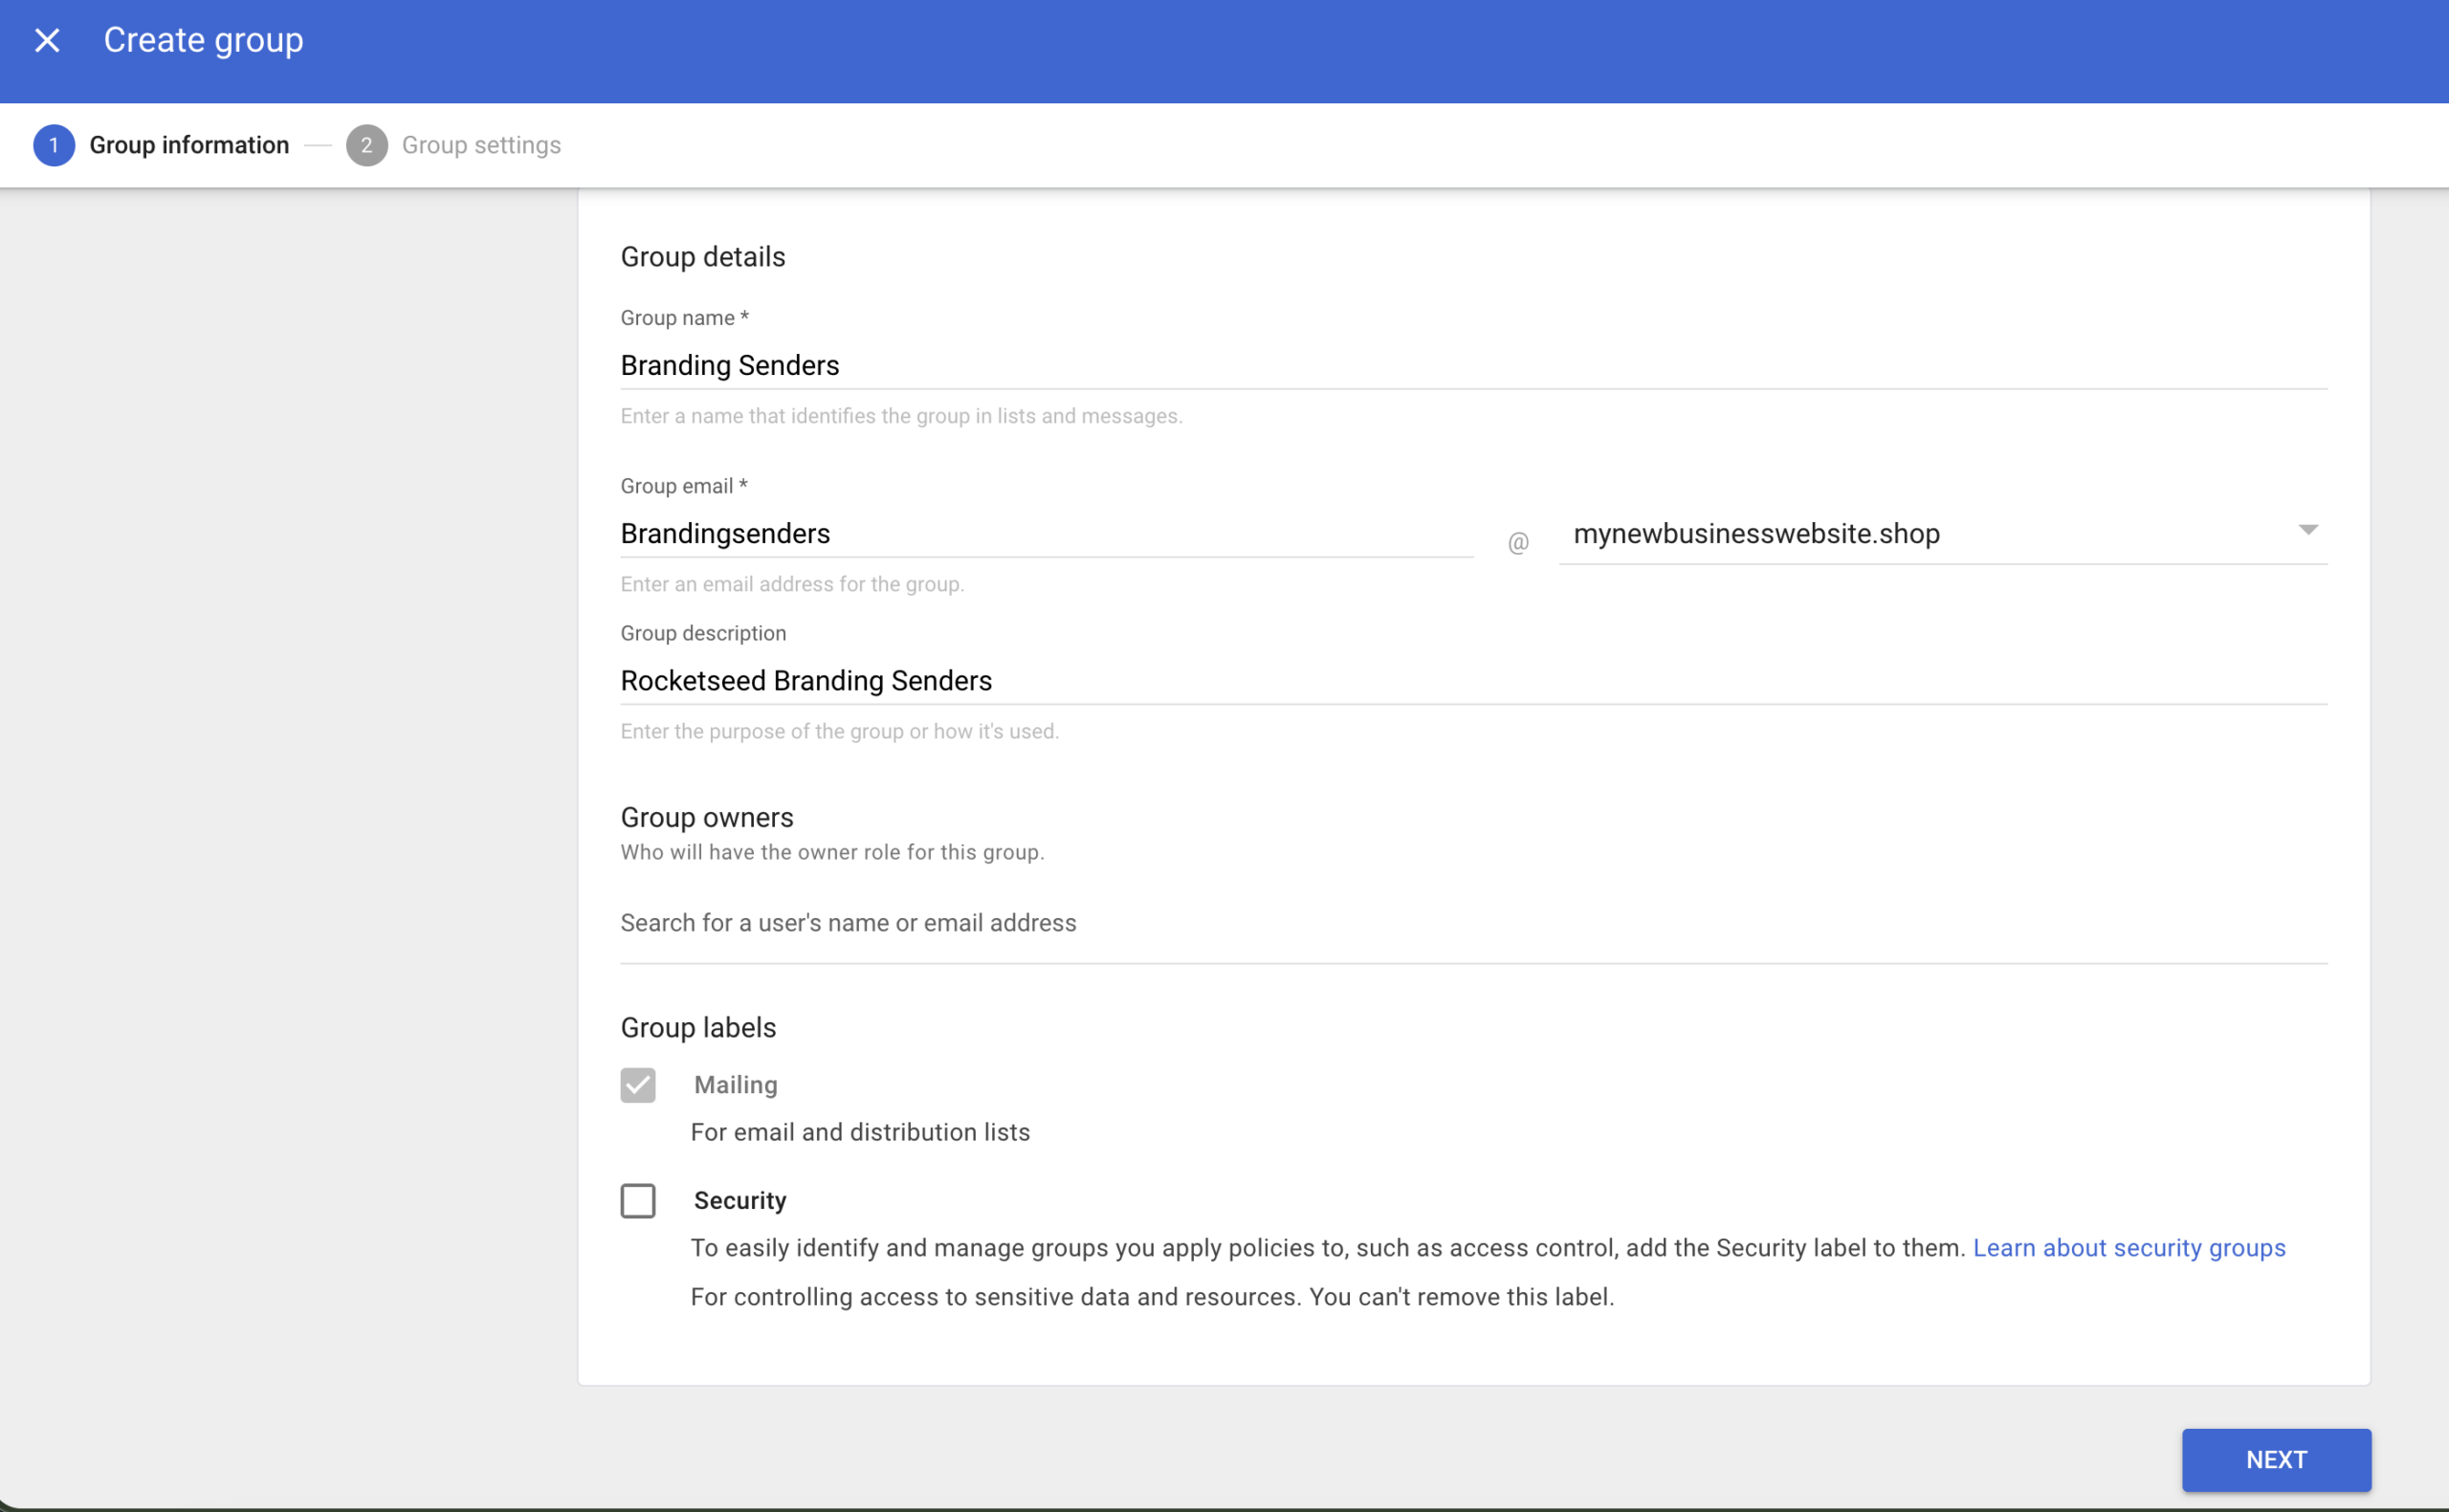
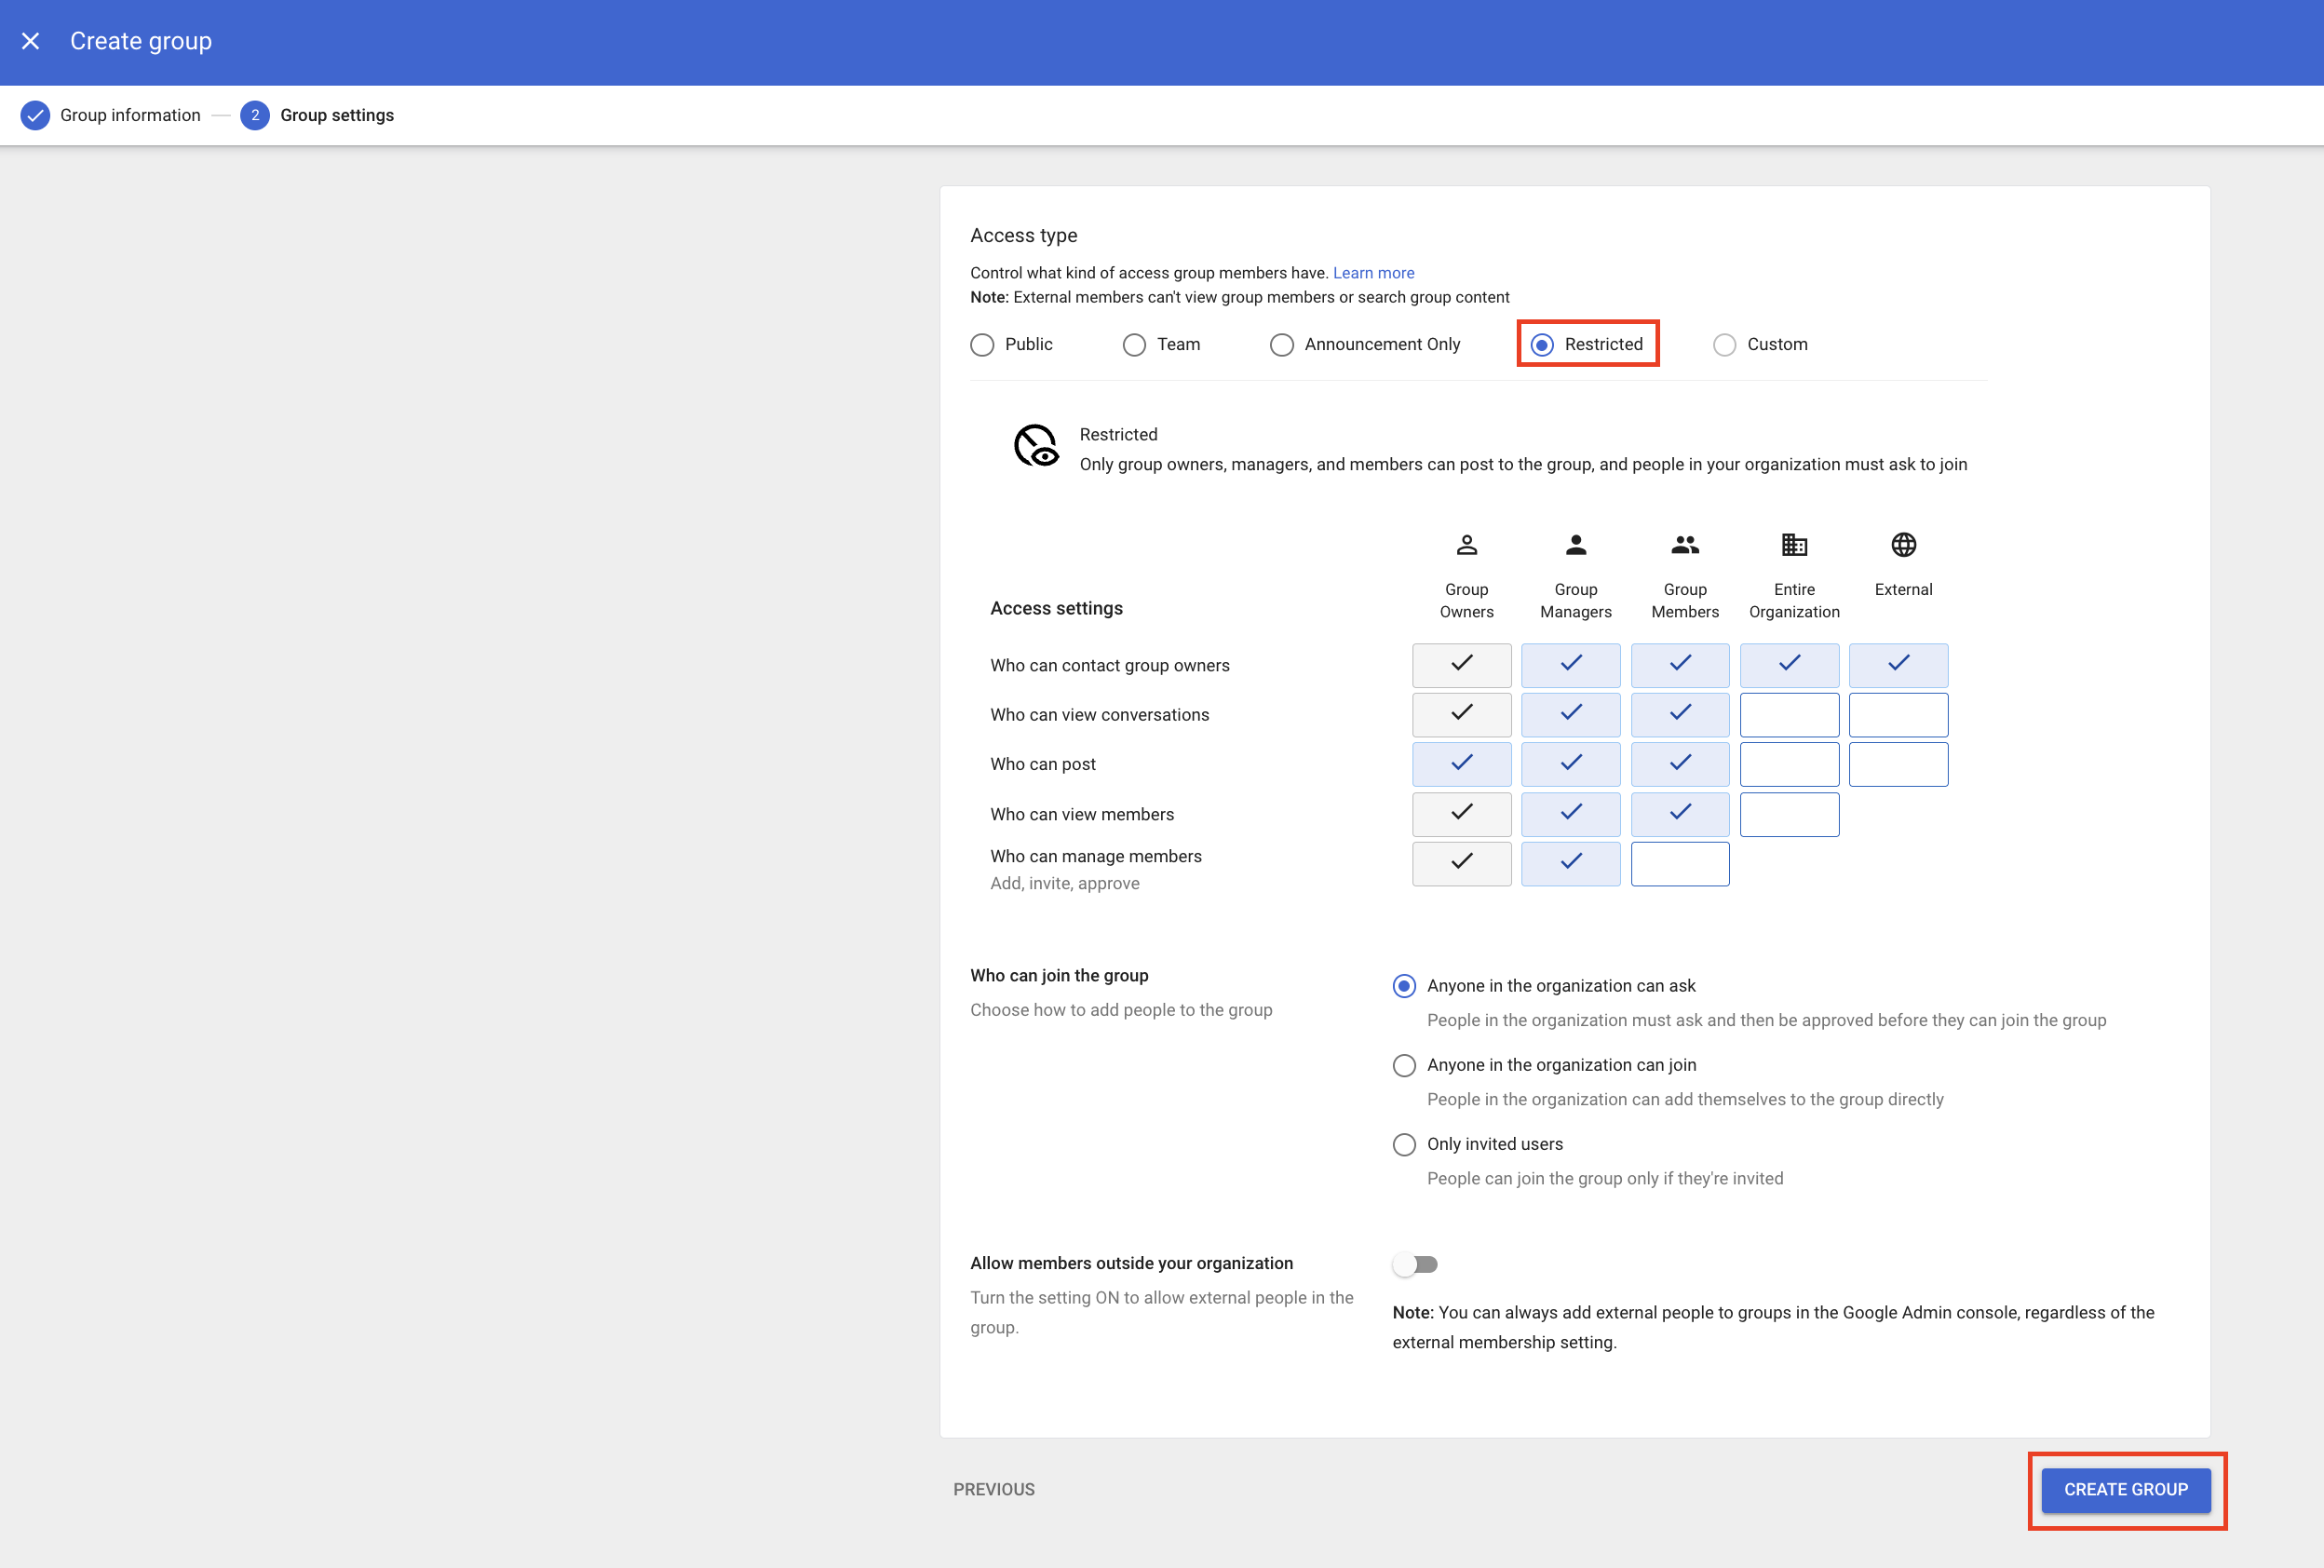
3. Name your group, we recommend naming Branding Senders. Add the name of the group address you wish to add.
The next step will allow you to add all applicable addresses to your sender group to route through Rocketseed.
We recommend Restricted Access Level.
Click Create
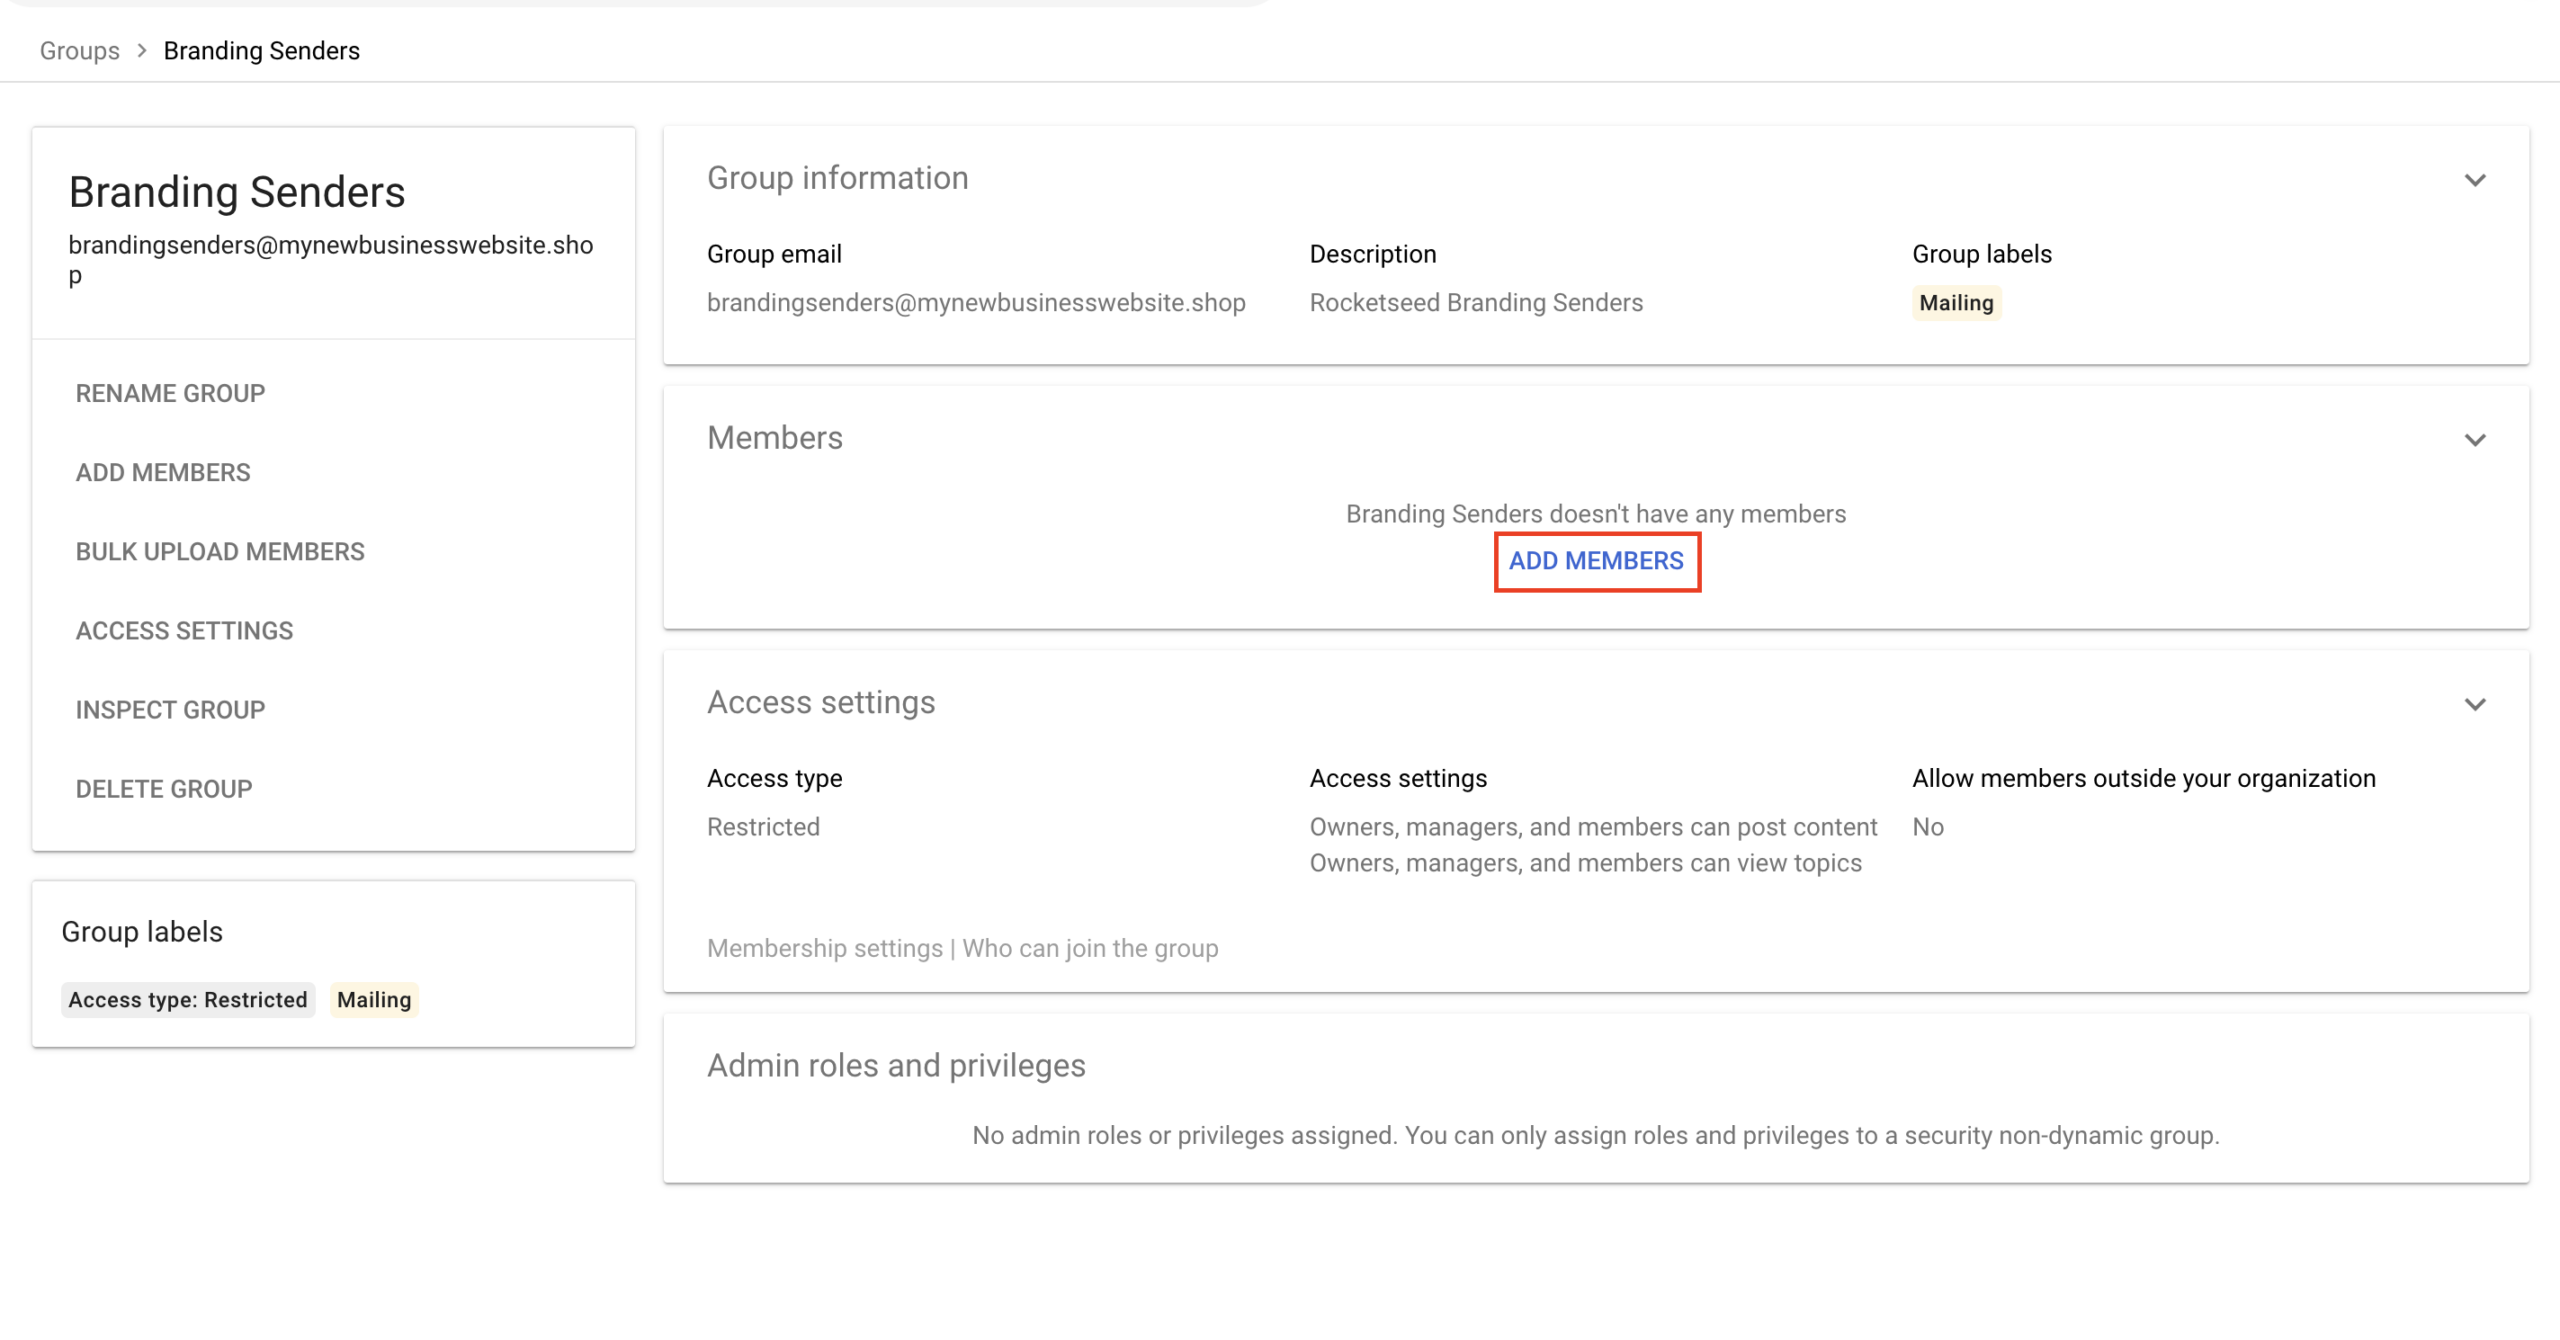
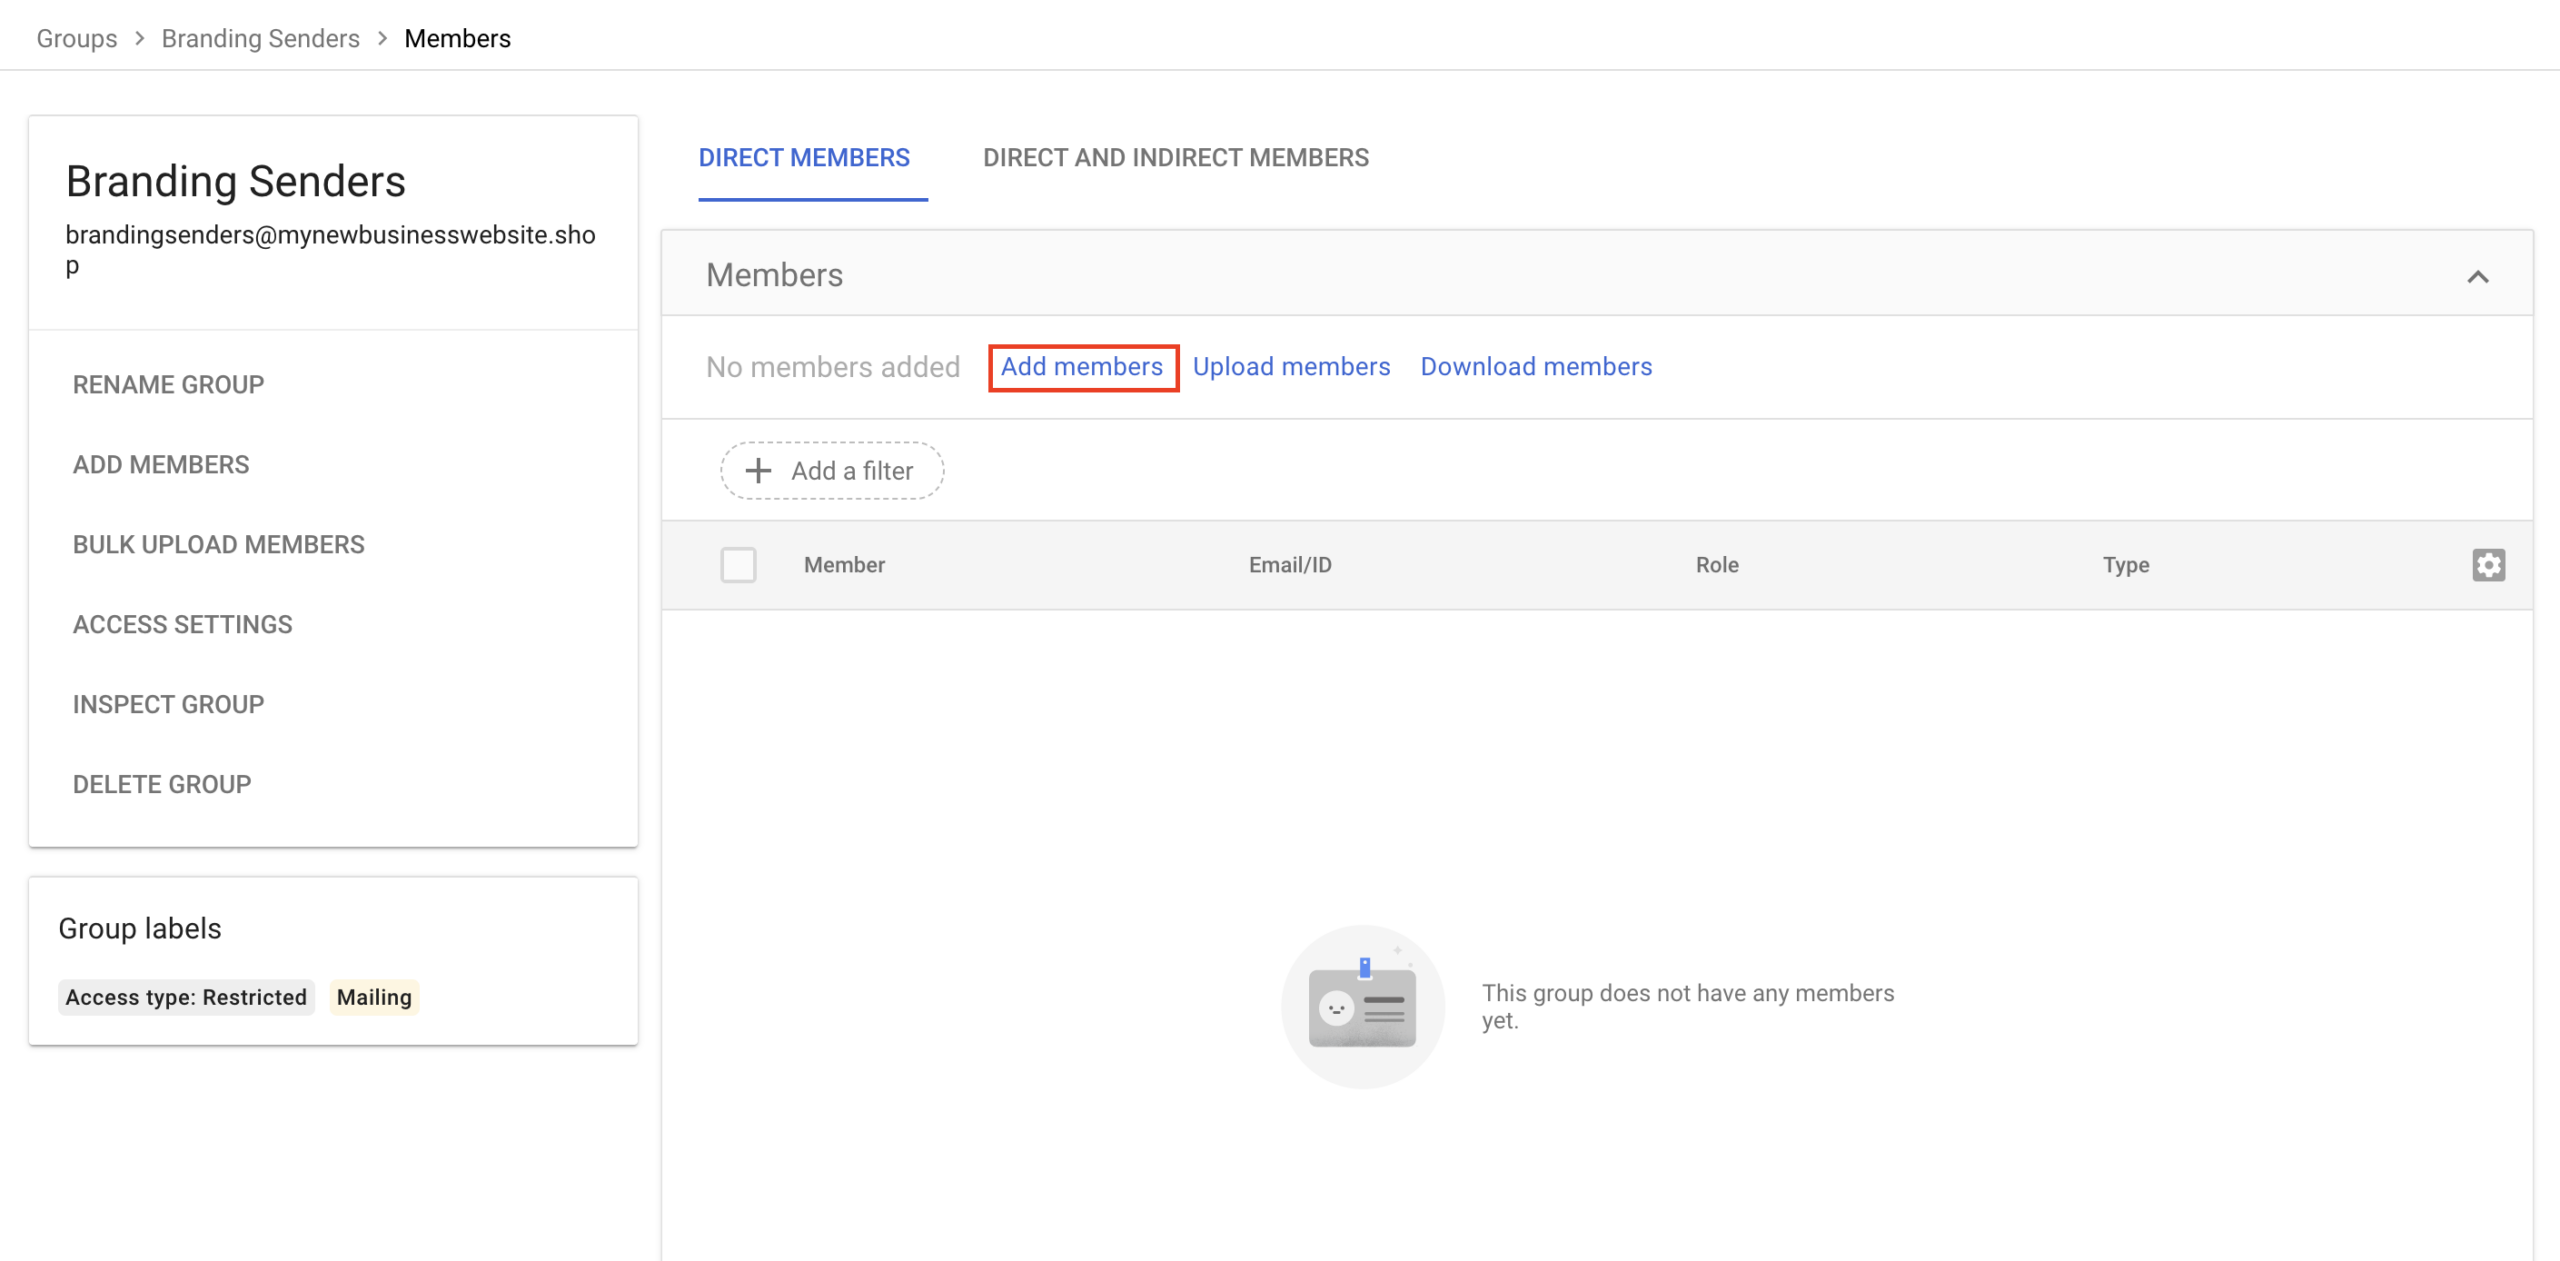
4. Your group has been created. Click on the downwards arrow on the right hand side of the Members section
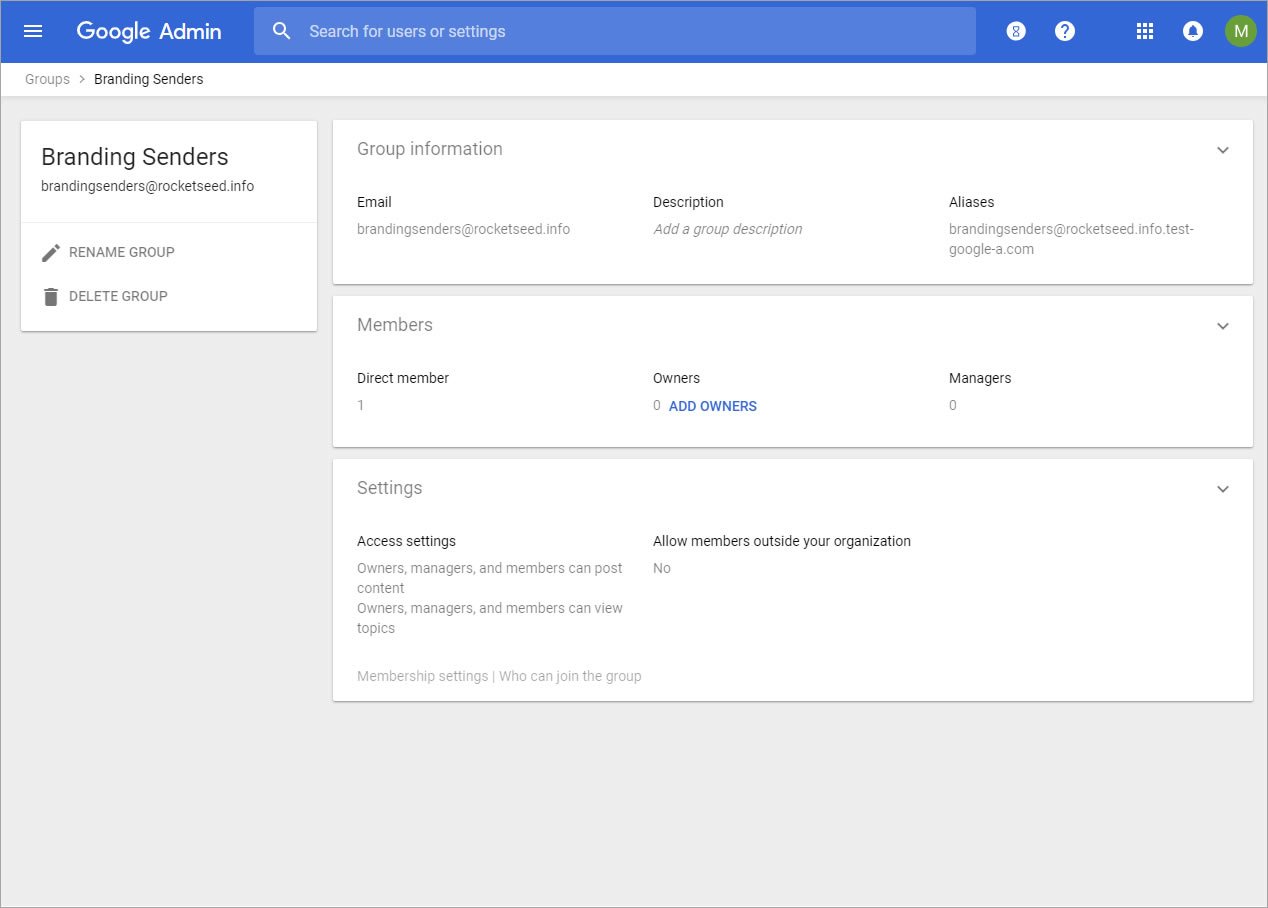
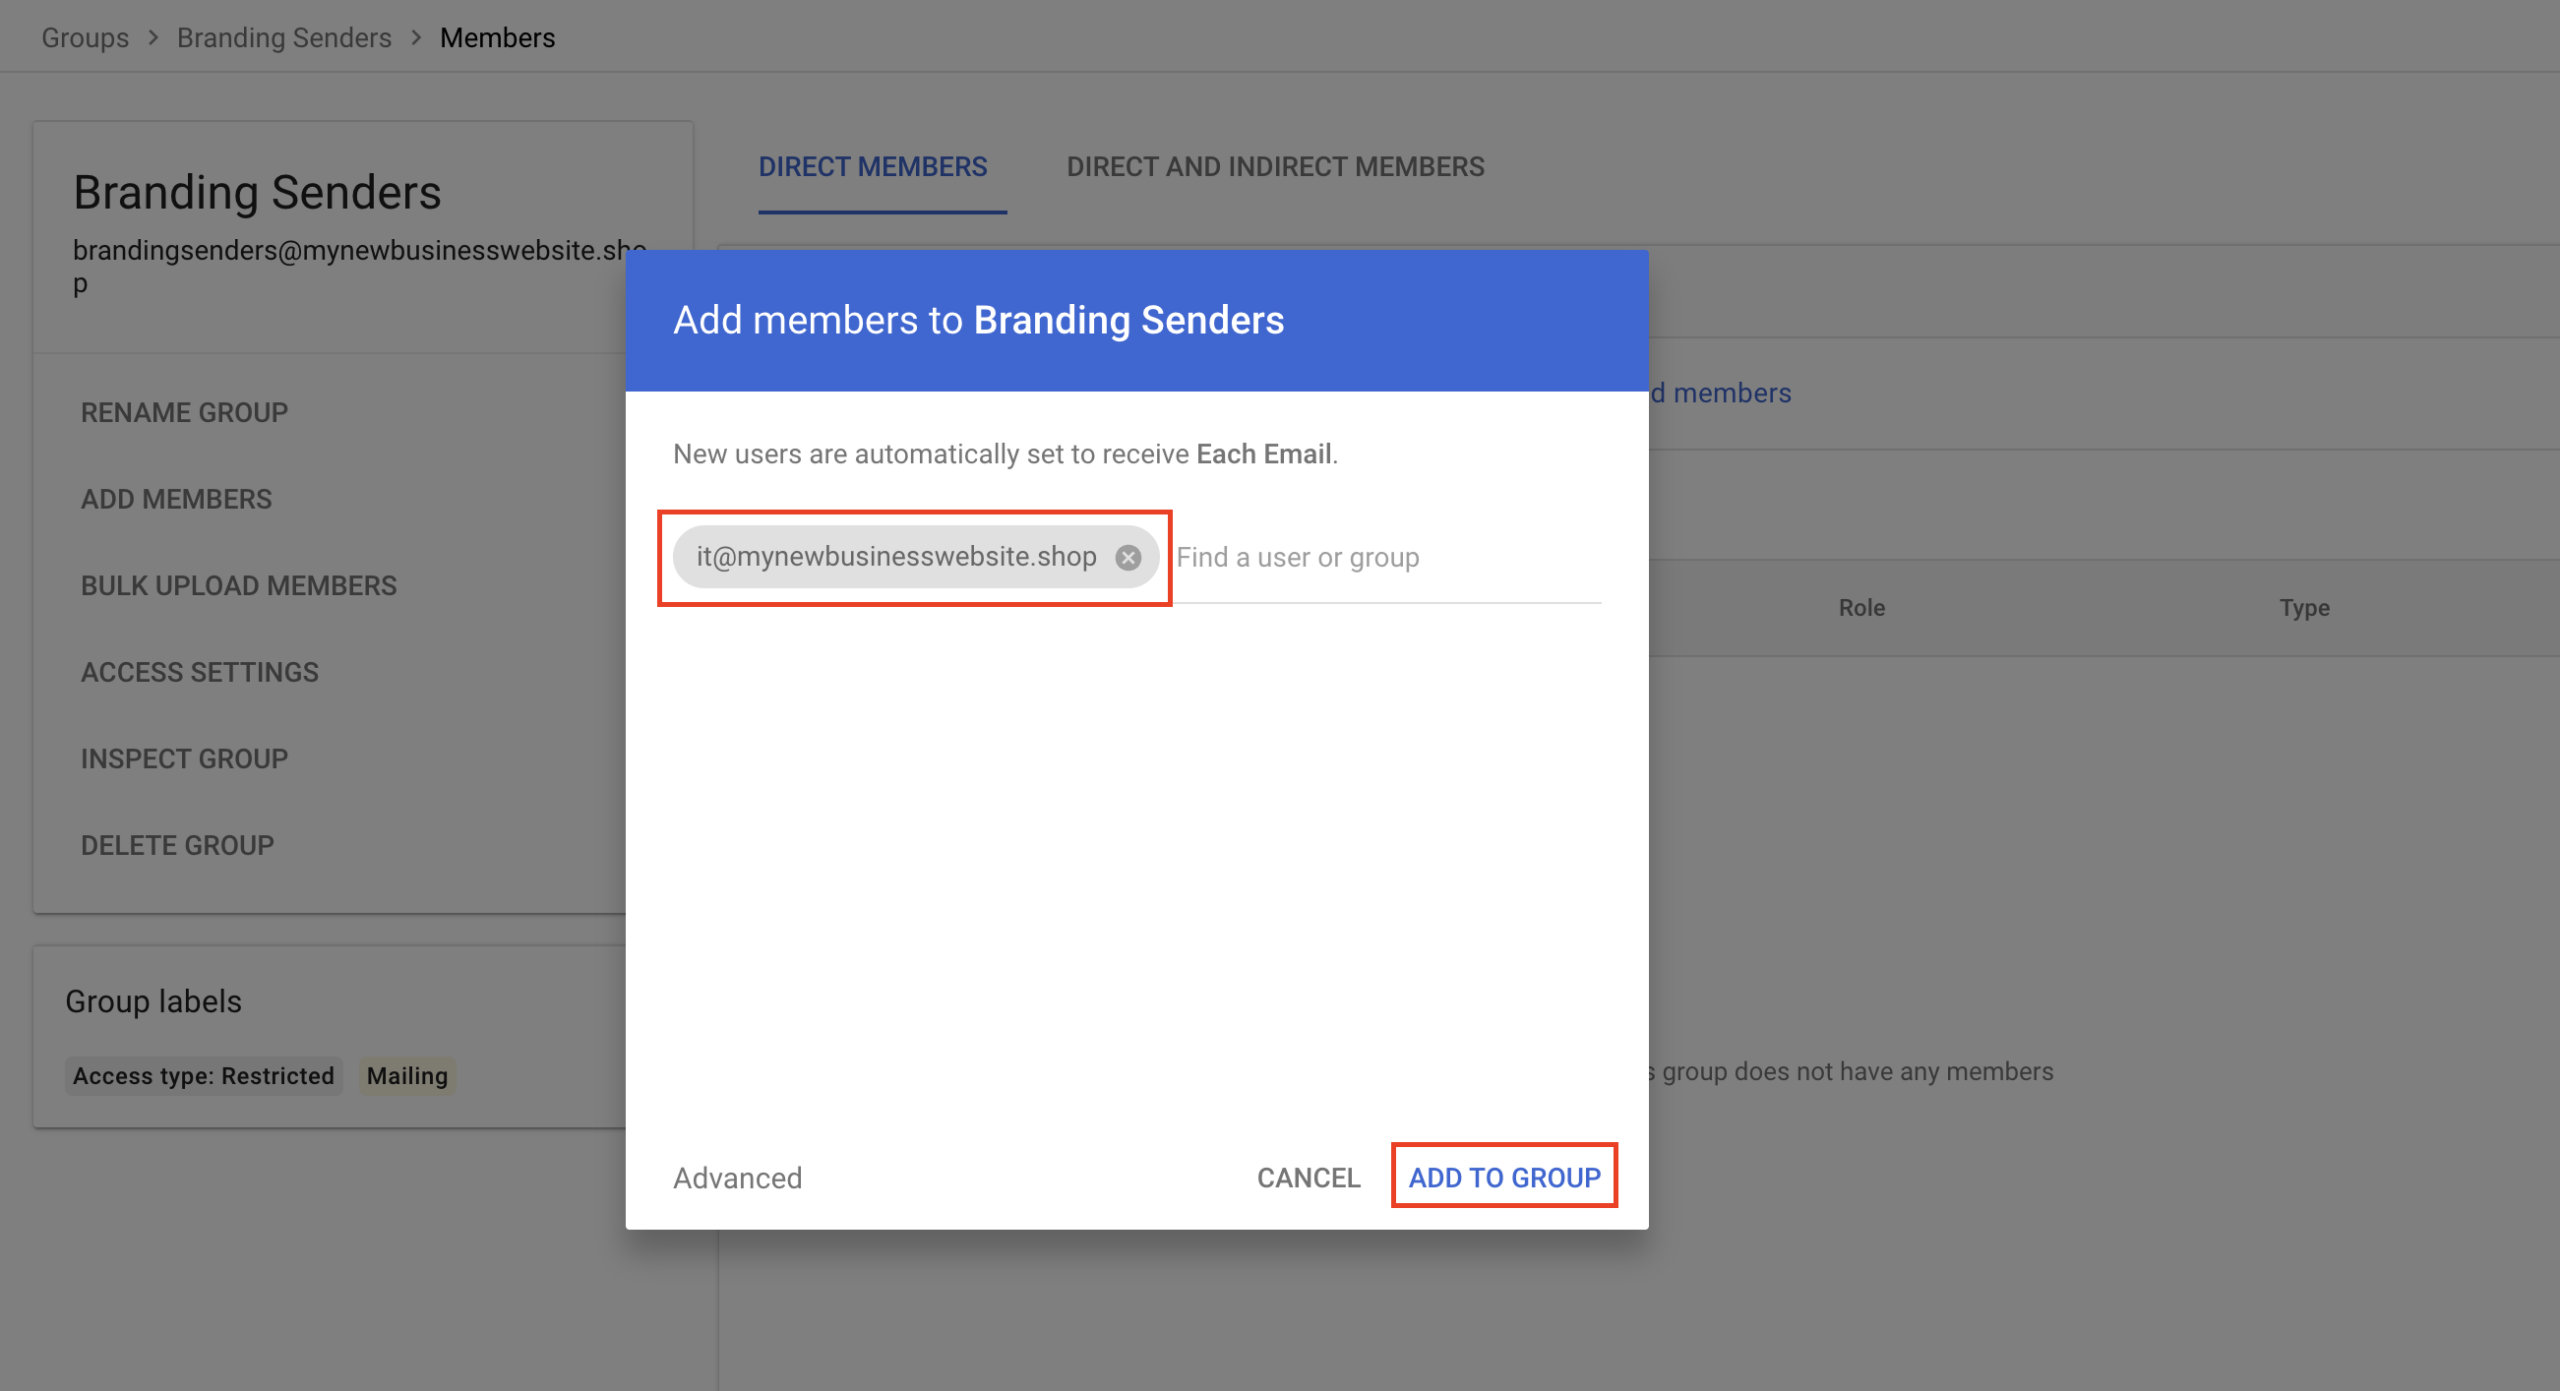
5. Hover over and click the ‘ADD MEMBERS’, this will give you the option to add individual members, or bulk upload members. We recommend adding an individual member at this stage. Other groups or your whole company can be added after testing.
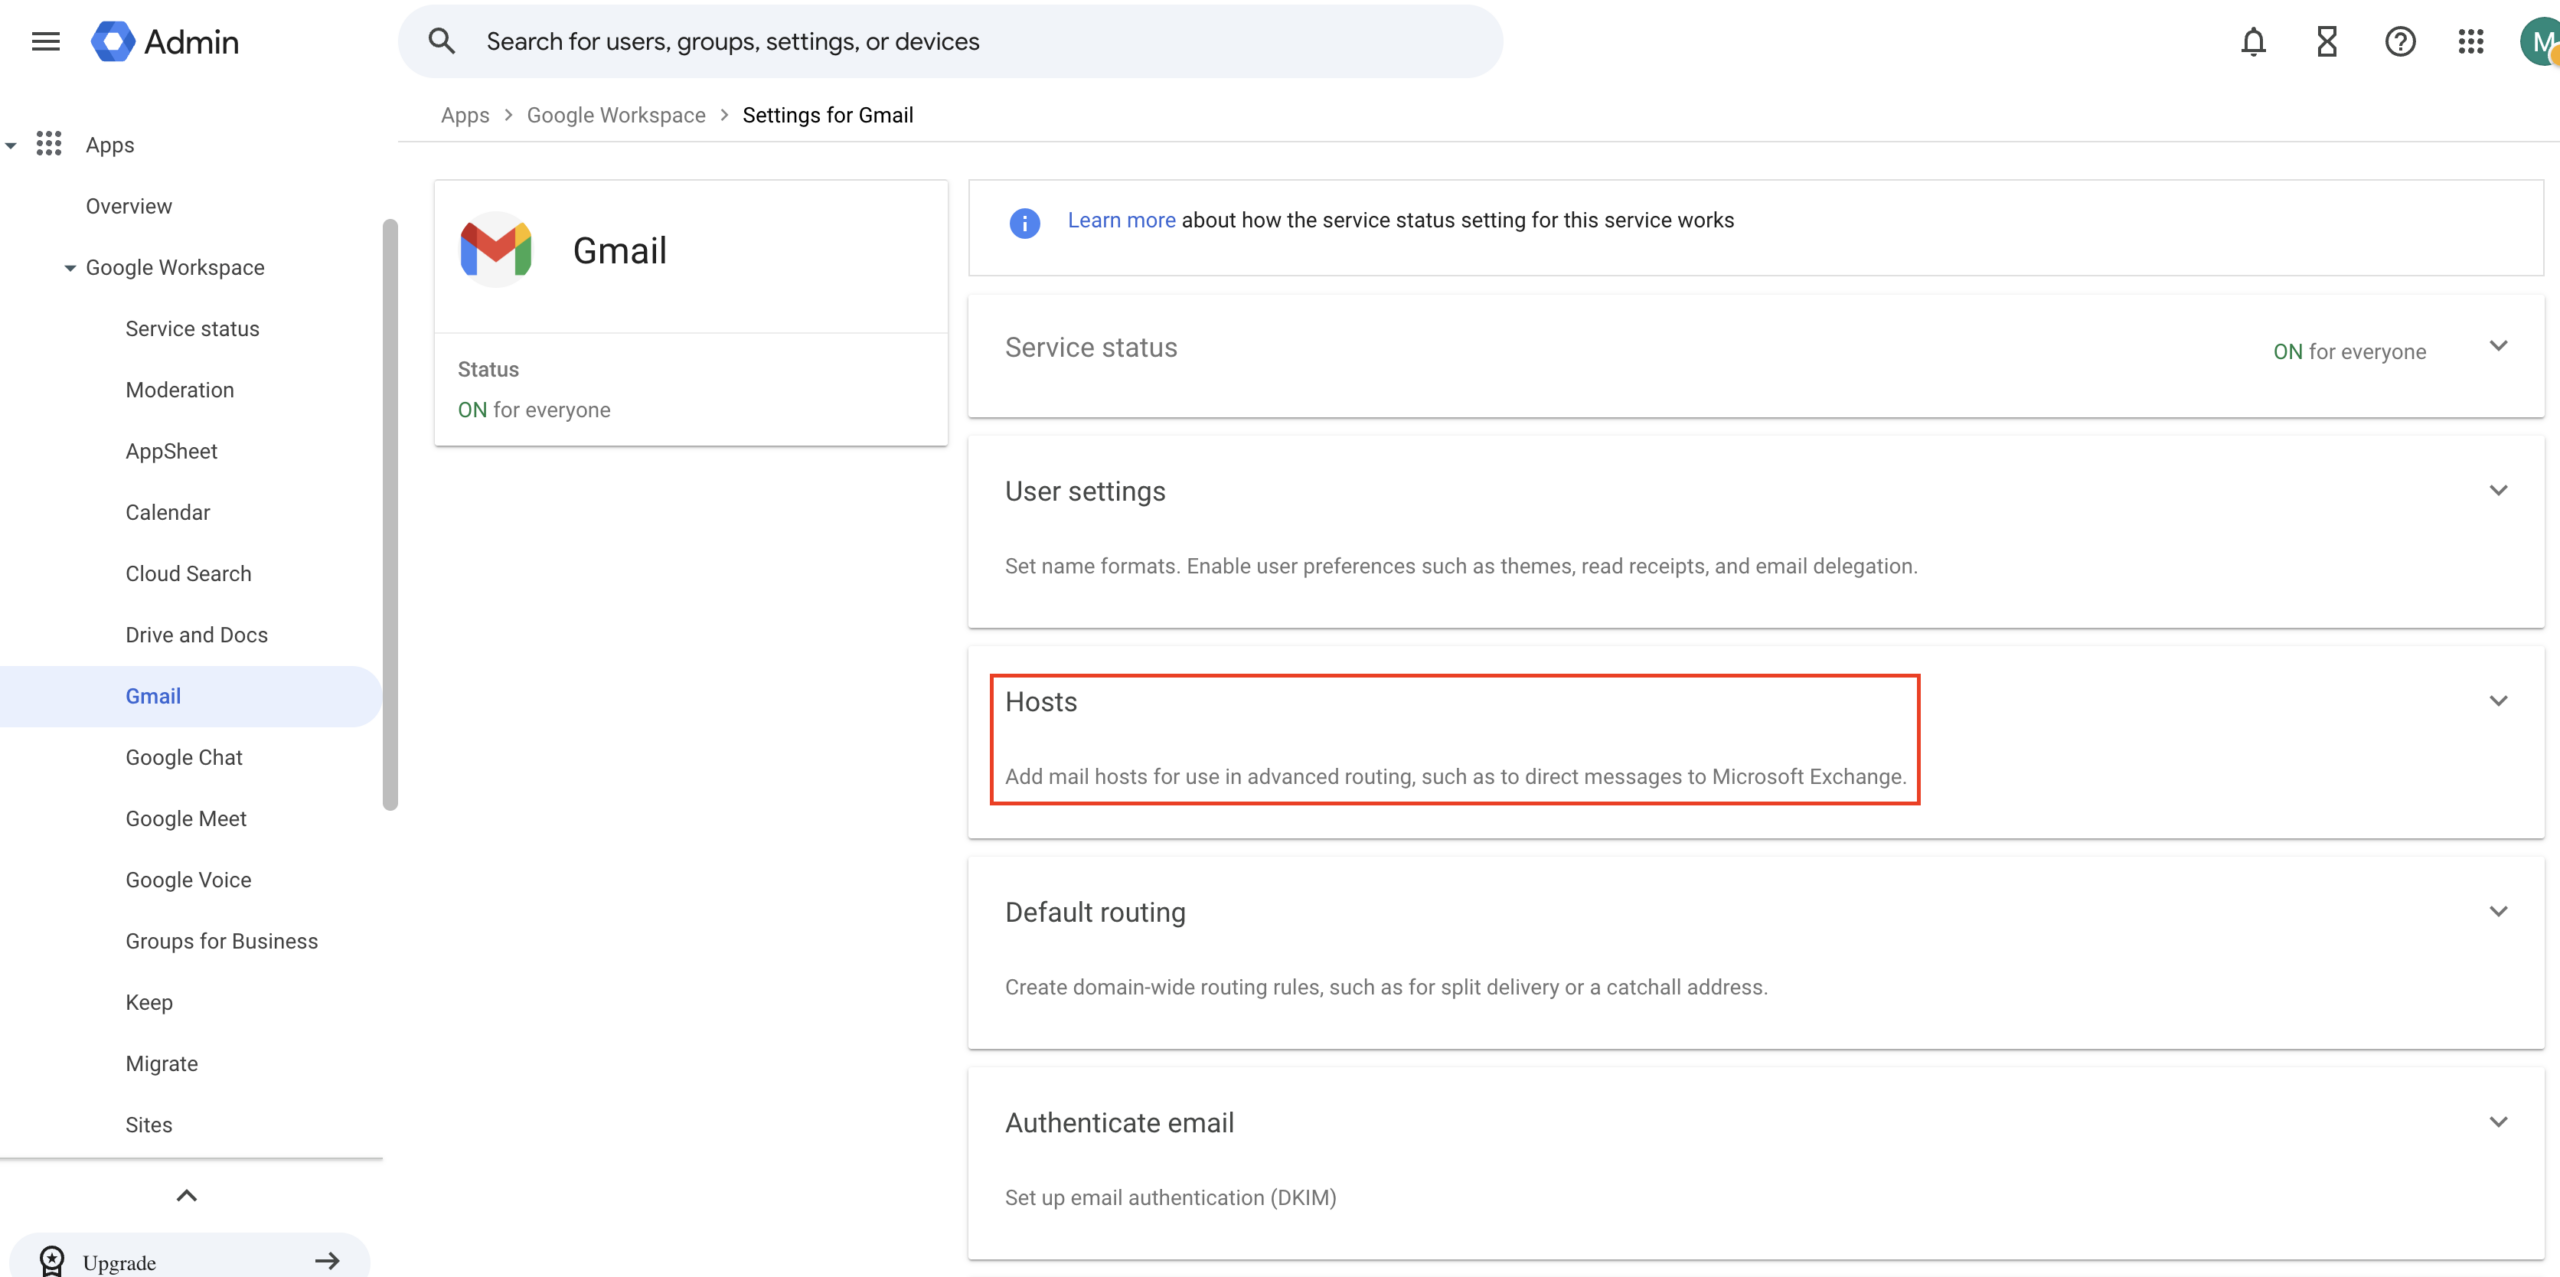
6. On the main menu of Google workspace. Expand Apps then expand Google Workspace and click on Gmail. On the right of the page you will see a number of options. Select ‘hosts’
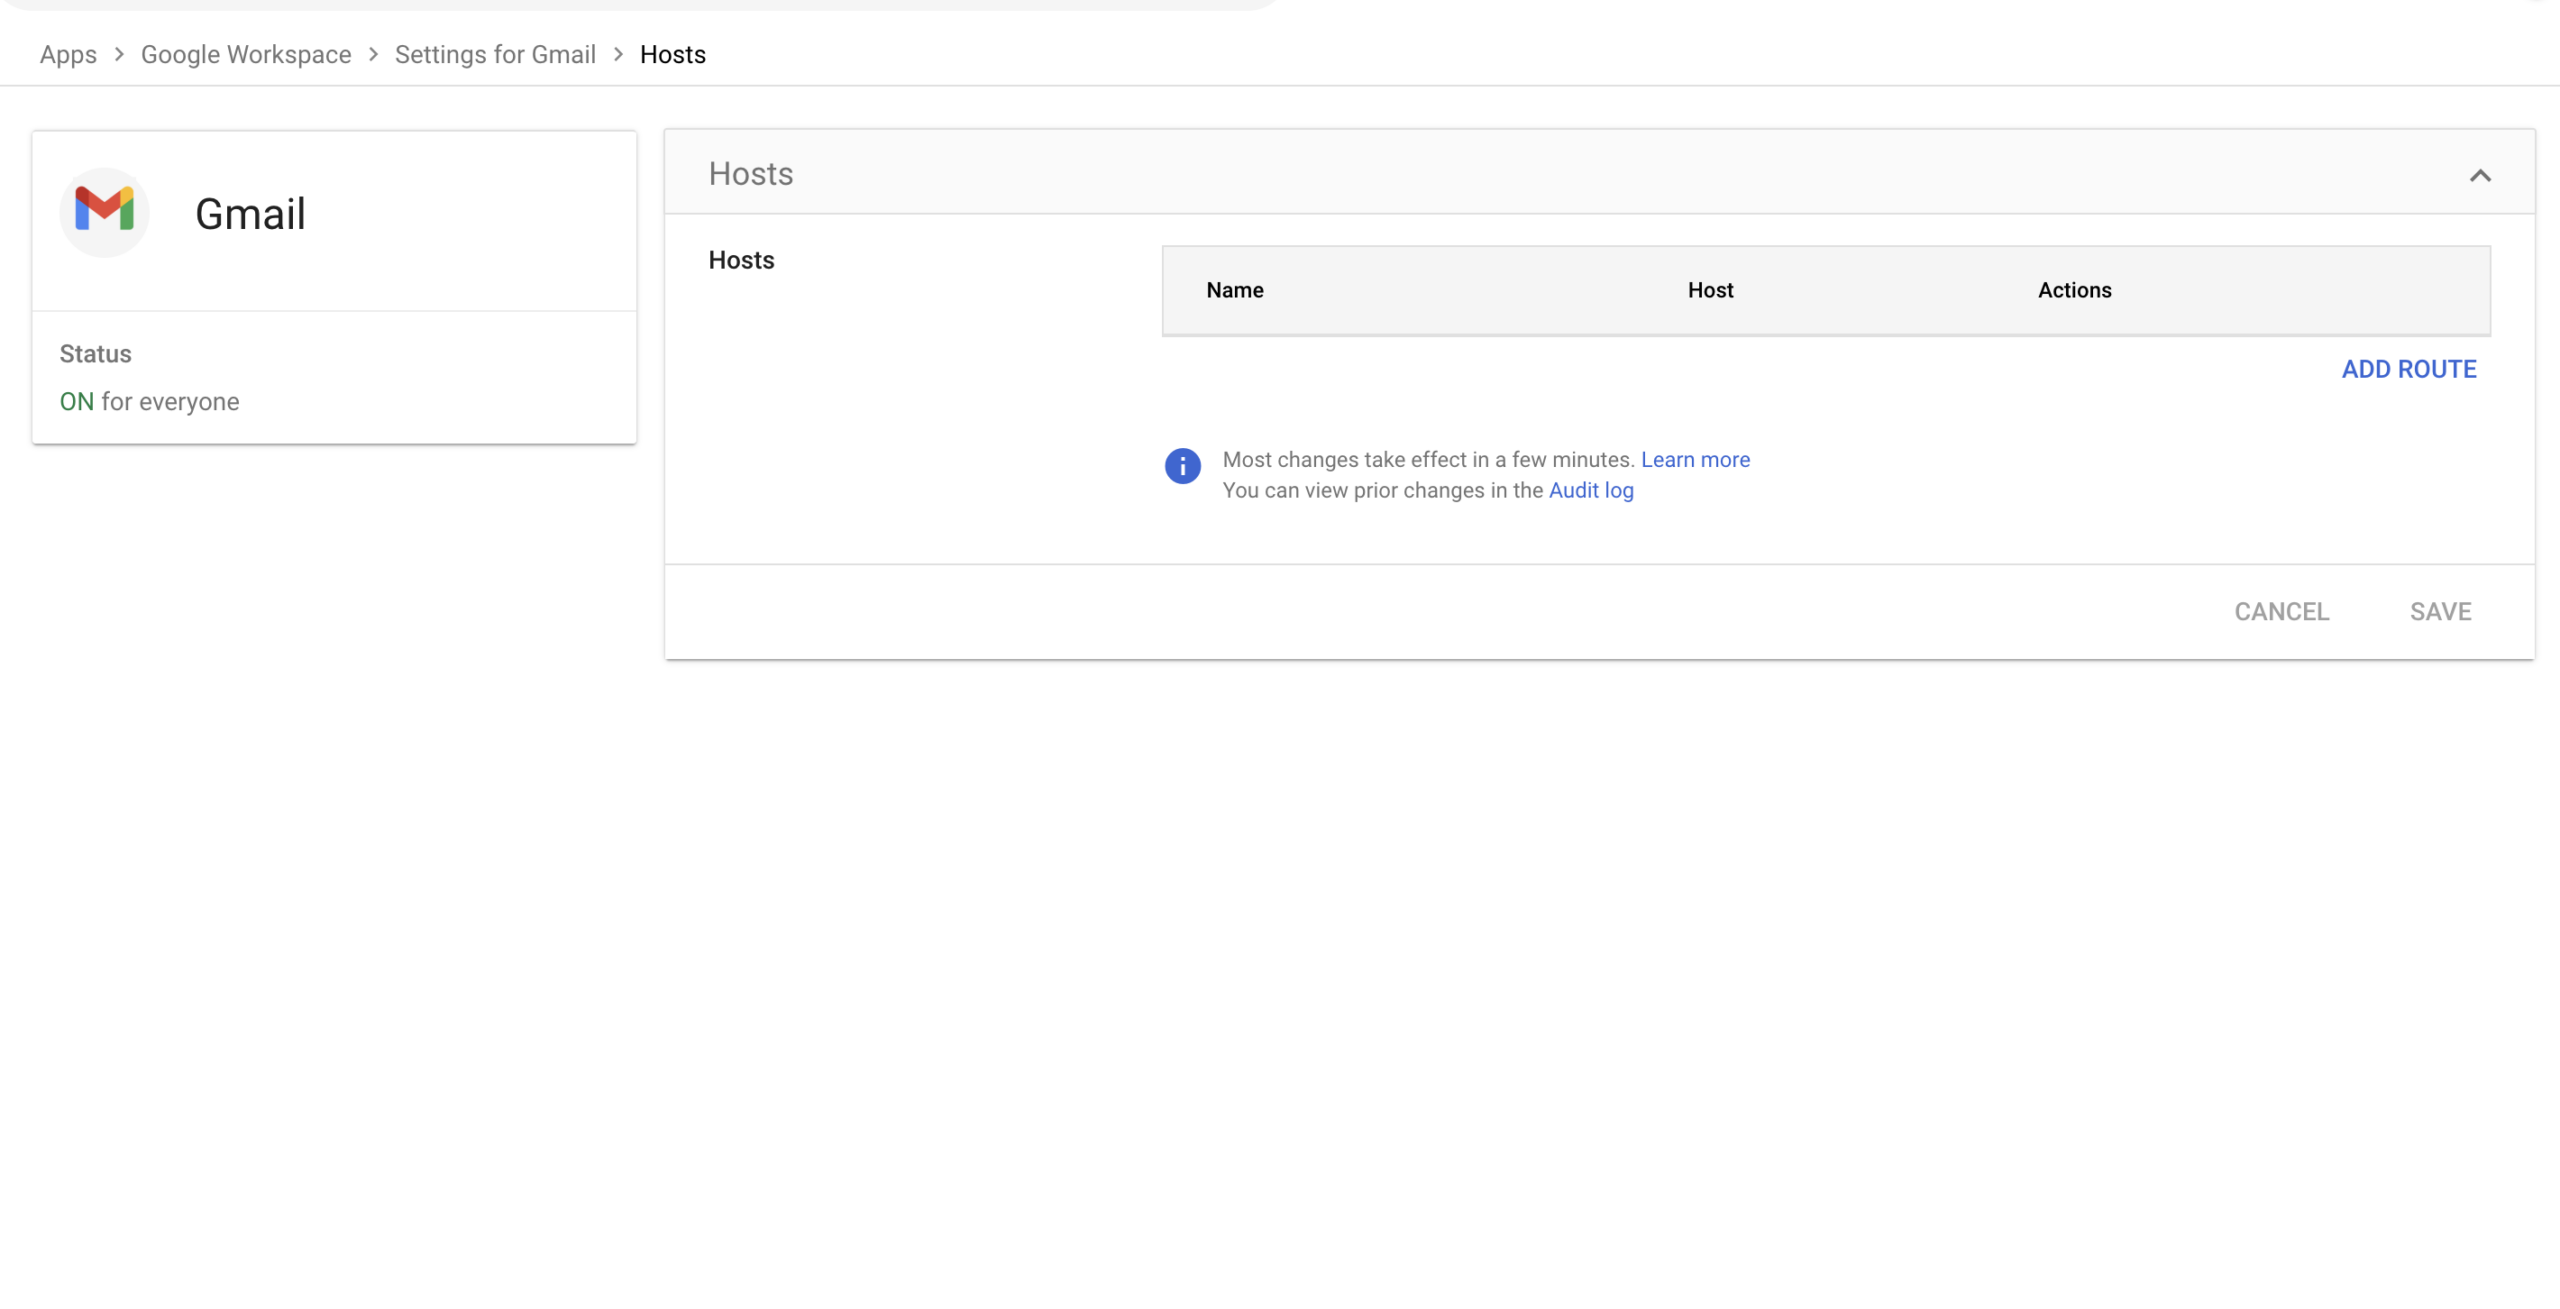
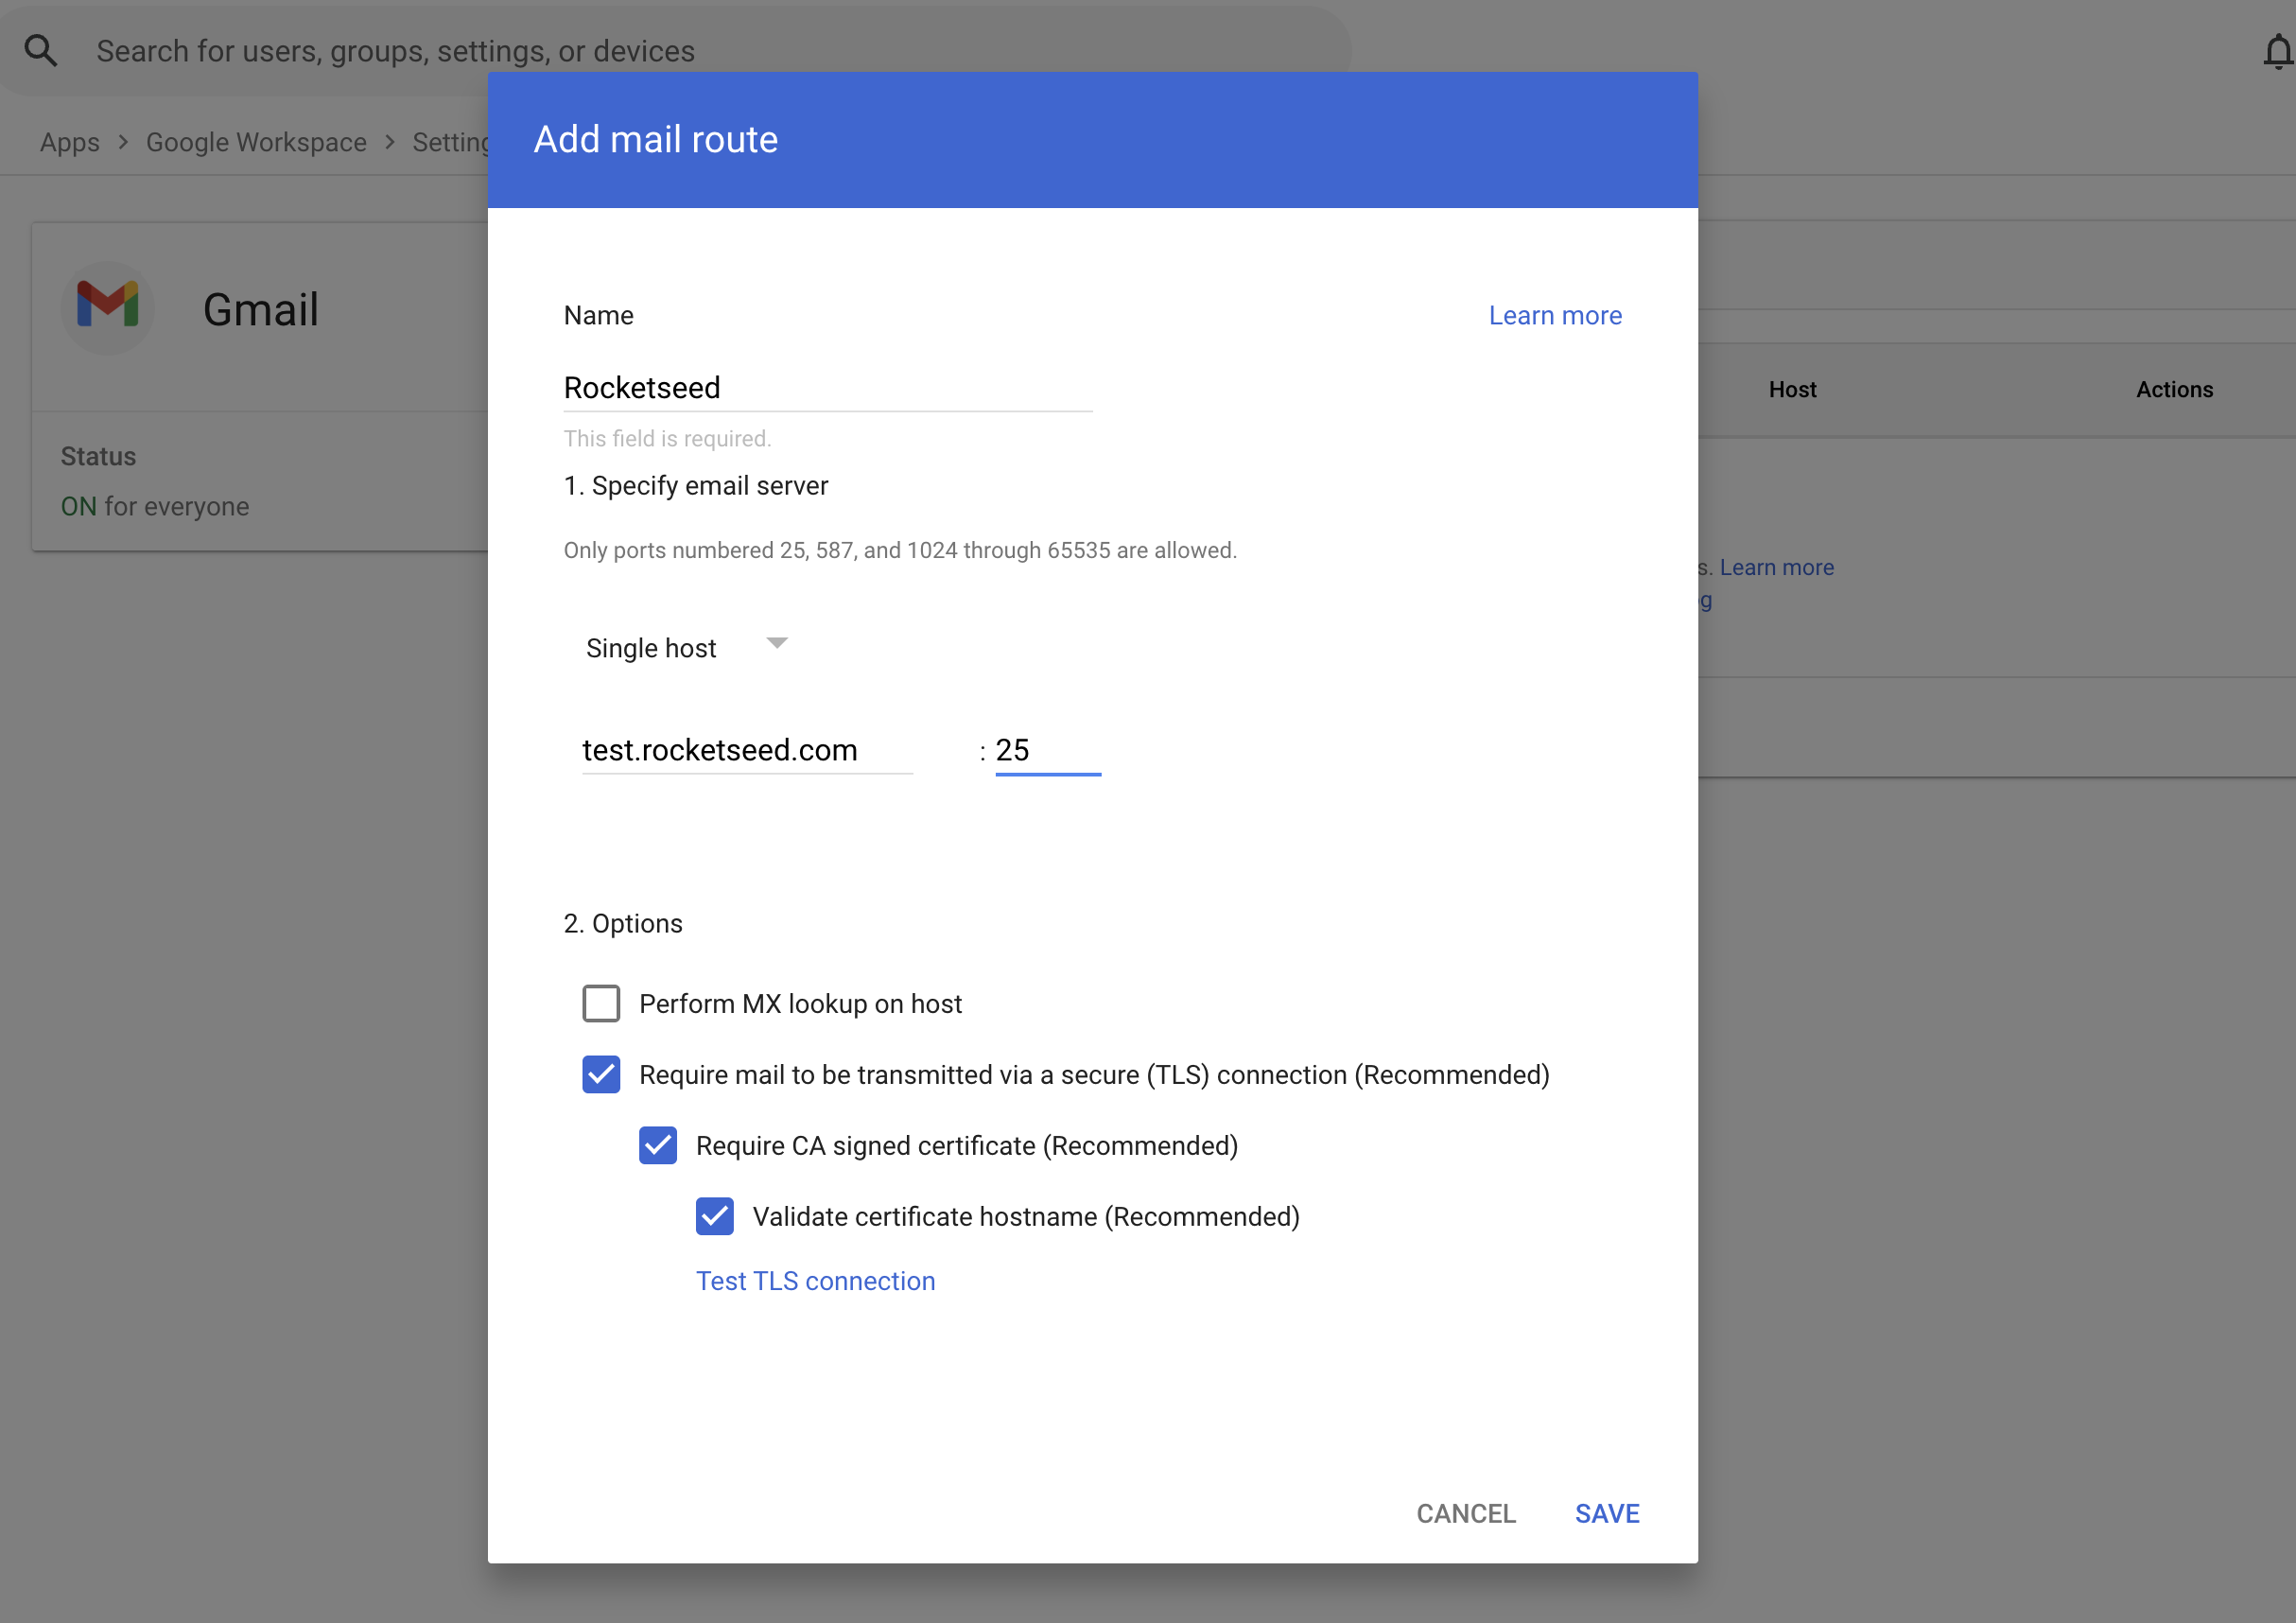
7. Select ‘ADD ROUTE’
Name of host = Rocketseed
Hostname = Hostname supplied by Parrot Digital and Port = 25
Options = As shown in the screenshot below ensure all 3 radio buttons are
selected
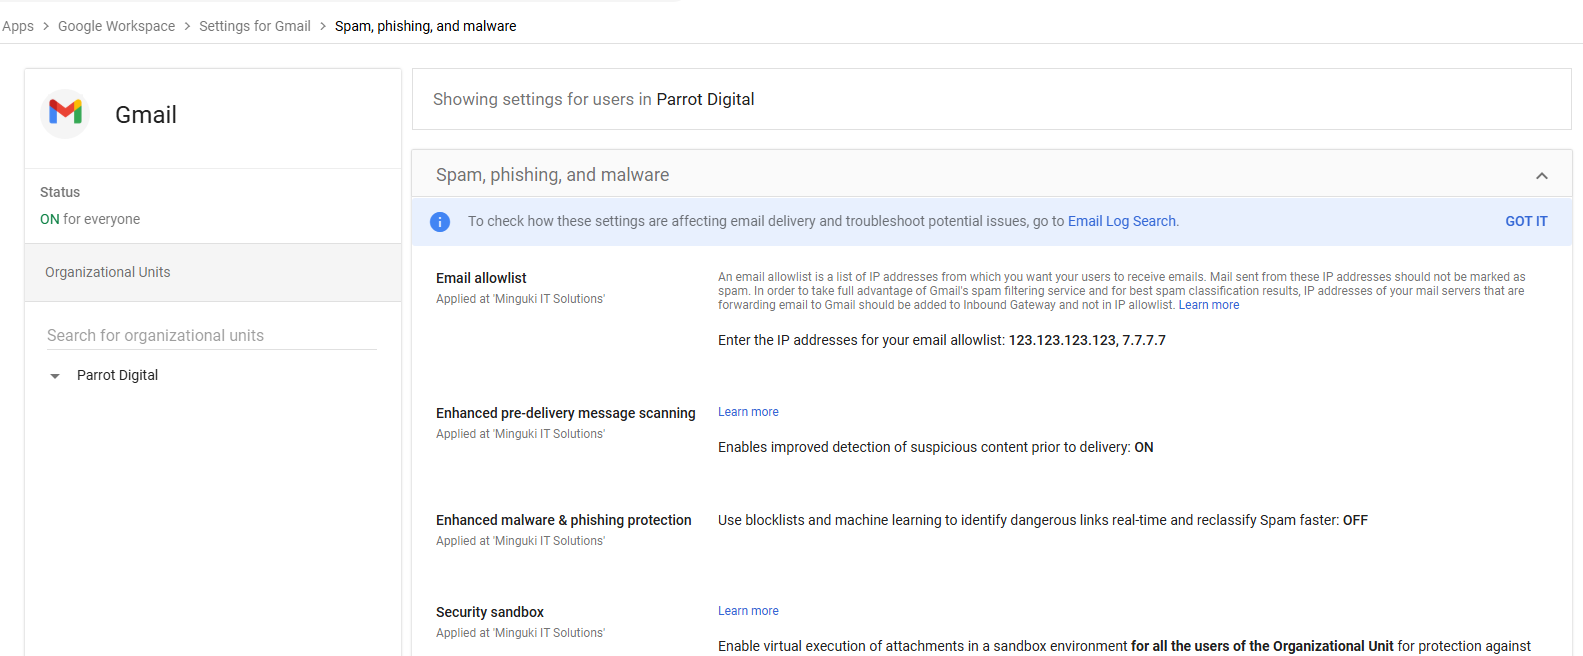
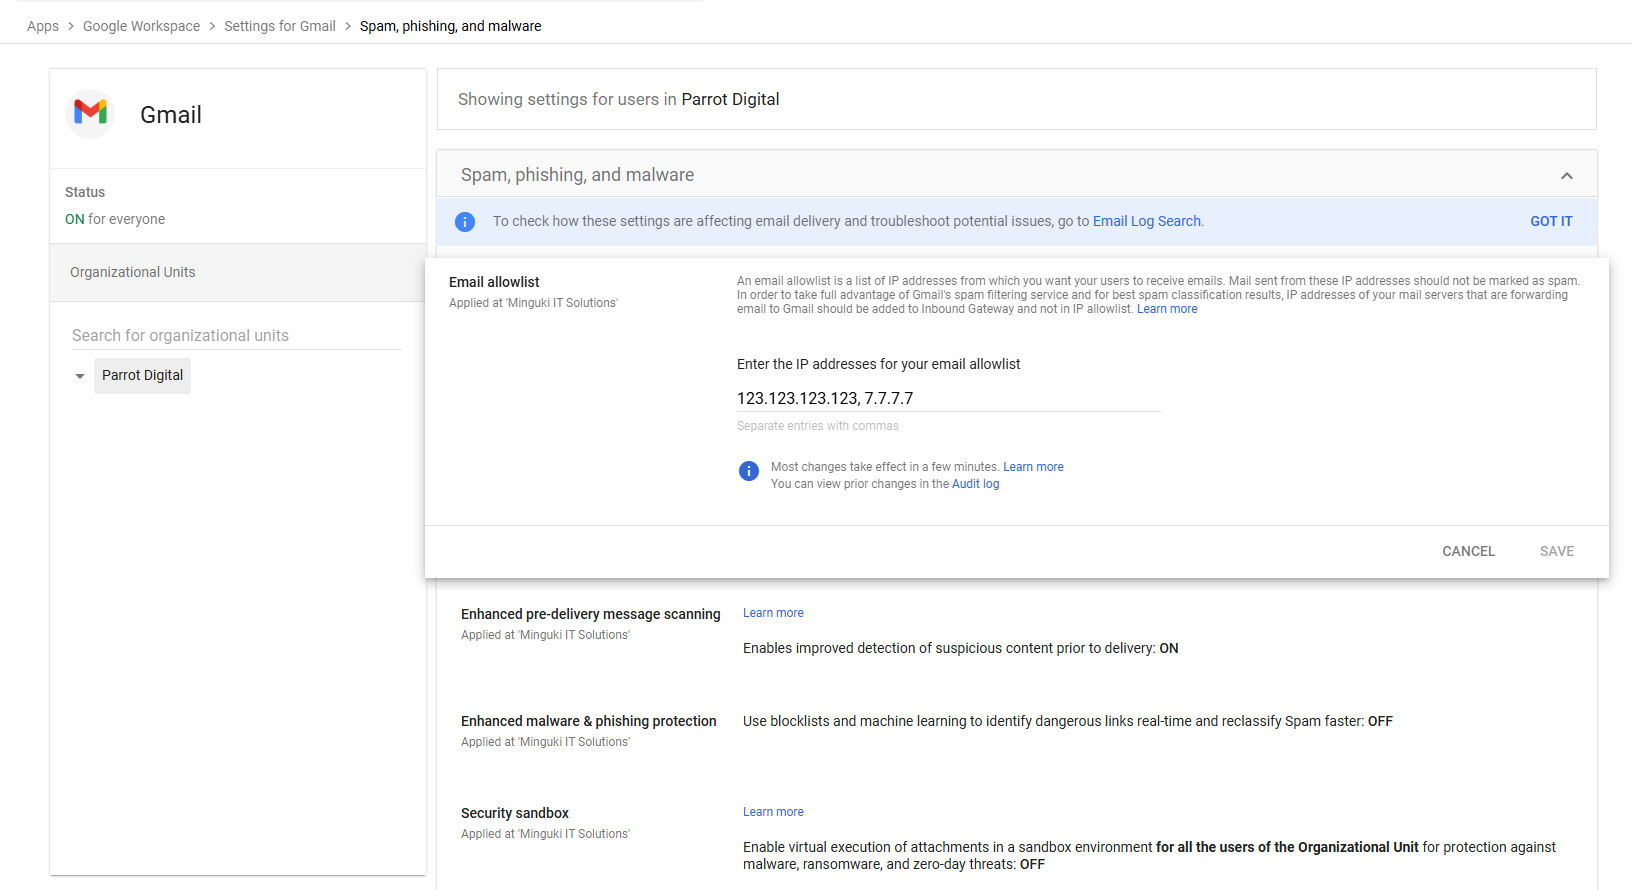
8. Click on ‘Settings for Gmail’. This will take you back to the previous page. Then Scroll down the page until you see ‘Spam, Phishing and Malware’. Select that option pane.

9. Add the IP address supplied by Parrot Digital has provided you with to the whitelisting. Please note this needs to be comma separated. Then click ‘Save’.
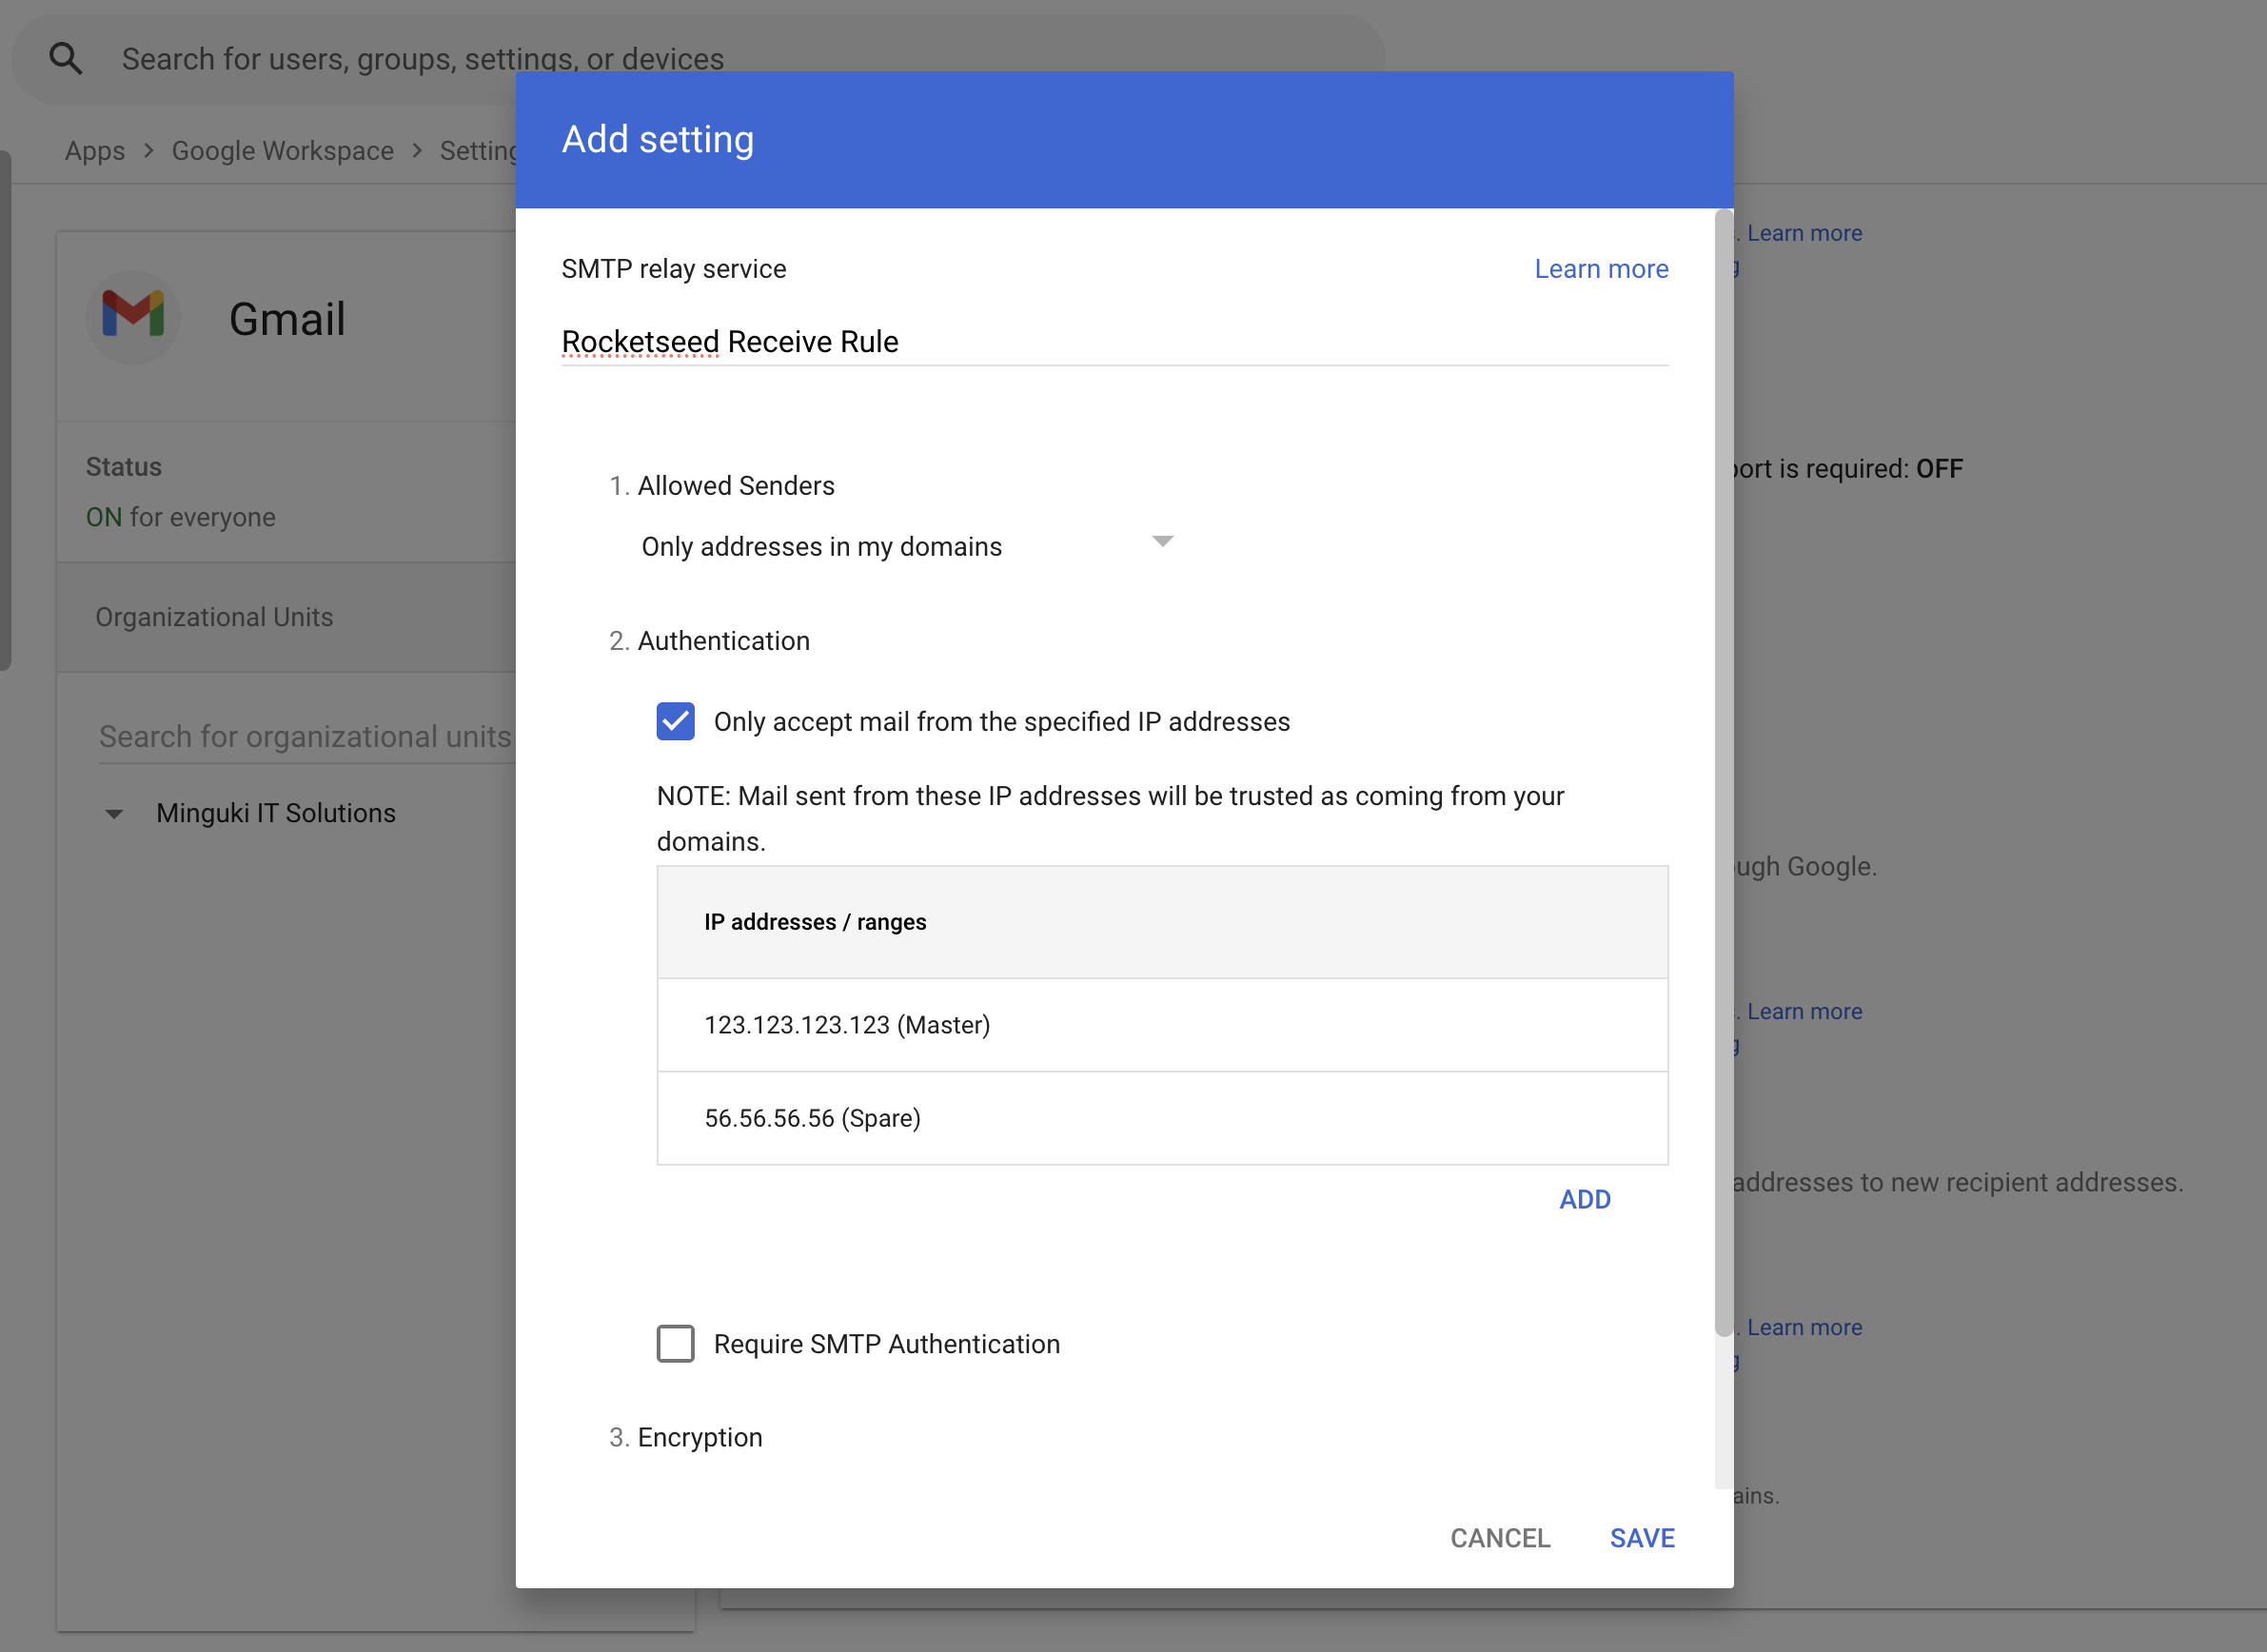
10. Once the IP address is added, select settings for gmail to navigate back to the option pane list and select ‘routing’. Then scroll down until you see ‘SMTP relay service’. Click on ‘configure’

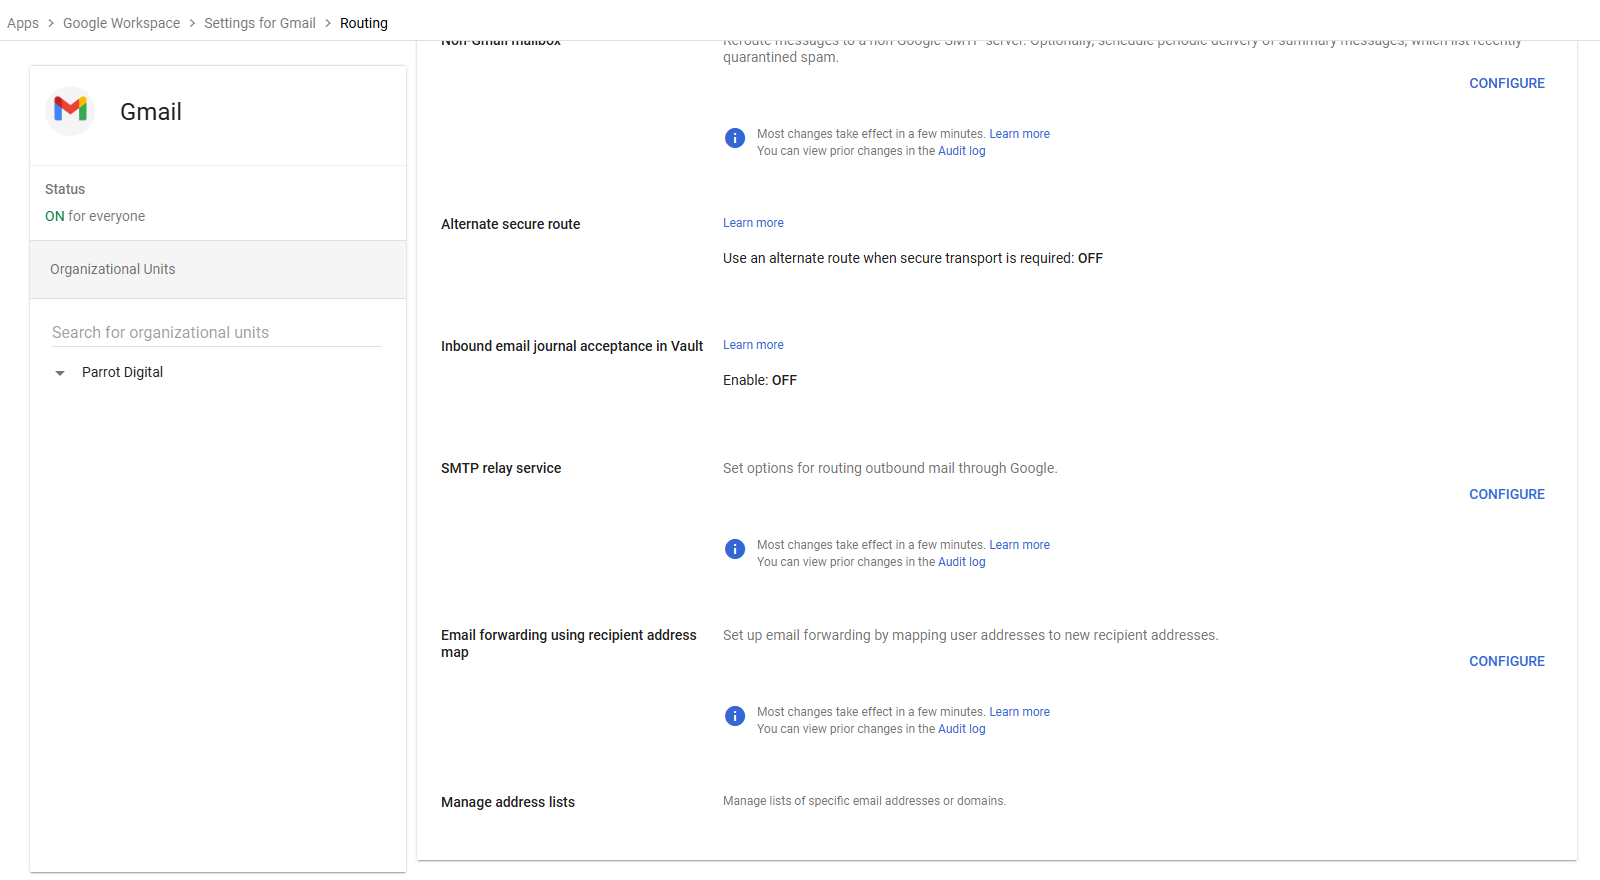
11. Name = Rocketseed Receive Rule
Radio button = Only accept emails from these Specified IP ranges Click
Add and insert the below IP addresses. Add one at a time. IP addresses:
Master server = IP address supplied by Parrot Digital, Spare Server IP address supplied by Parrot Digital
Then Click save.
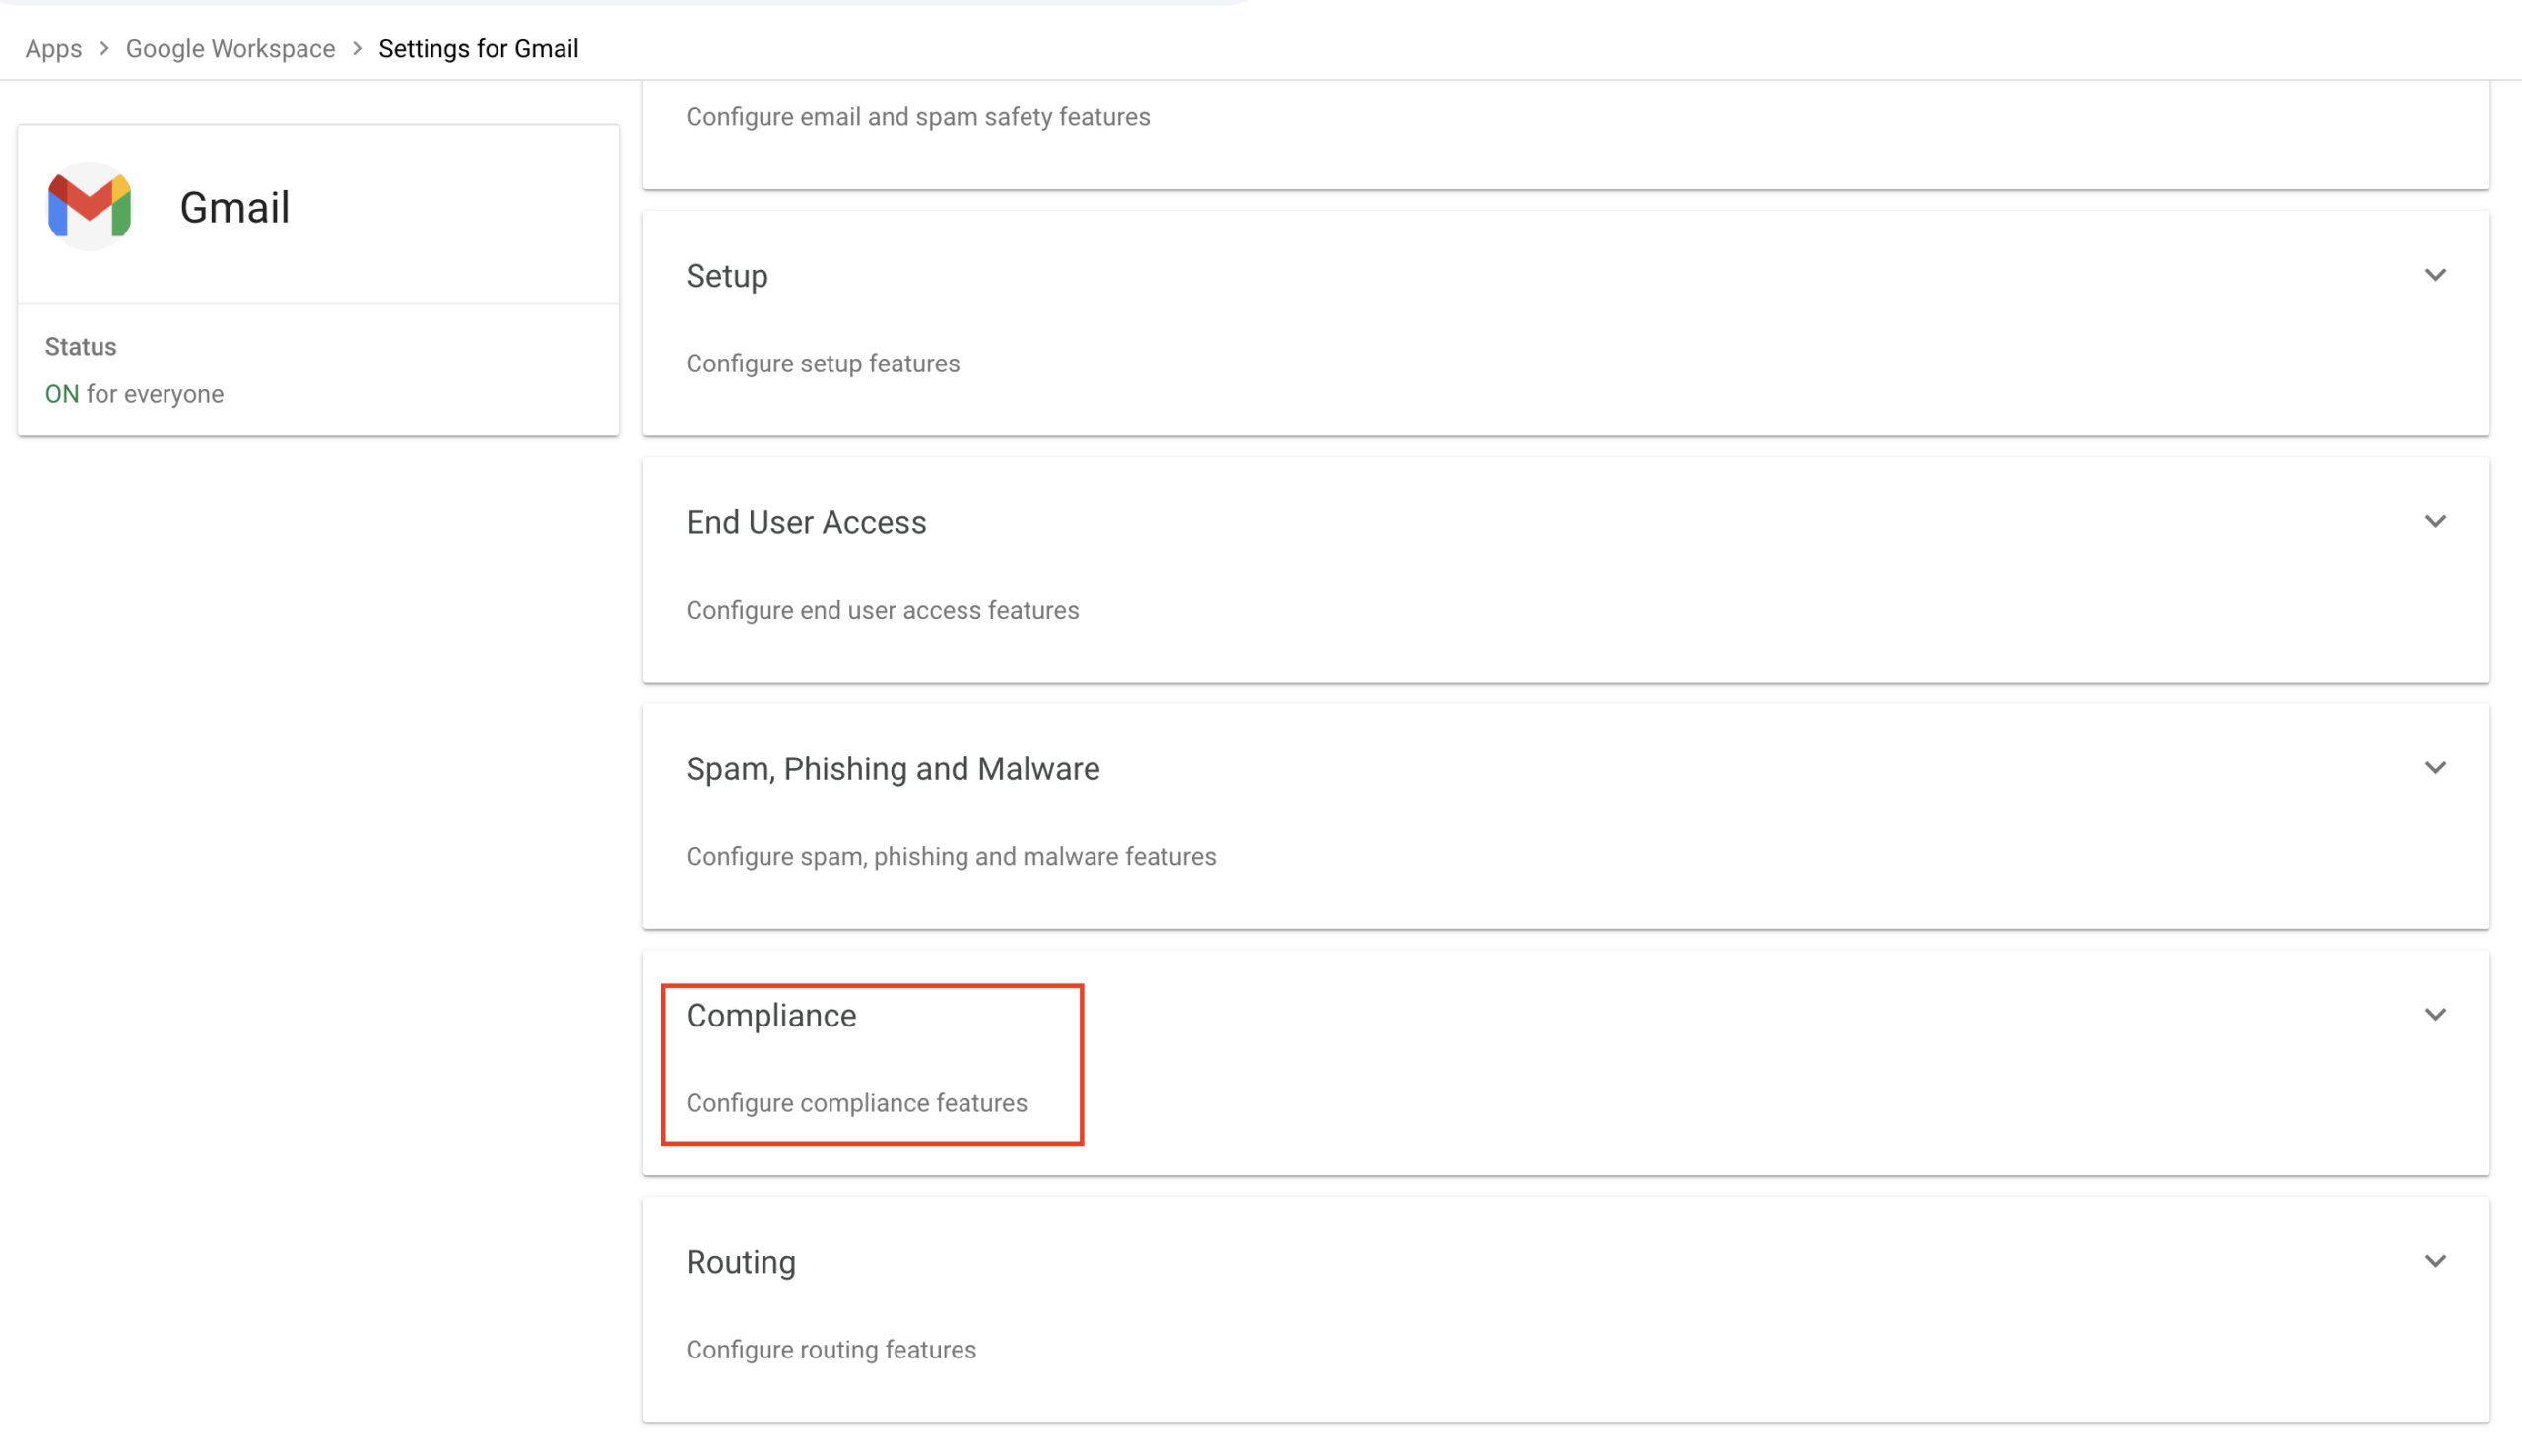
12. Click on ‘settings for gmail’. This will once again take you one
page back to the main settings page. Scroll all the way down and click on
‘Compliance’.
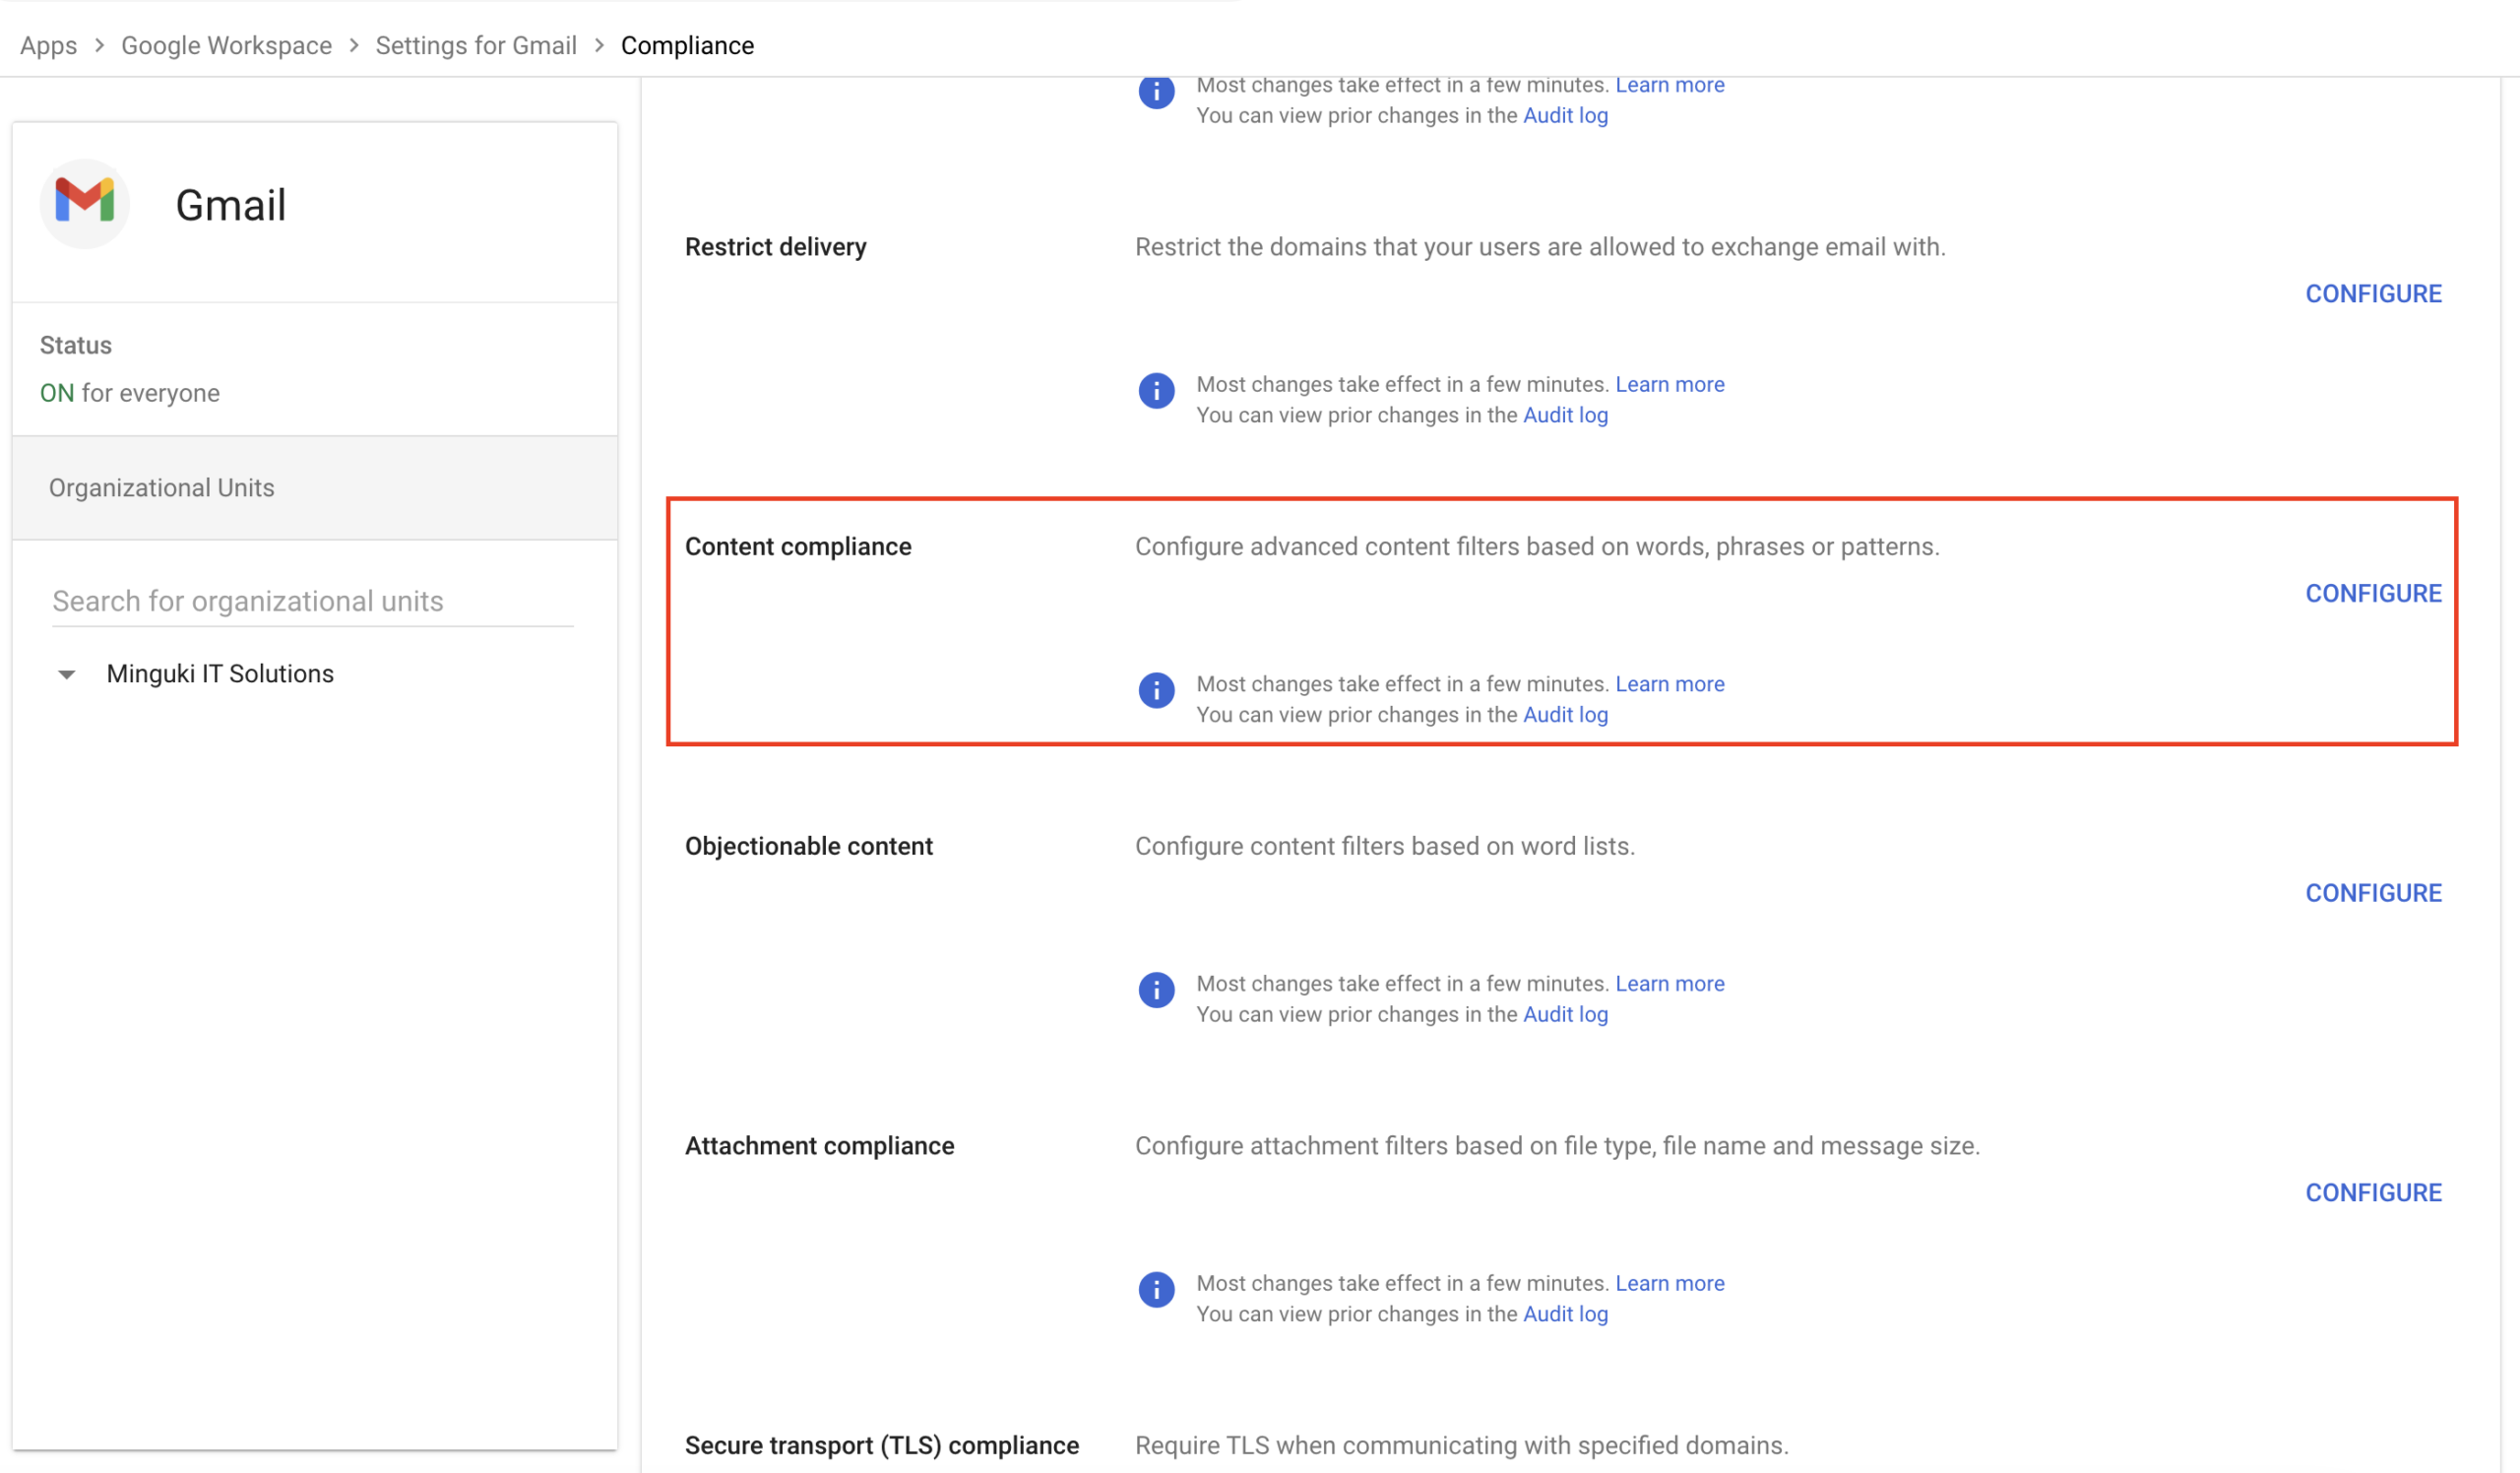
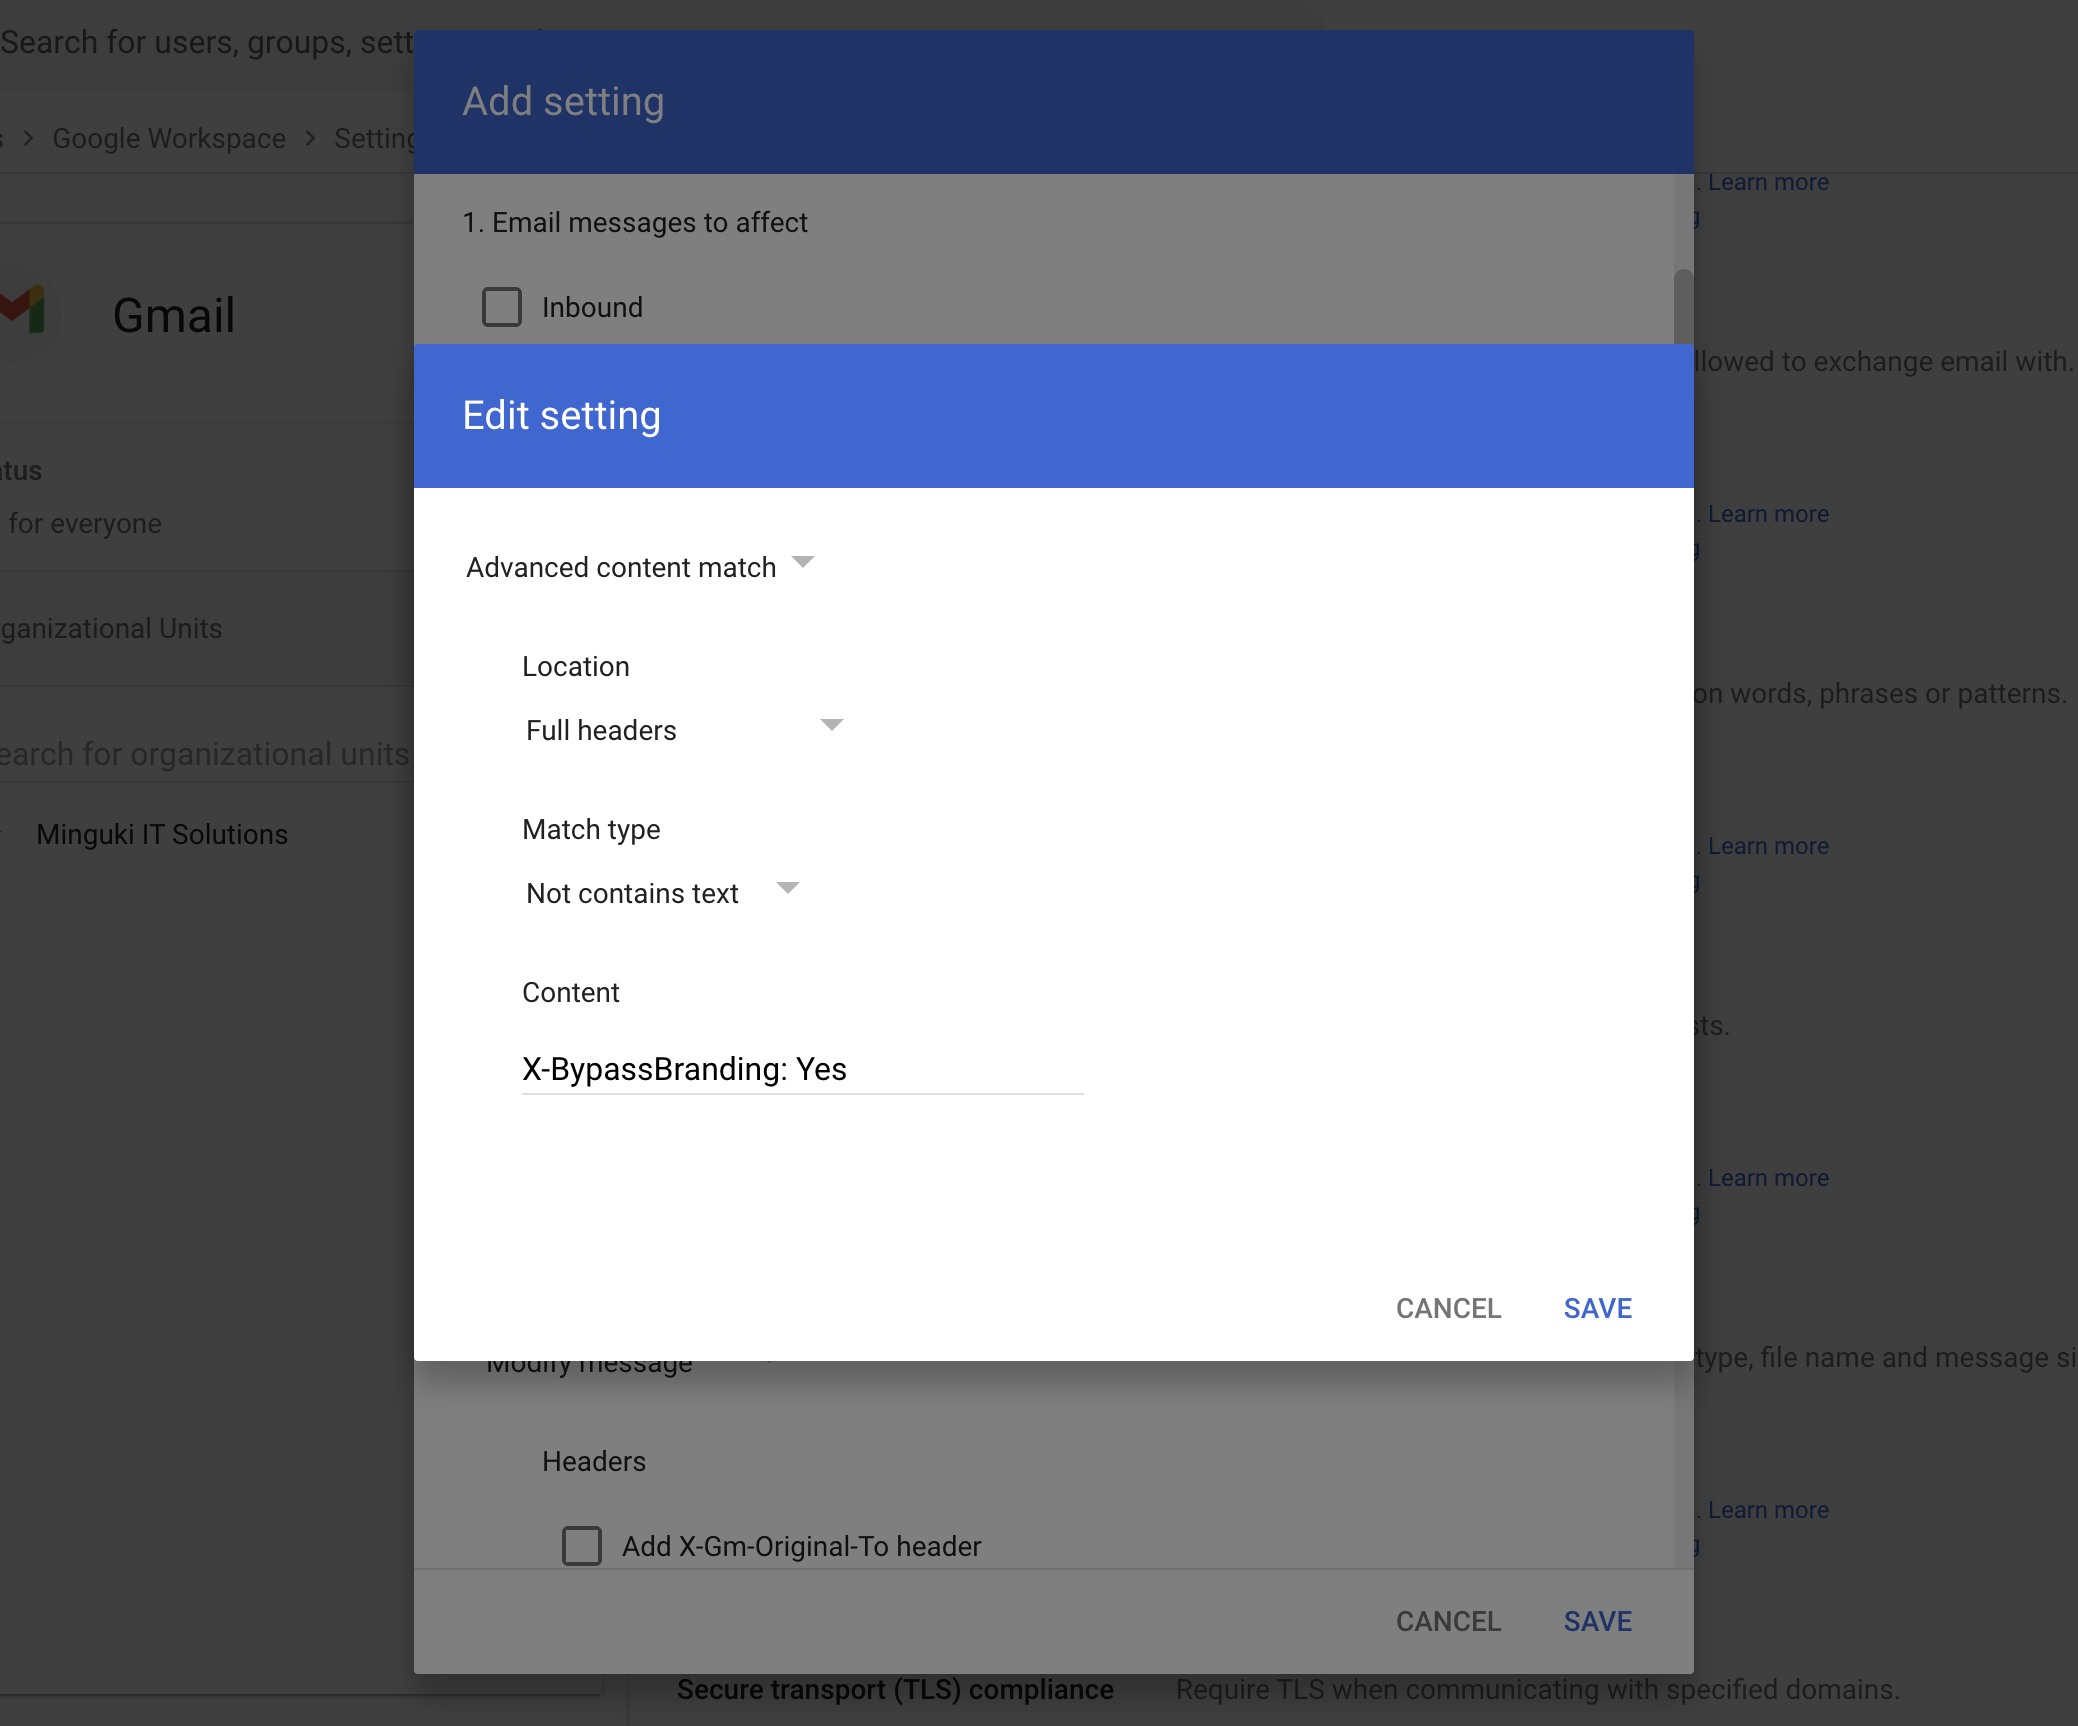
13. Scroll down and click Configure next to Content Compliance.
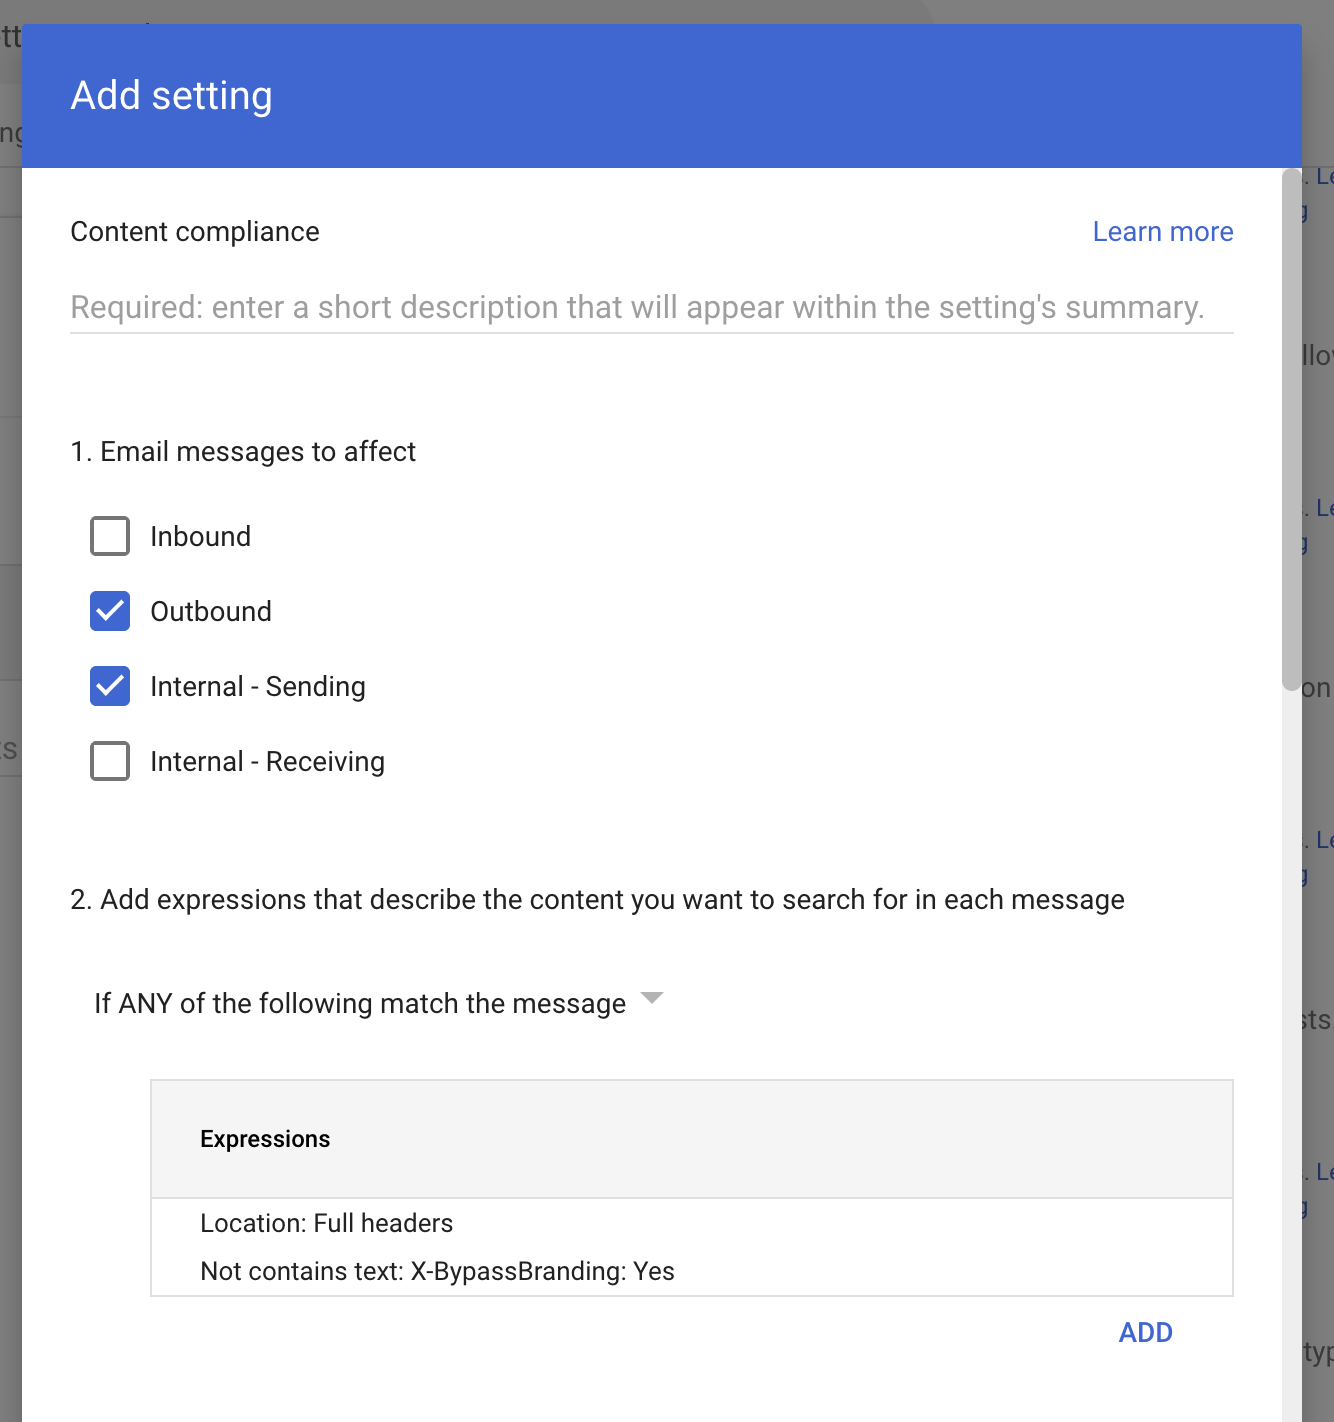
Then enter the following details:
Name: Rocketseed Routing Rule
Messages to affect: Outbound and Internal Sending
Add Expression:
- Advanced Content Match Location: Full Headers
- Match type: Not contains text
- Content: X-BypassBranding: Yes
Once completed, click Save.
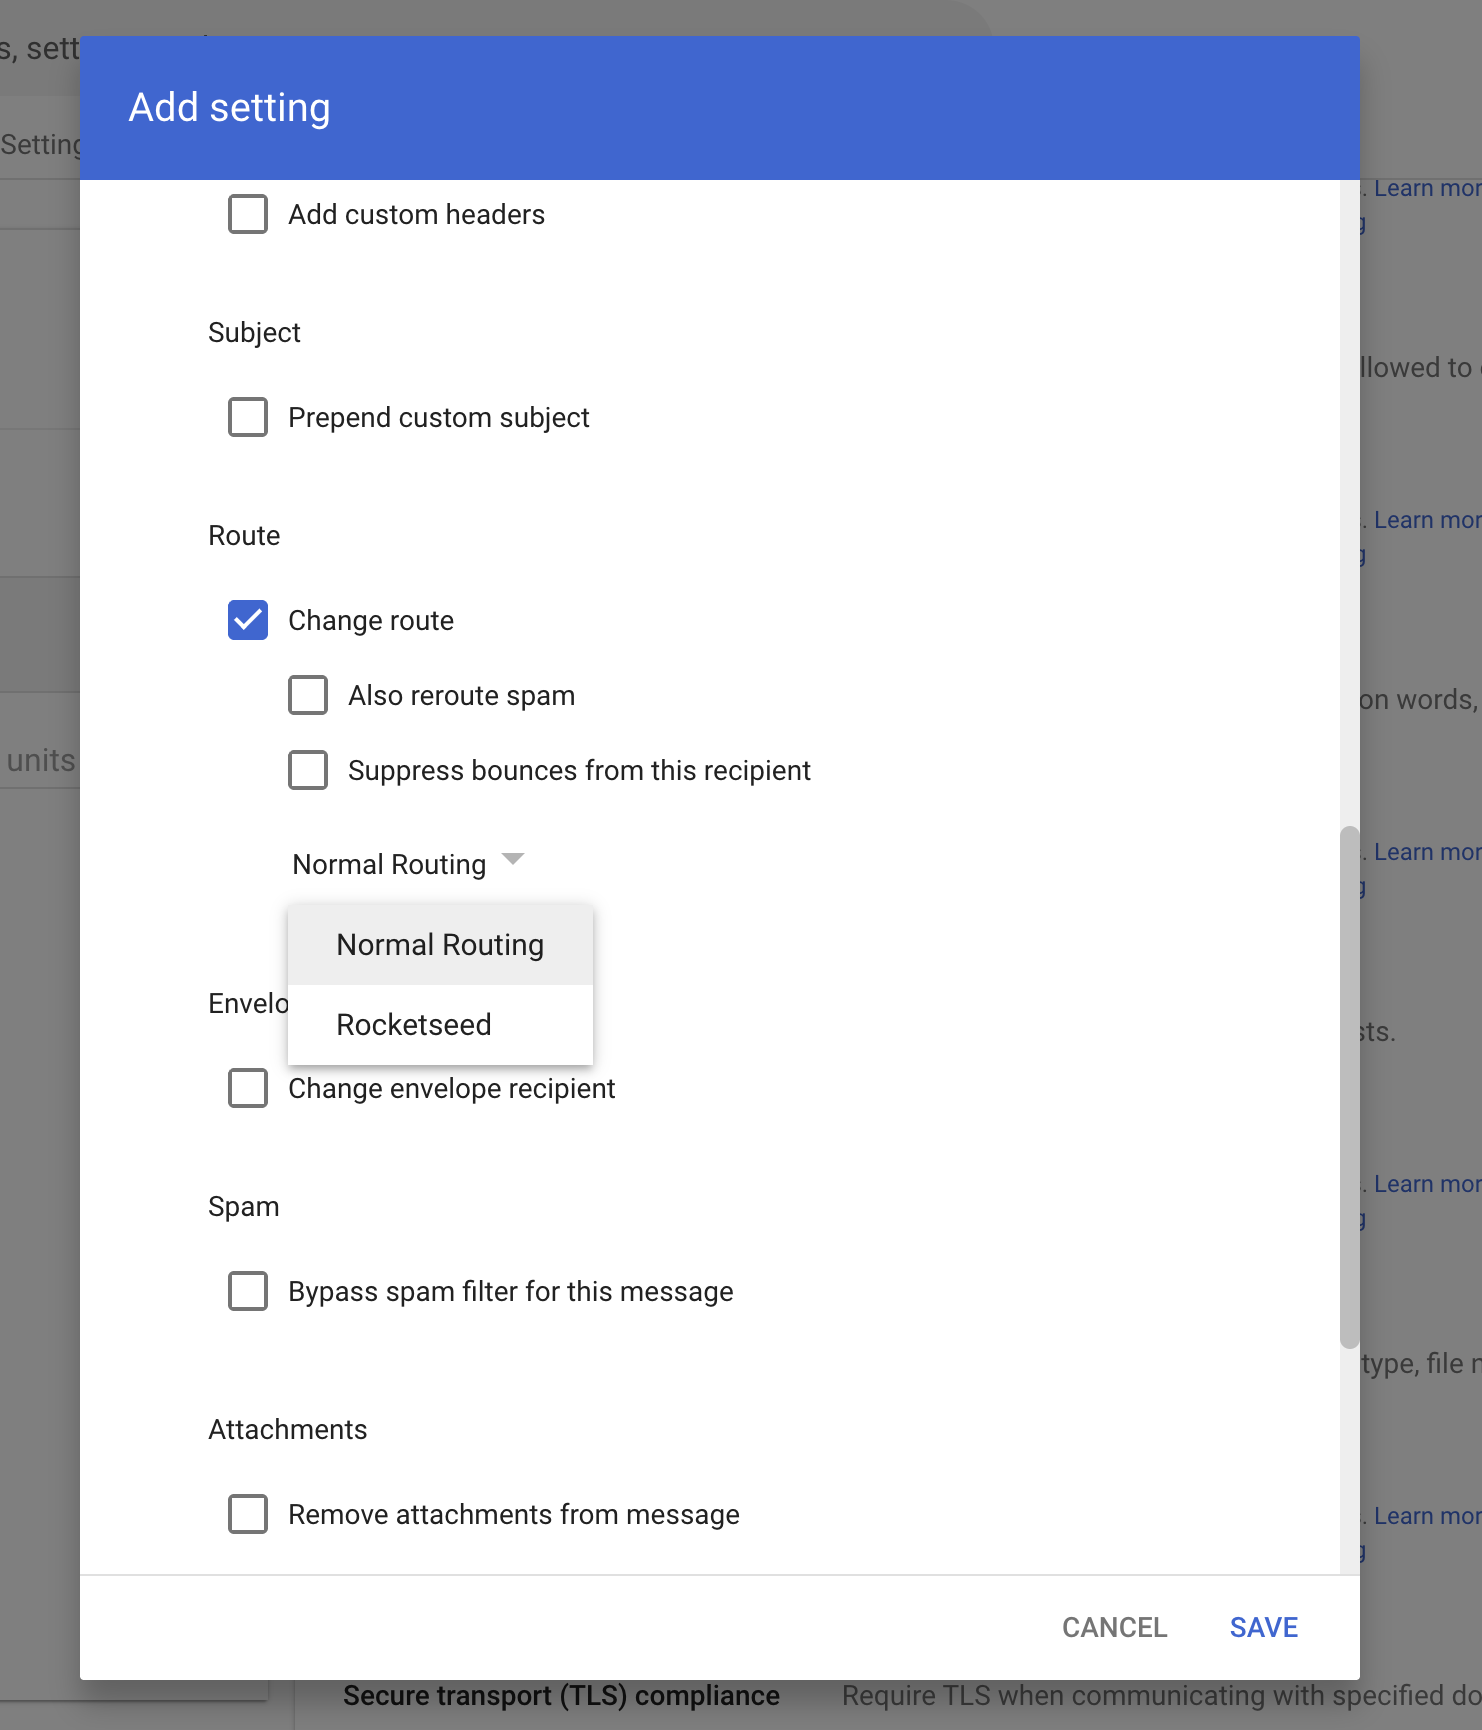
14. Scroll down until you see ‘Route’. Click “change route” and select the host
which was created in step 7.
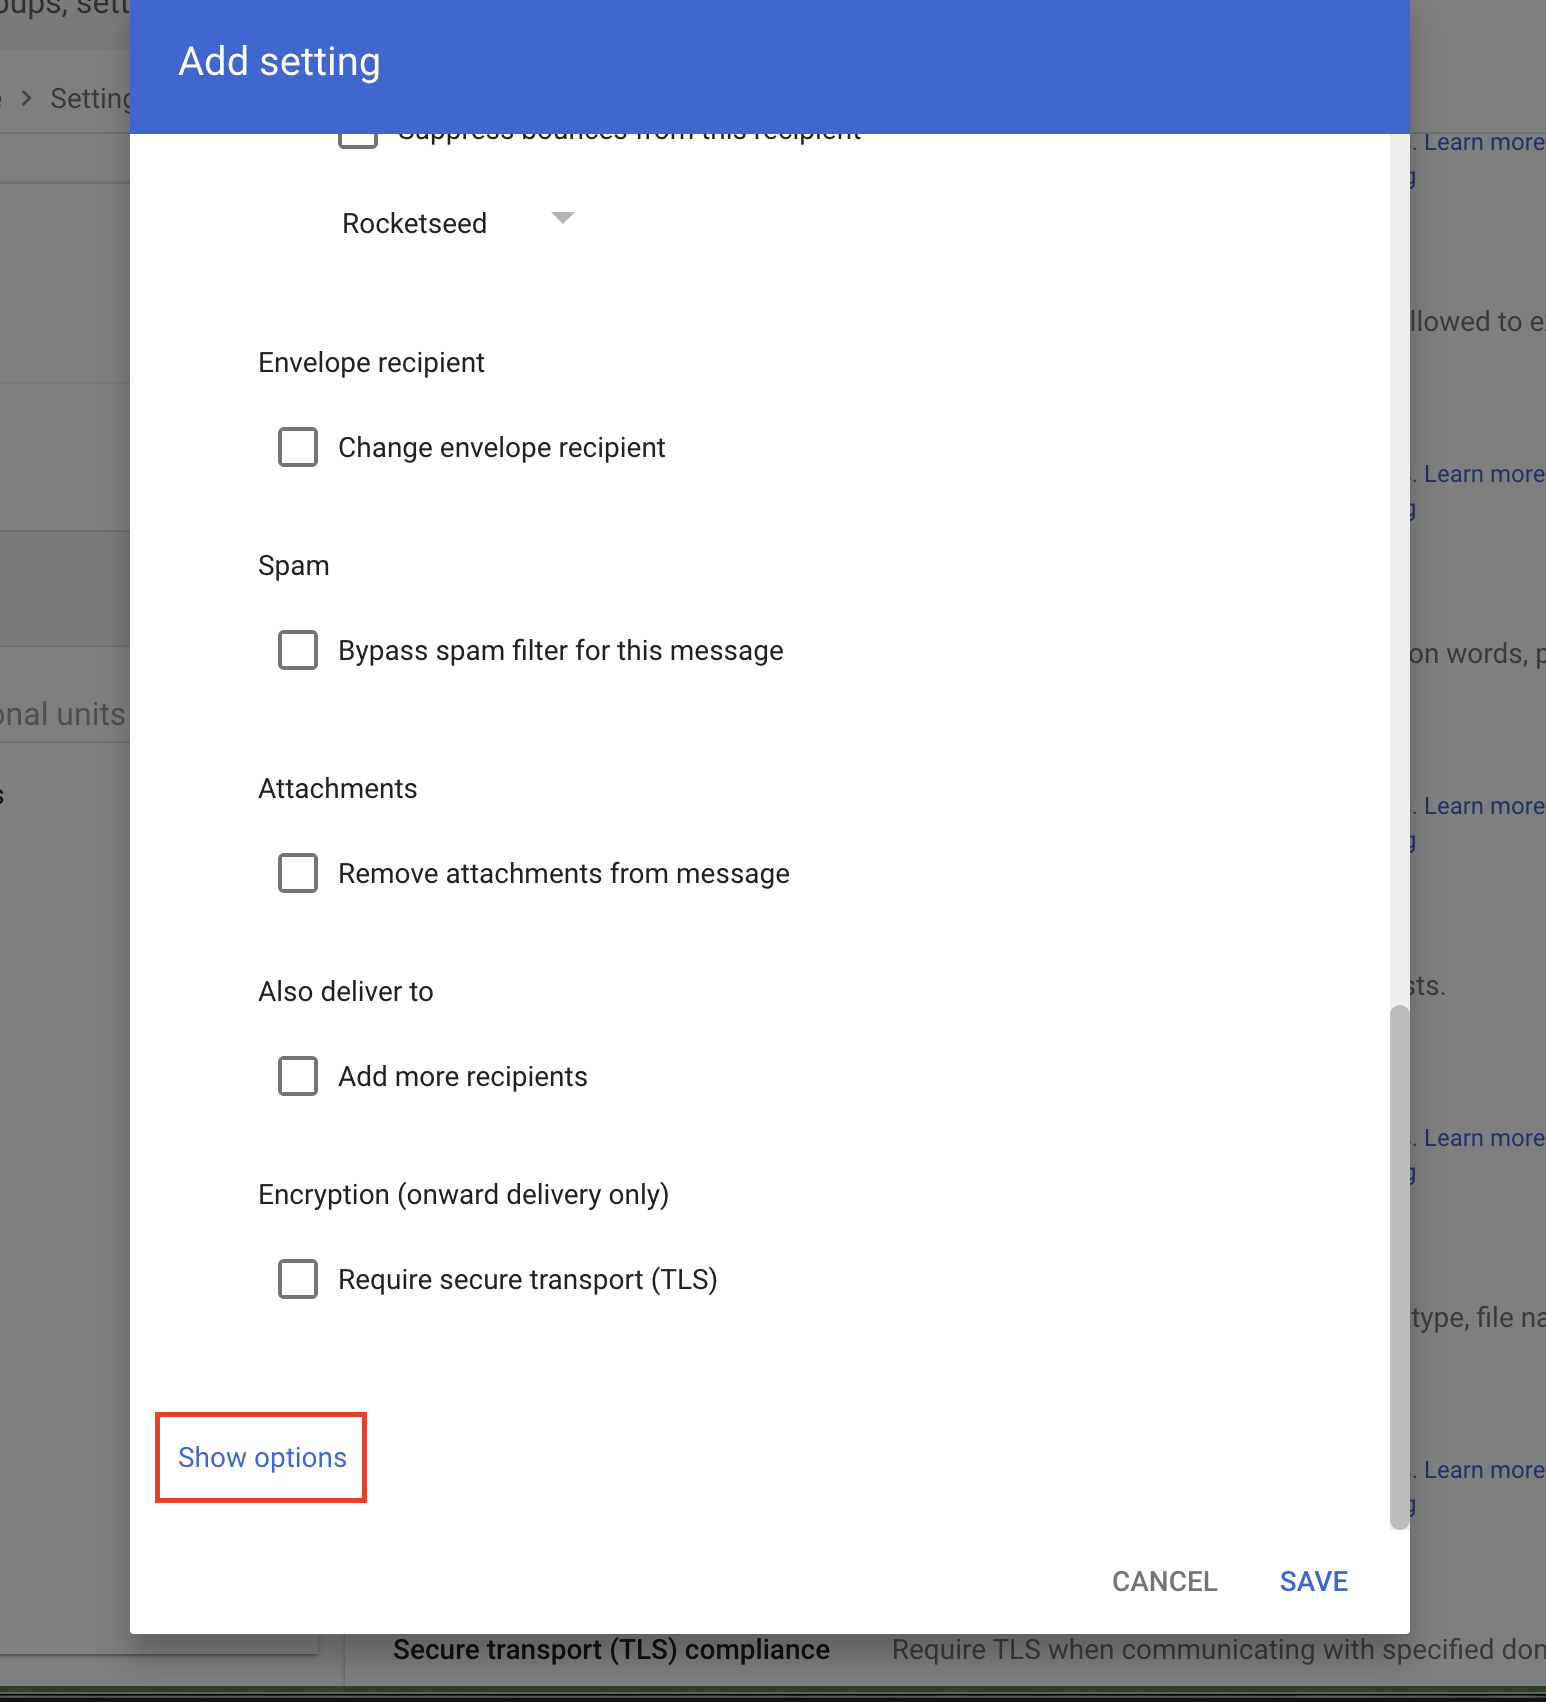
15. Scroll all the way down and click “Show options” (this will be highlighted in blue).
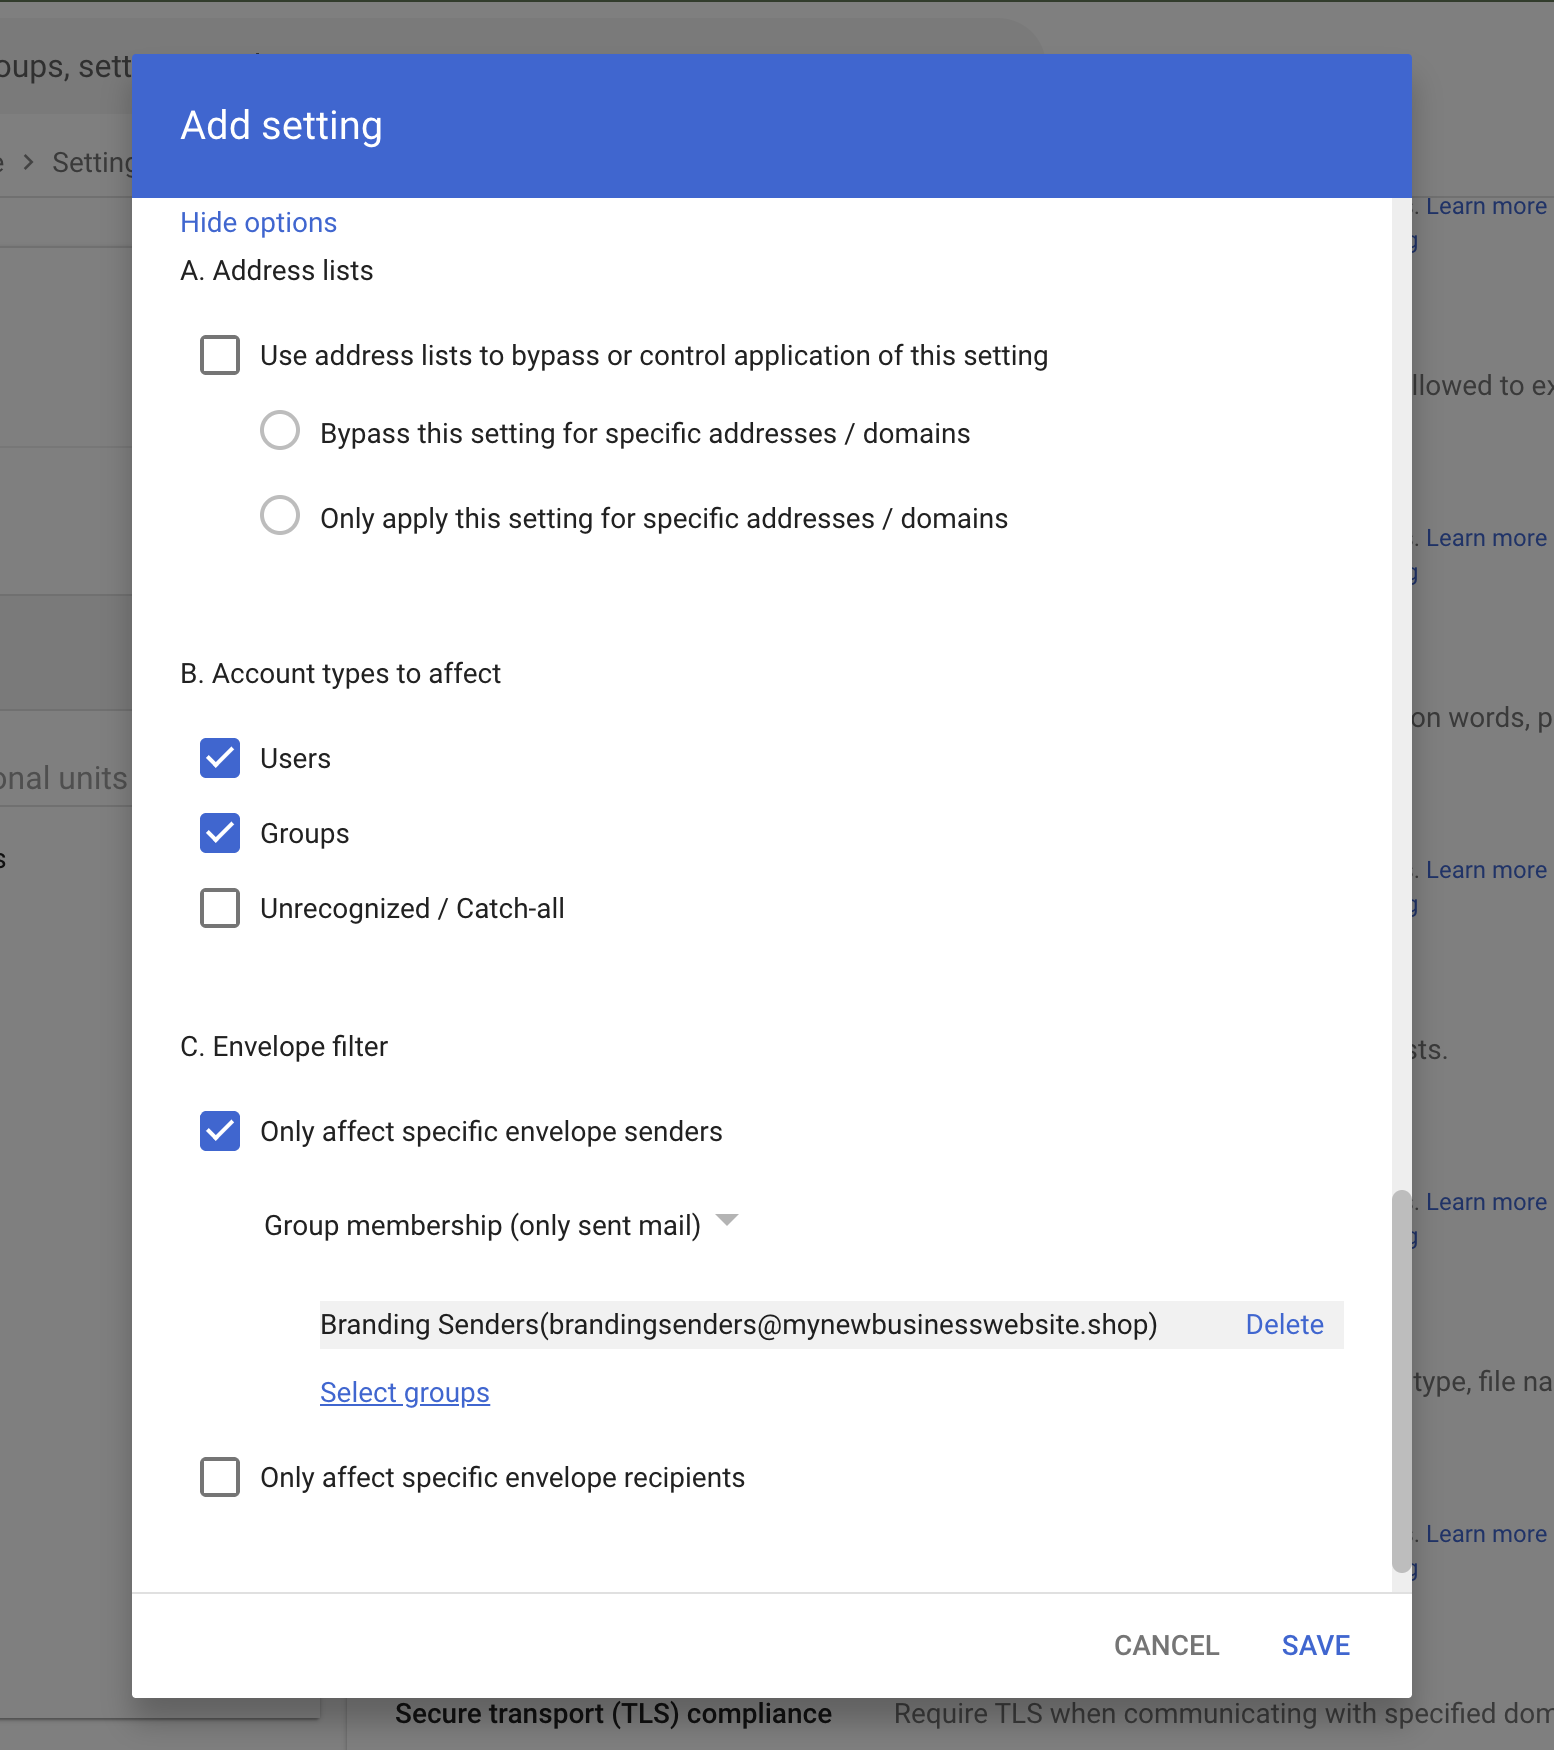
From there, select the following:
Option B: Account types to affect = Users and Groups
Option C: Only affect specific envelope senders = Group membership (Then select the BrandingSenders group you created in Step 3.)
16. Once done, click Save. Emails from all users added to the BrandingSenders group will then be routed through the Rocketseed server.
Note: The initial setup can take up to 24hours to propagate the changes depending on the size of your organization.
Note: Rocketseed best practise is to brand your emails and then smart host them back to your Google Workspace using: smtp-relay.gmail.com for final delivery. This is true for internal sending and outbound external emails. Google is responsible for the delivery of your mail.
Please email support@parrotdigital.com.au when you have made the changes. Parrot Digital will then update the system config to relay via the Google Workspace servers.